Enabling notifications
After the Notifications functionality has been configured in the backoffice, it must be turned on to be activated.
Globally
Globally, for the whole portal, the Notifications functionality is toggled on or off as follows:
- In the backoffice, go to Media > Site settings > Notifications.
- Use the following switches:
- Enable portal notifications - Specifies whether the functionality that displays notifications about changes on subscribed records directly on the portal as well as pages where you manage notification subscriptions will be enabled. If you change this setting, you must restart the application for the changes to take effect.
- Enable email notifications - Specifies whether the functionality that sends notifications about changes on subscribed records by email will be enabled.
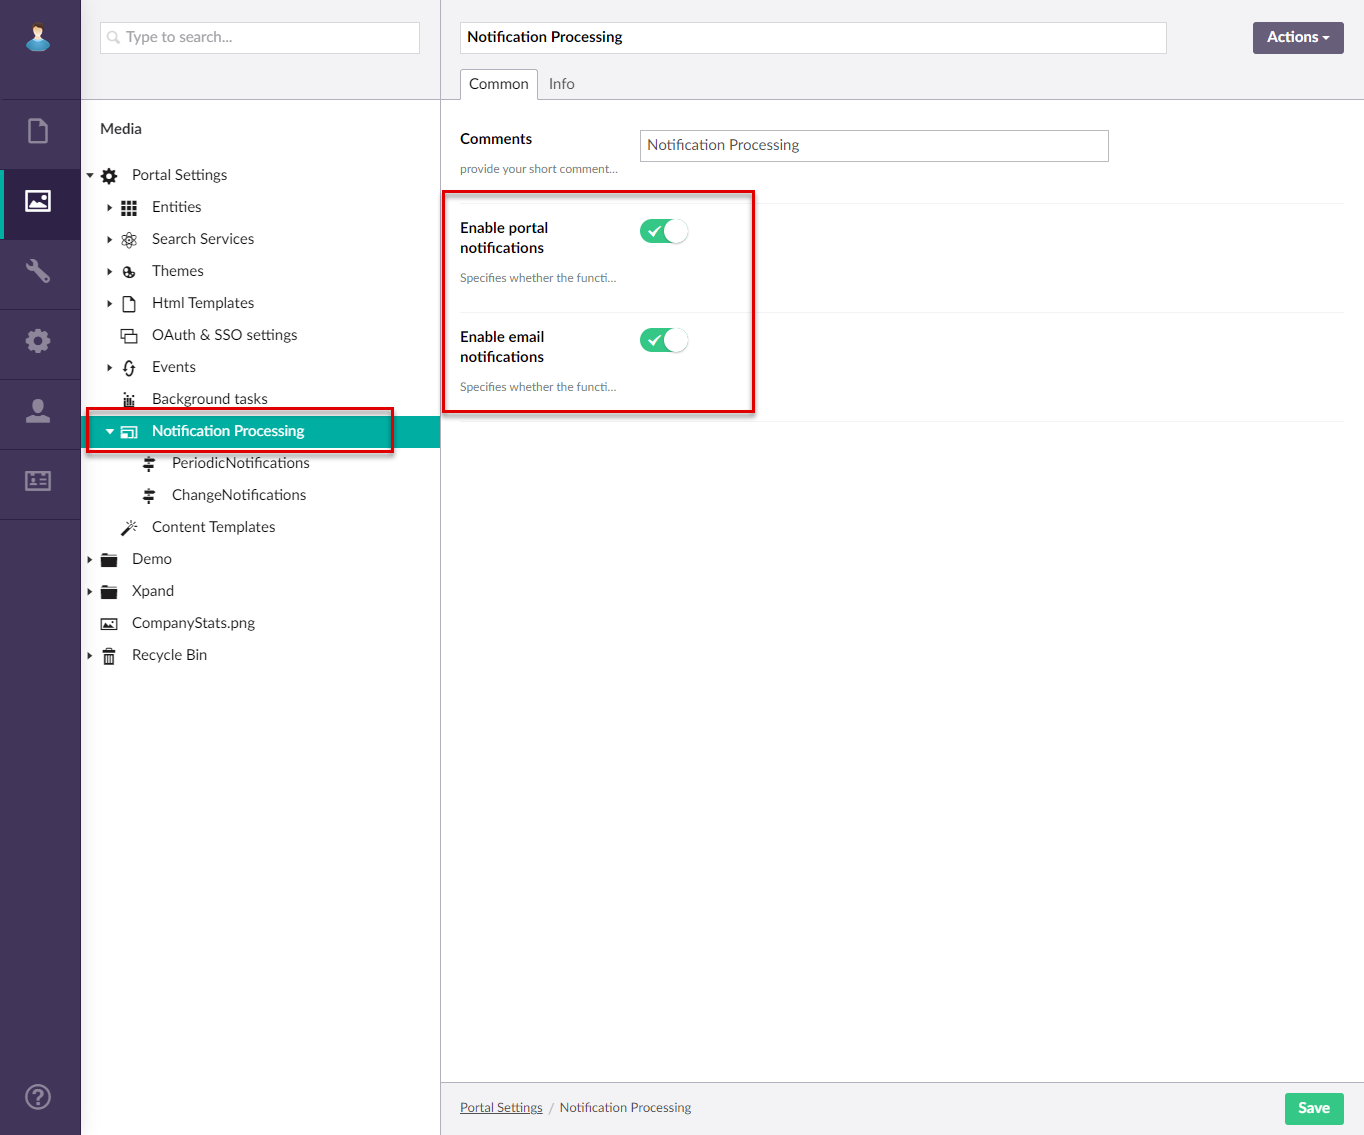
- Optionally, in Comments field, you can provide comments about the notifications configuration.
- In the Administrators to notify field, you can specify the emails of the portal administrators to which email alerts will be sent in case of critical errors that may occur when processing notifications. Use the comma (,) as a separator when you need to specify multiple emails.
- On the Data clean up settings tab, configure the automatic deletion of generated notifications and log entries:
- Archived changes older than (days) (Changes archive maximum age)- Specifies after how many days the processed and archived change sets are automatically deleted.
- Task log entries older than (days) (Task logs maximum age) - Specifies after how many days the log entries with statistics on processing change sets by background tasks are automatically deleted.
- Web notifications older than (days) (Maximum age of web notifications) - Specifies after how many days the generated portal (web) notifications are automatically deleted.
- Email notification log entries older than (days) (Maximum age of email logs)- Specifies after how many days the log entries with statistics on email notifications are automatically deleted.
- Select Save.
- Reload the application (Settings > More > Reload application) for the changes to take effect.
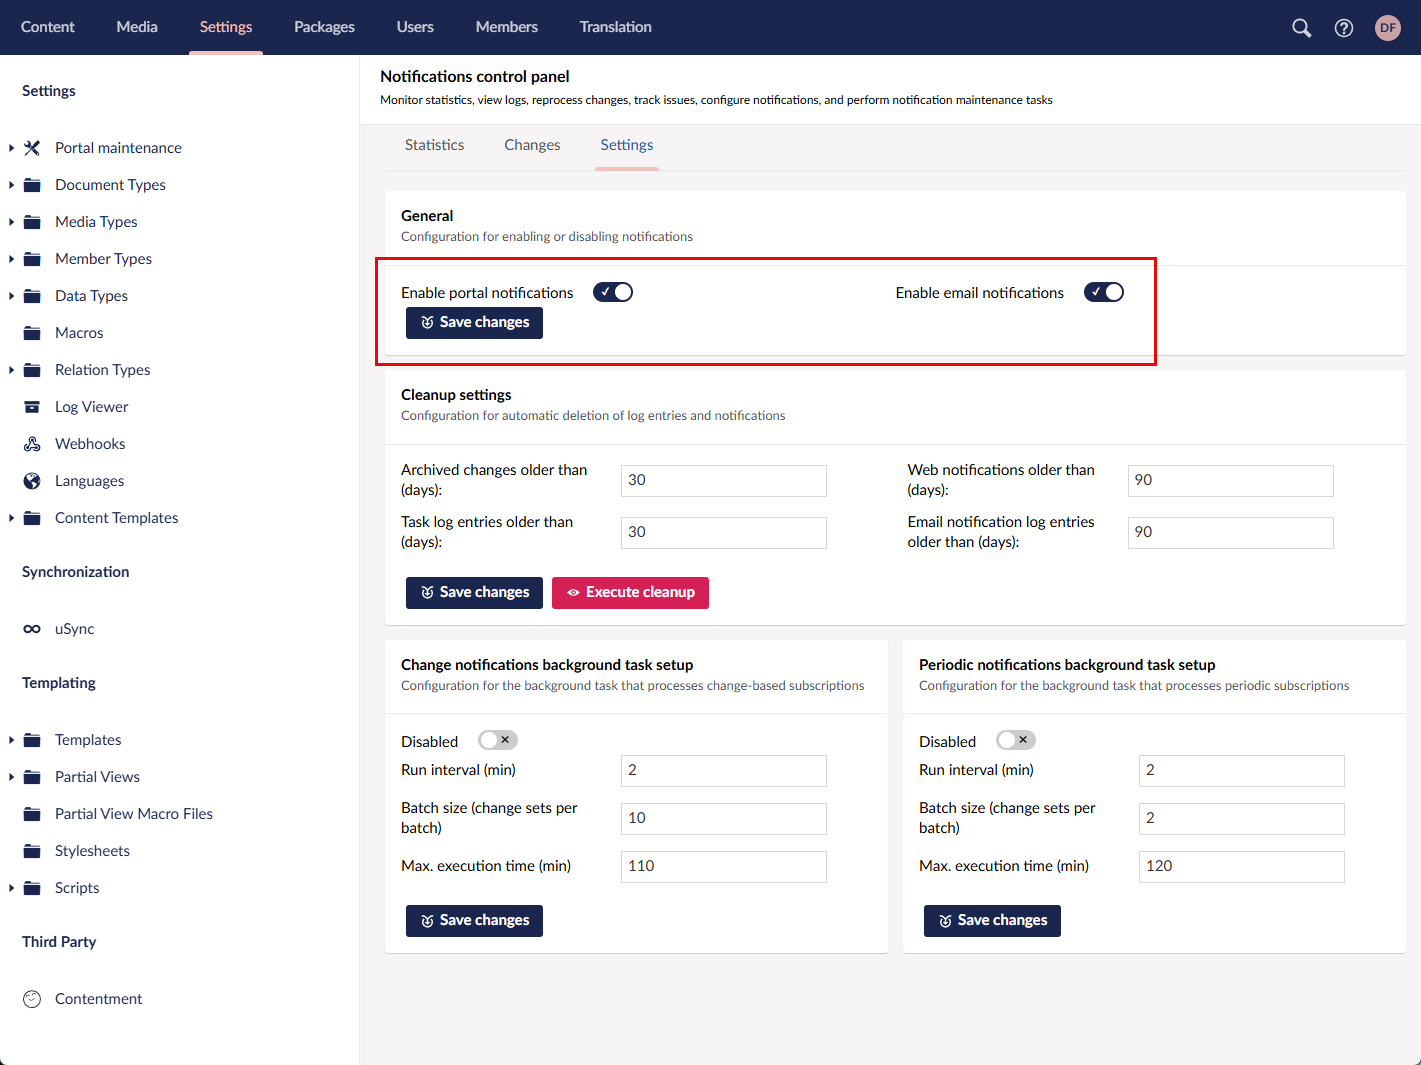
Alternatively, you can enable/disable notifications as well as configure cleanup settings in the Notifications Control Panel:
- Go to Settings > Portal maintenance, and then, under Manage notifications, select More.
- On the Settings tab, use the following switches:
- Enable portal notifications - Specifies whether the functionality that displays notifications about changes on subscribed records directly on the portal as well as pages where you manage notification subscriptions will be enabled. If you change this setting, you must restart the application for the changes to take effect.
- Enable email notifications - Specifies whether the functionality that sends notifications about changes on subscribed records by email will be enabled.
For a specific page
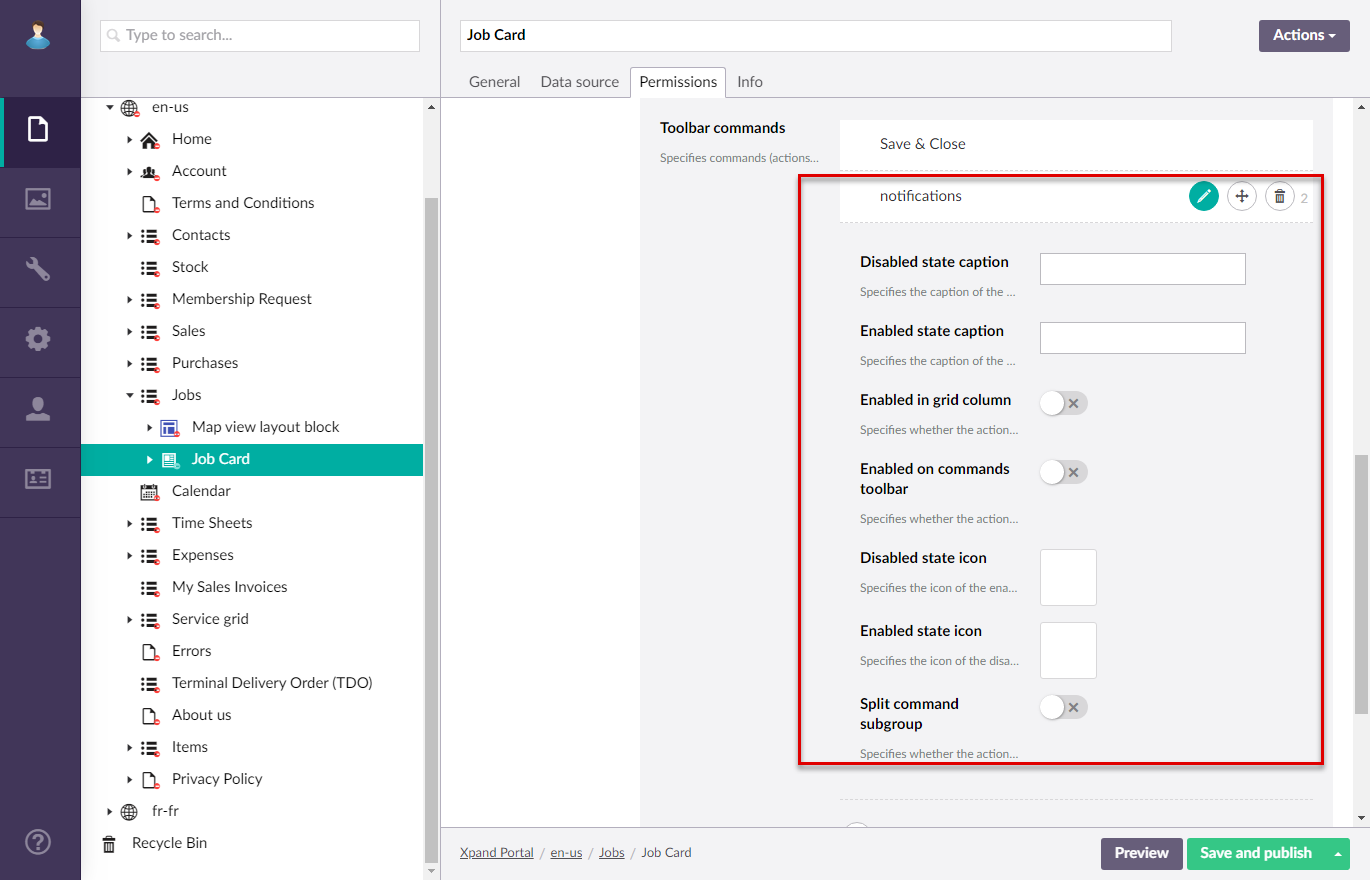
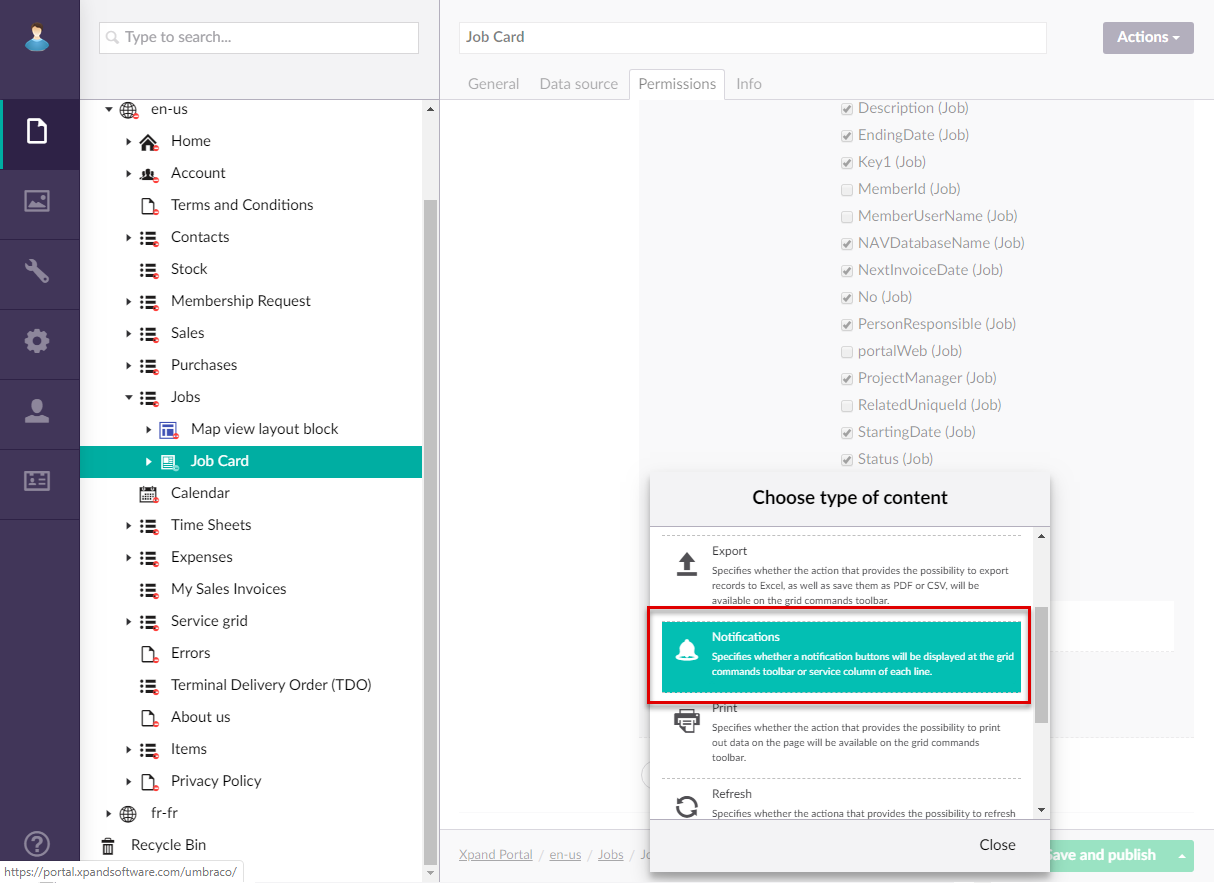
Additionally, for each page where you want portal members to have the ability to manually subscribe to changes (the Direct subscription type), you should add and configure the Notifications command. This command is available on the Permissions tab of the grid or detail page settings.
When you add this command, specify the command caption, enable it in the command toolbar if necessary, specify the icons for the Enabled and Disabled state (you don’t have to specify icons if you want to use the default images).