Setting up Xpand Portal API
To be able to access Xpand Portal data through Xpand Portal API, you must configure the following in Xpand Portal backoffice:
- API settings – These are general settings for Xpand Portal API.
- API clients – You must add settings for each API client application that you want to grant access to portal data through API with JSON Web Token (JWT) authentication.
- API settings for portal members – For each portal member that you want to grant access to portal data through Xpand Portal API, you must configure API-related settings in the portal member settings.
General API settings
To set up general API settings:
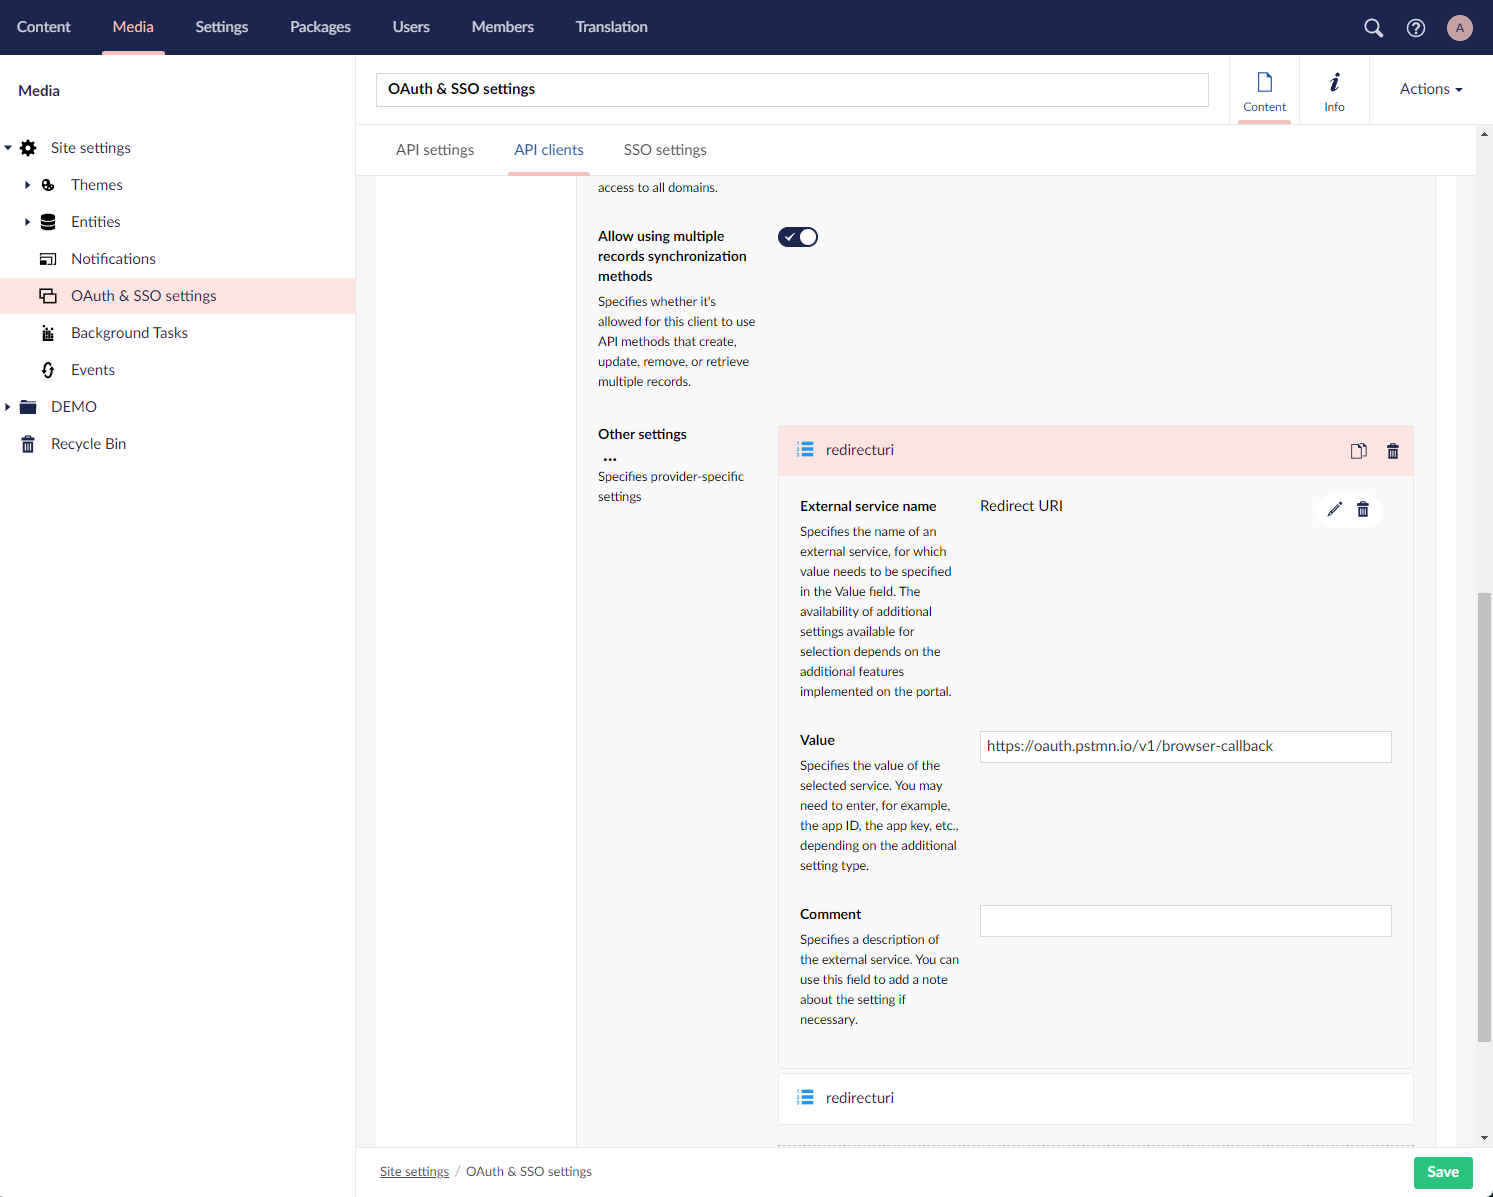
- In the backoffice, go to Media > Site settings > OAuth & SSO Settings.
- On the API settings tab, configure the settings as described below:
- Enable API – Use this switch to enable or disable Xpand Portal API for all clients.
- Token lifetime (min.) – Specifies the period in minutes that the authentication token (JWT) will be valid.
- Refresh token after (min.) – Specifies after how many minutes the authentication token (JWT) will be refreshed.
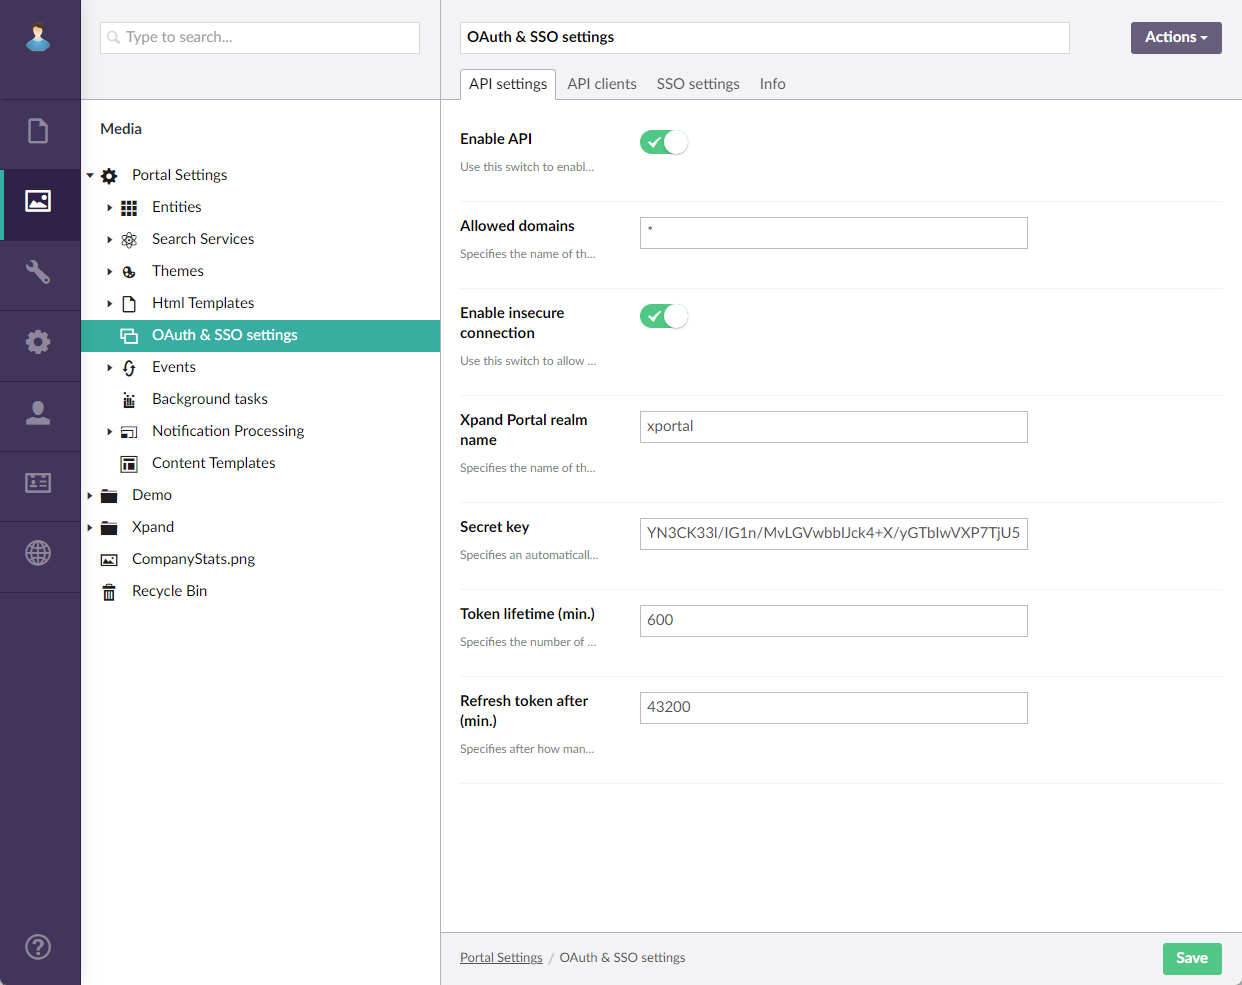
- Select Save.
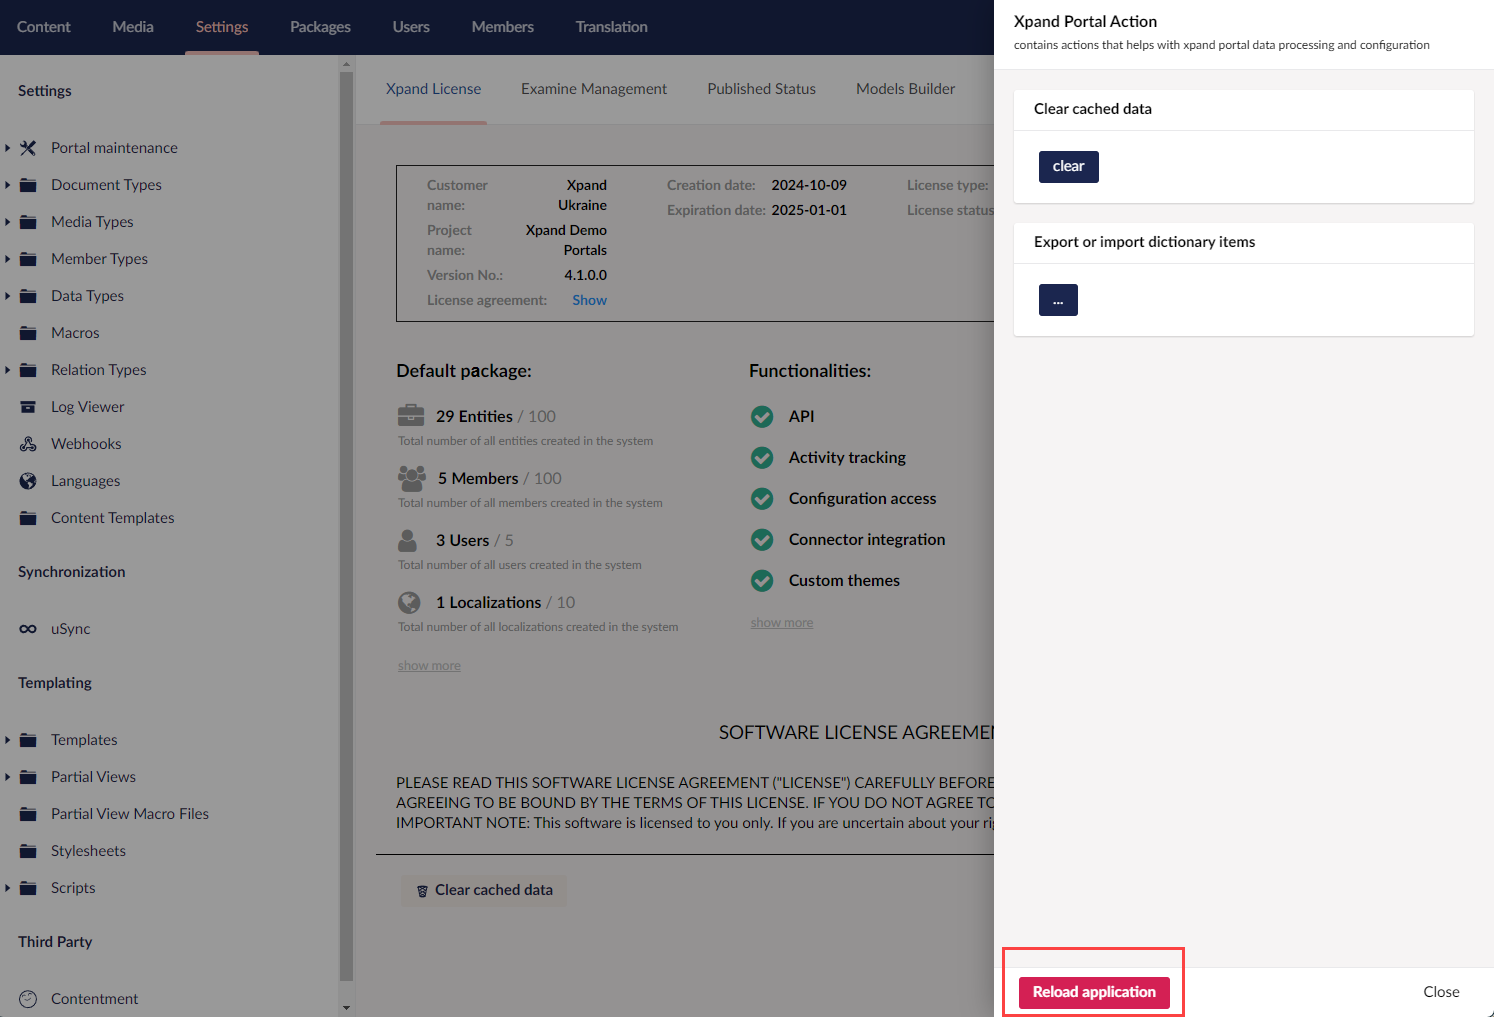
- In the backoffice, go to Settings > More, and then select Reload Application.
 Important
You must reload application whenever you make changes in the Media section of CMS. Otherwise, your changes may not take effect.
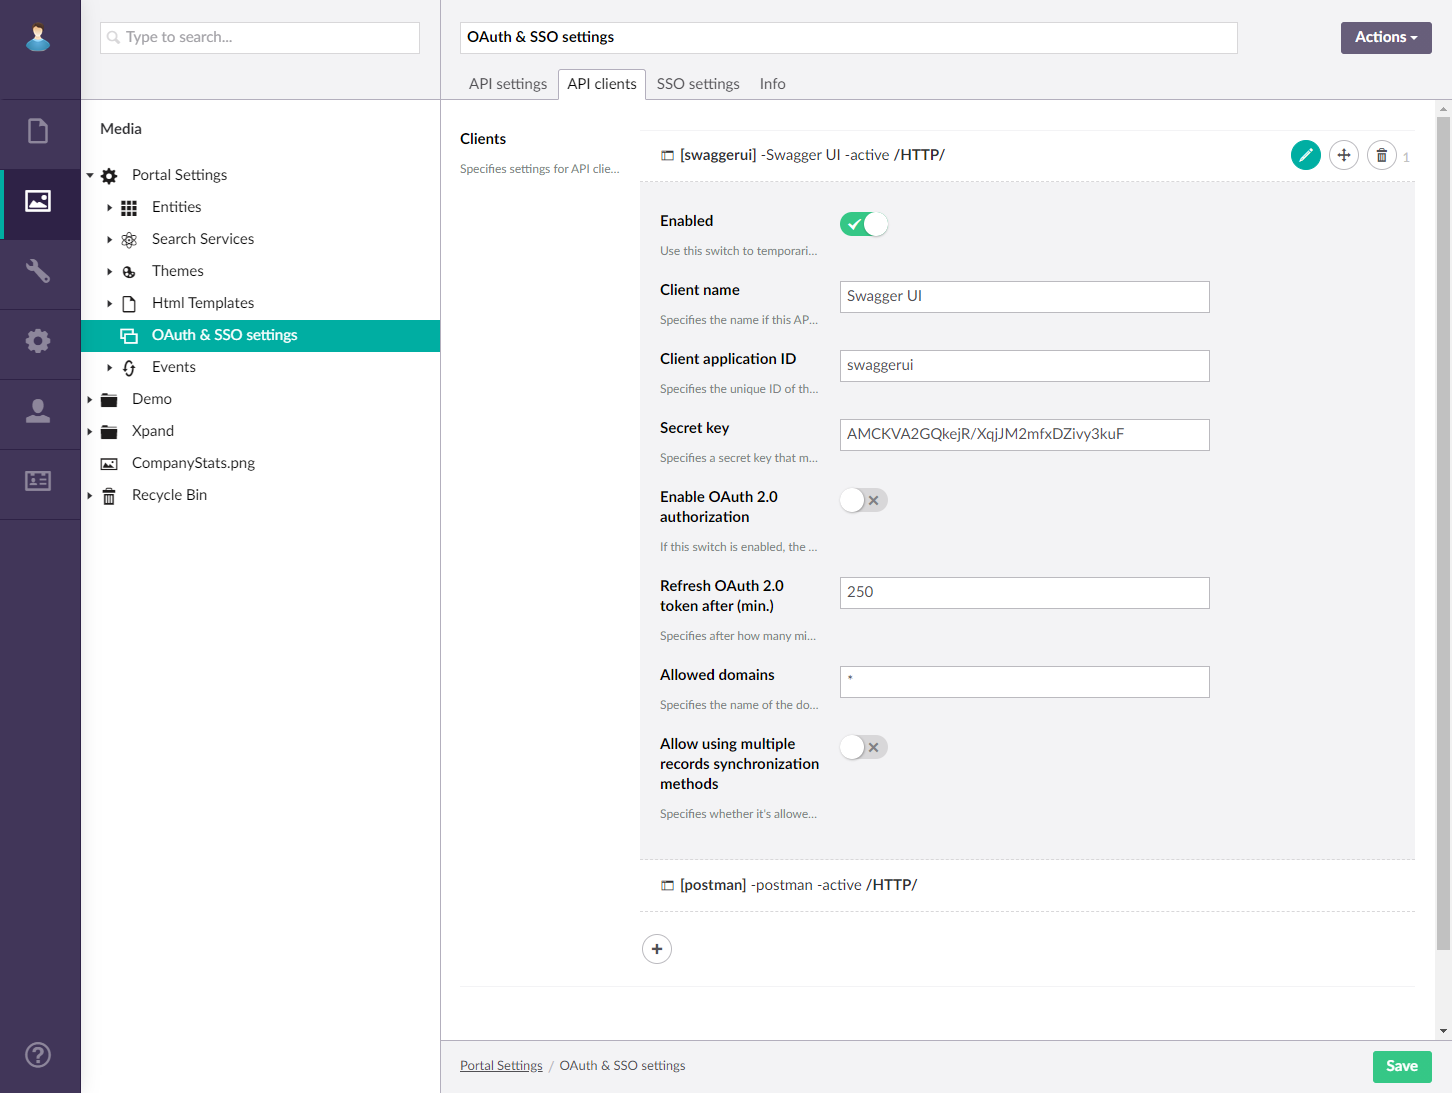
API clients
To set up API clients that you want to grant access to portal data through API with JSON Web Token (JWT) authentication:
- In CMS, go to Media > Site settings > OAuth & SSO Settings.
- On the API clients tab, in the Clients settings, select Add content to set up a new JWT client or select an existing client configuration to edit it.
- Configure the settings as described below:
- Enabled – Specifies whether this API client is enabled. You can use this switch to temporarily block access to portal data through API for this client having the client settings preserved so that you could re-enable the client at a later time if necessary.
- Client name - Specifies the name if this API client that will be used to identify it in CMS. This setting is optional.
- Client application ID – Specifies the unique ID of the client application that will be able to use Xpand Portal API to get data from the portal or send data to the portal. This ID is used along with the secret key to grant access for the API client to portal data through OAuth 2.0 authorization. This ID can be alphanumeric text without spaces.
- Secret key – Specifies a secret key, which is used along with the client application ID to grant access for the API client to portal data through OAuth 2.0 authorization. Type the password for this API client that will be automatically transformed into a secret key after you save these settings. Remember this password because it is the password that a member will need to specify during authorization not the generated secret key.
- Use secure connection - Specifies that the API client will be able to access portal data only using a secure connection, i.e. the HTTPS protocol is required.
- Allowed domains – Specifies the name of the domain that will be allowed to use Xpand Portal API with this API client. You can fill in this field with * to allow any domain name.
- Allow using multiple records synchronization methods - Specifies whether it's allowed for this client to use API methods that create, update, remove or retrieve multiple records. Enable this switch if you want to such API methods as Sync Get and Sync Store. Note that this setting can also be configured on the member level in the member settings.
- Next to Other settings, select Add content or select an existing configuration to edit it.
- External service name - Specifies the name of an external service, for which value needs to be specified in the Value field. The availability of additional settings available for selection depends on the additional features implemented on the portal.
- Value - Specifies the value of the selected service. You may need to enter, for example, the app ID, the app key, etc., depending on the additional setting type.
- Comment - Specifies a description of the external service. You can use this field to add a note about the setting if necessary.
- Repeat steps 3 through 4 to configure more JWT clients if necessary.
- Select Save.
- In CMS, go to Settings > More, and then select Reload Application.
Important
You must reload application whenever you make changes in the Media section of CMS. Otherwise, your changes may not take effect.
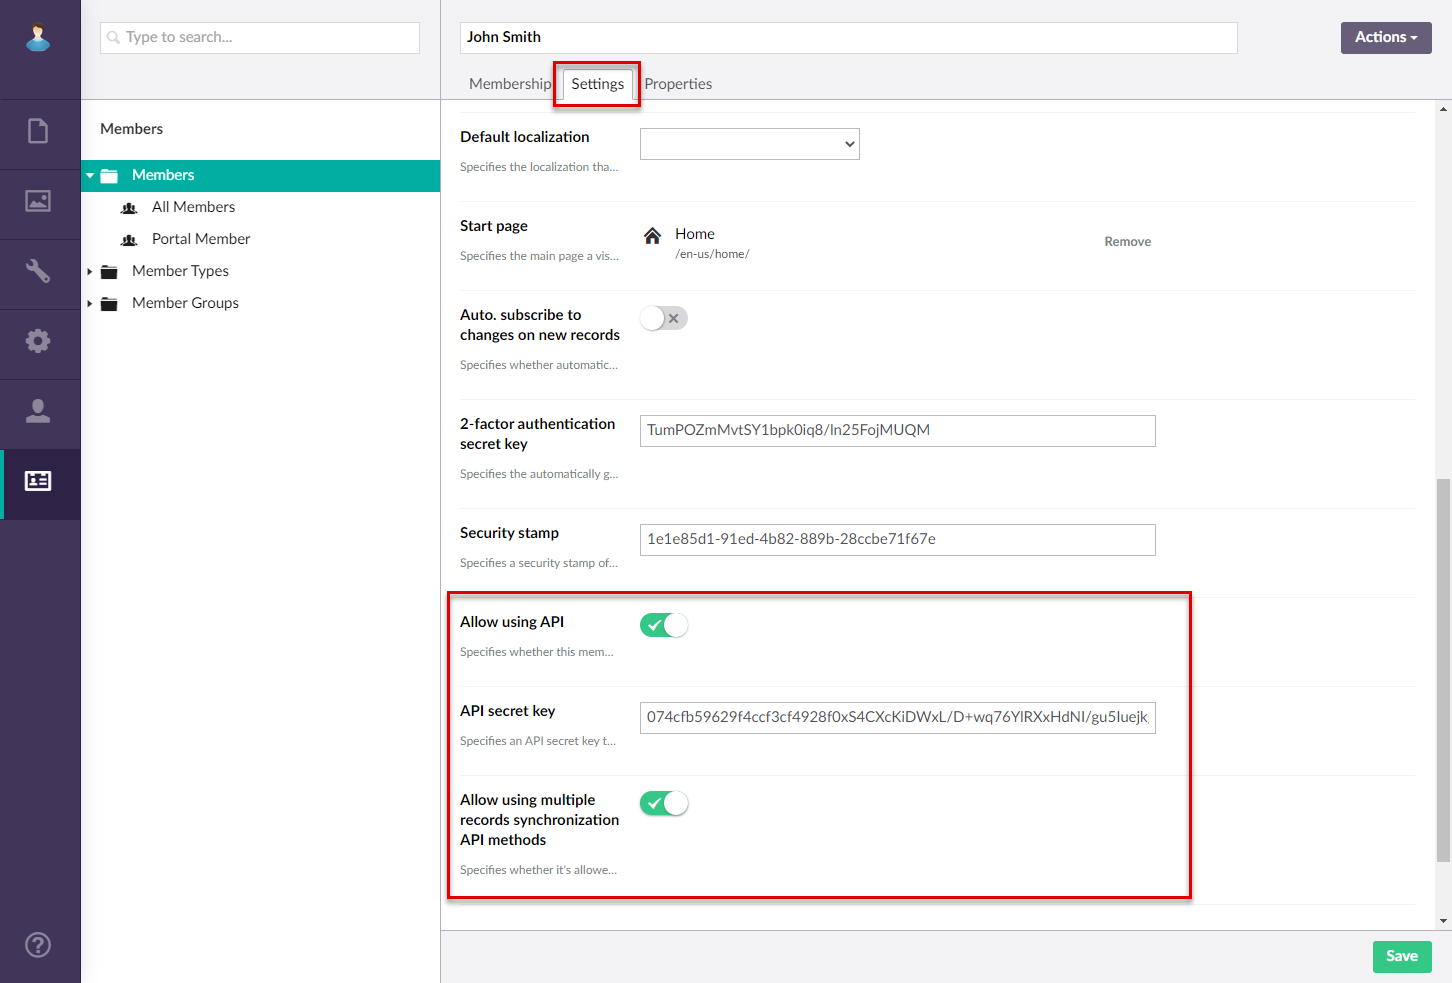
API settings for portal members
To grant access to portal data through Xpand Portal API to a portal member:
- In CMS, go to Members> Members > All Members. and select a portal member for which you want to configure API settings.
- On the Settings tab, enable the Allow using API switch.
- Enable the Allow using multiple records synchronization methods switch if you want to allow this member to use API methods that create, update, remove or retrieve multiple records. Enable this switch if you want to allow using such API methods as Sync Get and Sync Store. Note that this setting can also be configured on the API client level in the API clients settings.