Configuration packages
Xpand Portal allows you create packages with portal configuration using your current portal configuration as a basis. Packages are more flexible than backup/restore because packages in addition to content (configured pages and their settings), members, and media can also include code files, indexes, structure elements (dictionary items, data types, document types, etc.) email templates, notification templates, and portal indexes. When creating a configuration package, you can choose which elements from your current portal will be included in the package. These packages can then be quickly imported into another portal.
A configuration package can include the following:
- Content:
- Configured pages including their settings
- Member roles and specific members
- Media (images, site settings)
- Notification templates
- Email templates
- Code files ( files, scripts, views, etc.)
- Indexes (records from portal entities)
- Record attachments (document and other files)
- Structure elements (dictionary items, data types, document types, etc.)
Xpand Portal modules
In addition to the configuration packages that portal managers can create directly from the backoffice, Xpand Portal also provides a set of custom modules that are created and maintained by the Xpand Portal:
- A set of license-based modules that are tailored to specific business scenarios (read more about Xpand Portal modules here). These modules also include custom features that are unique to these modules.
- Demo module (free) – Explore portal features with pre-configured basic pages
These modules can also be deployed using the configuration package import functionality.
After Xpand Portal installation, on your first sign-in to the backoffice, a request window appears when you can deploy Xpand Portal modules available to you according to your license. If you cancel the module deployment, they can always be installed later just like configuration packages.
Create a configuration package
You can use your current portal content and other elements as a basis for creating your own configuration packages, which can be deployed on any portal environment.
To create a configuration package from your current portal:
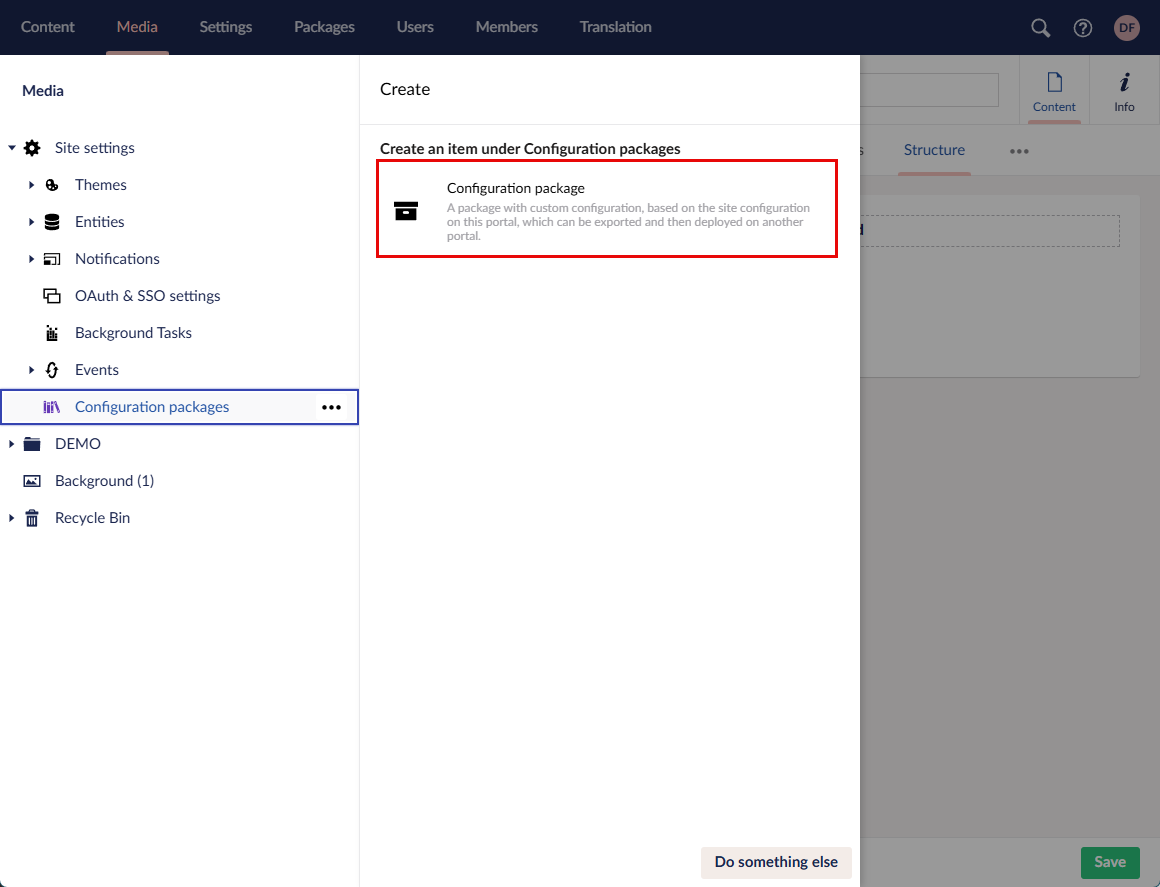
- In the backoffice, go to Media > Site settings.
- Select the
 icon next to the Configuration packages. node (the icon appears when you point to the node title). Alternatively, select and hold (right-click) the selected node, and then select Create.
 - Select
 Configuration package.
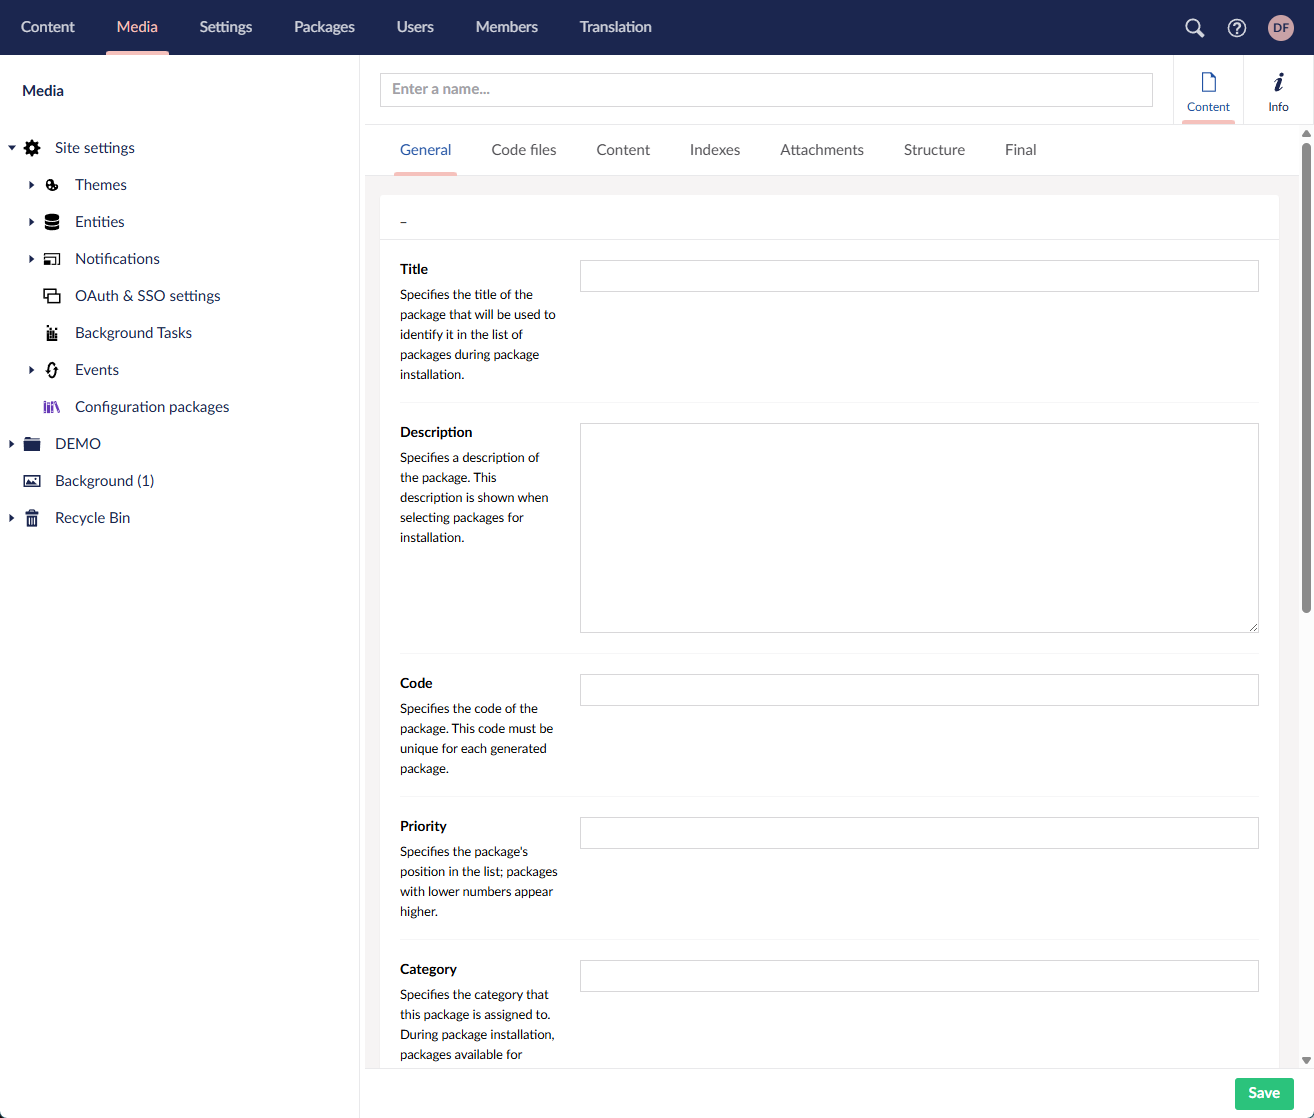
- At the top, enter a name of the configuration package.
- On the General tab, fill in the general information about the configuration package:
- Title - Specifies the title of the package that will be used to identify it in the list of packages during package installation.
- Description - Specifies a description of the package. This description is shown when selecting packages for installation.
- Code - Specifies the code of the package. This code must be unique for each generated package.
- Priority - Specifies the package's position in the list; packages with lower numbers appear higher.
- Category - Specifies the category that this package is assigned to. During package installation, packages available for selection are grouped by category.
- Version - Specifies the version of the package. This may be useful when you create a package that is an update of an existing package.
- Icon - Specifies the image that will be shown next to the package title when selecting packages for installation.
- Thumbnail - Specifies a thumbnail is a preview image assigned to each module within the Packages section.
- Badge - Specifies text that is shown next to the package title when selecting packages for installation. This badge serves as an additional indicator of the package content or purpose.
- On the Code files tab, configure what code-related files will be included in the package.
- Code files - Specifies the code-related files that are included in this package, such as dll files, scripts, views, etc.
- Title - Specifies the title of this set of files that will be used to identify it.
- Source - Specifies the location of the set of files in the current portal where the files for the package will be taken from.
- Destination - Specifies the location where the selected files will be stored after package installation.

- Code files - Specifies the code-related files that are included in this package, such as dll files, scripts, views, etc.
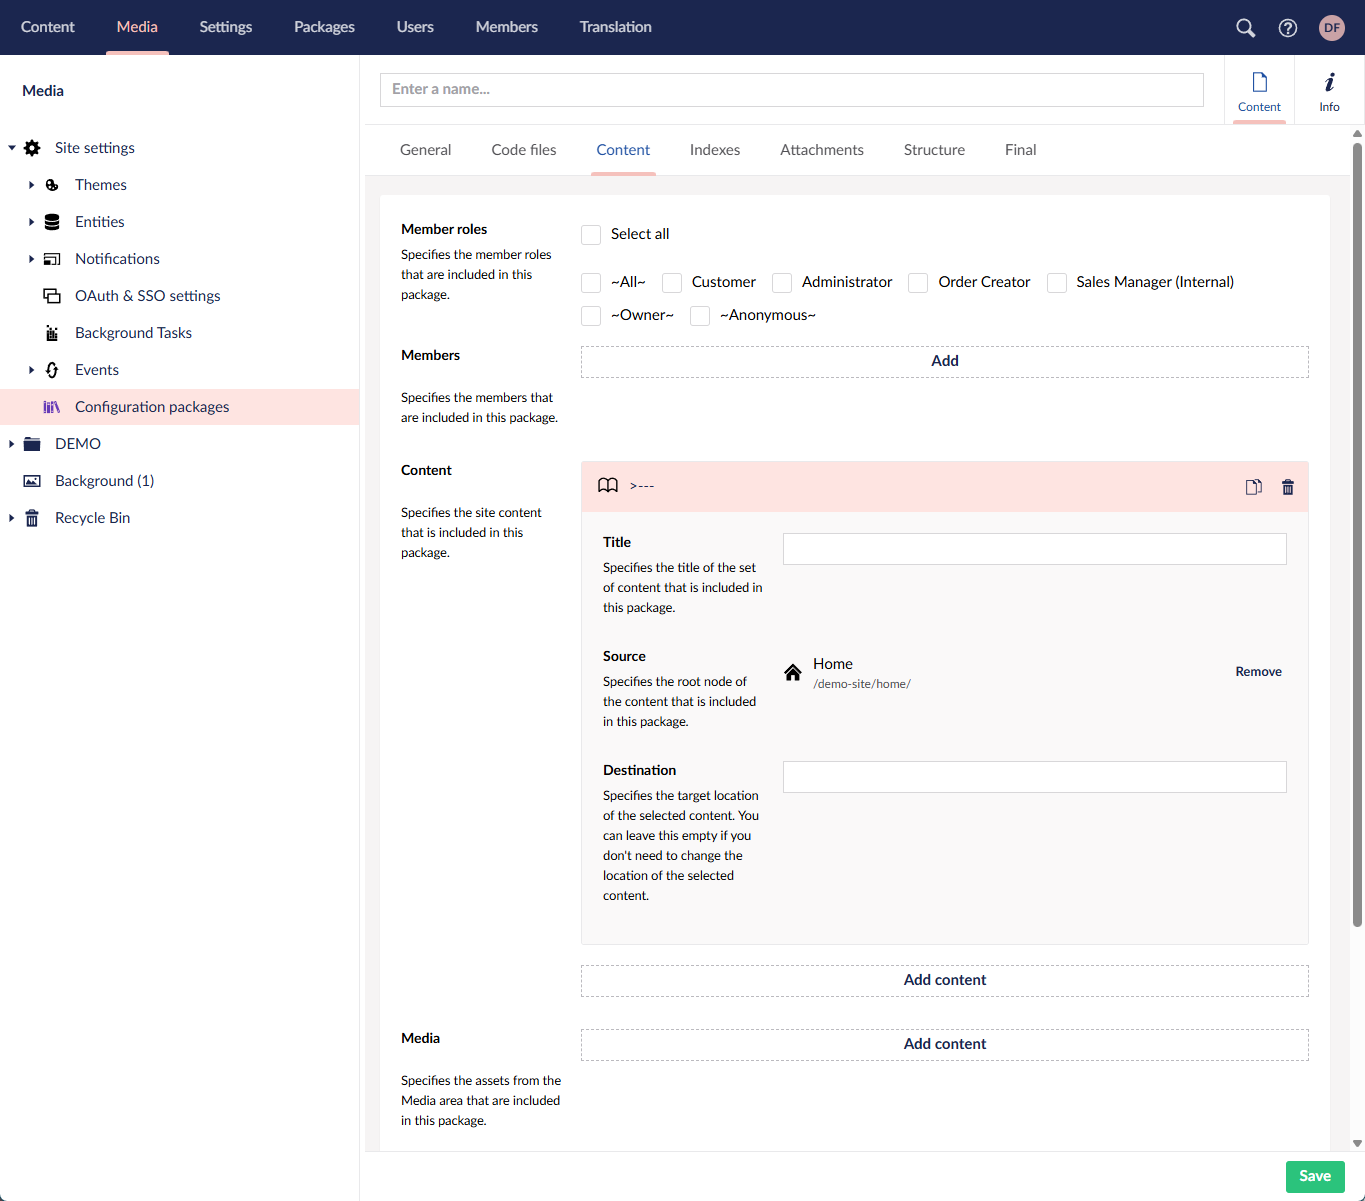
- On the Content tab, configure what content (pages including their settings), media, member roles, members, notification templates, and email templates from the current portal will be included in the package.
- Member roles - Specifies the member roles that are included in this package.
- Members - Specifies the members that are included in this package.
- Content - Specifies the site content that is included in this package. Select nodes from the Content area that you want to include and specify their new location if necessary (or leave the Destination setting empty to keep the current location). Add as many nodes as you want.
- Title - Specifies the title of the set of content that is included in this package.
- Source - Specifies the root node of the content that is included in this package.
- Destination - Specifies the target location of the selected content. You can leave this empty if you don't need to change the location of the selected content.
- Media - Specifies the assets from the Media area that are included in this package.
- Notification templates - Specifies the notification templates that are included in this package.
- Mail Templates - Specifies email templates that are included in this package.
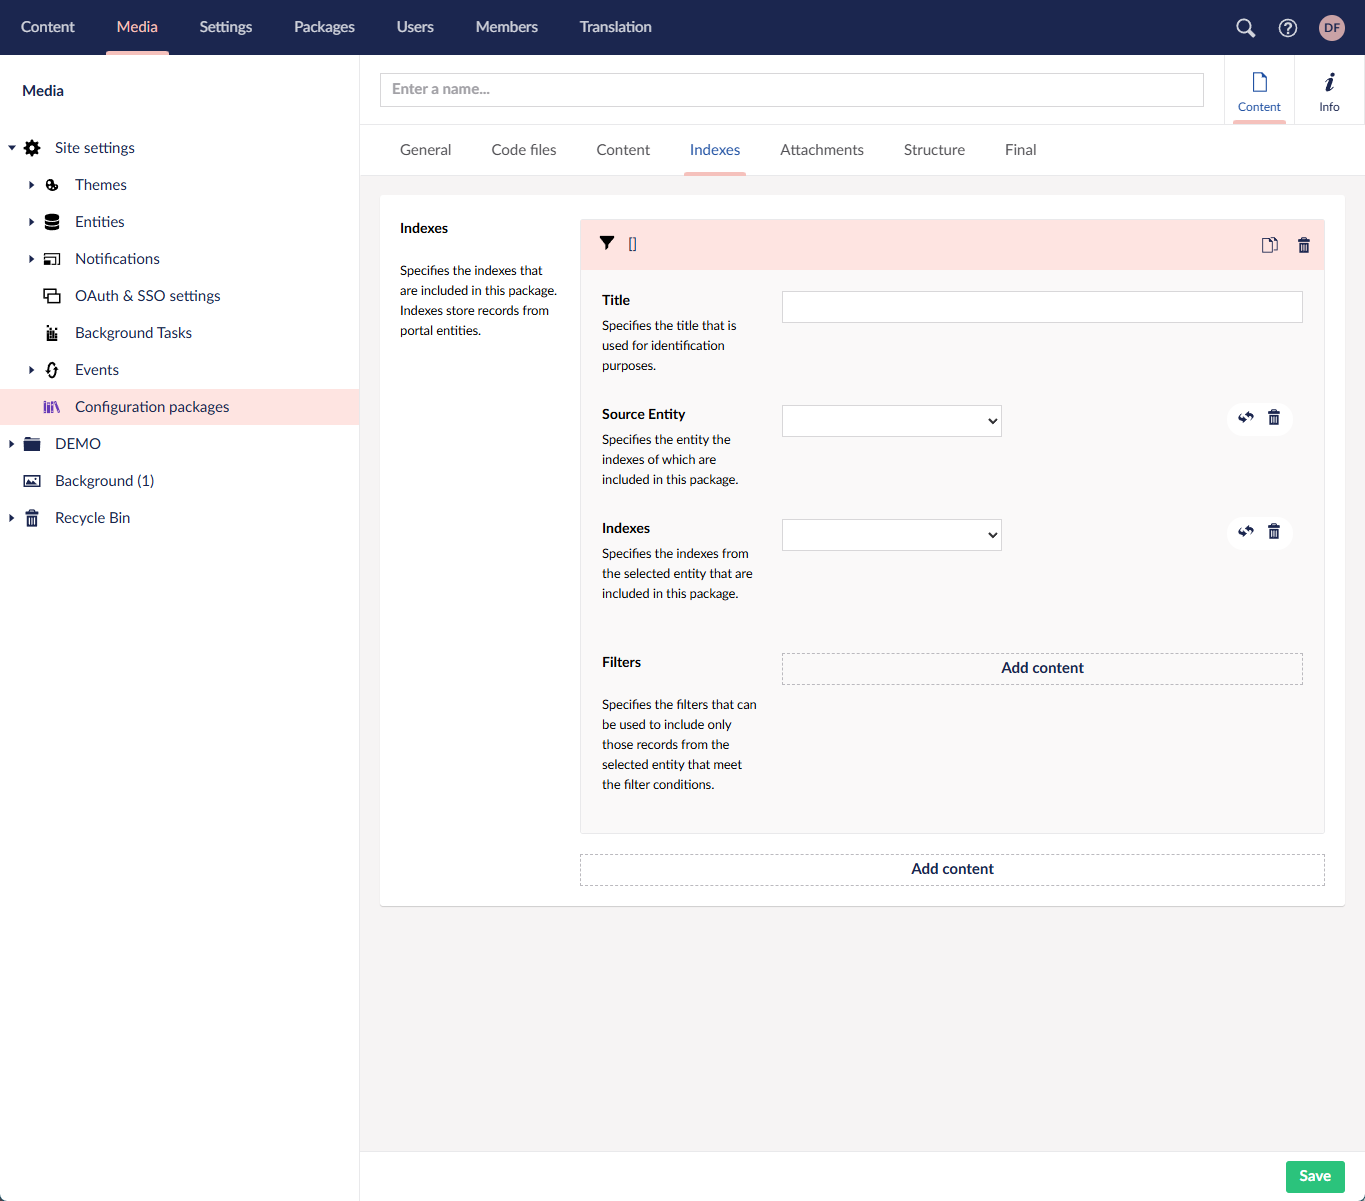
- On the Indexes tab, configure the indexes that are included in this package if necessary. Indexes store records from portal entities.
- Indexes - Specifies the indexes that are included in this package. Select Add content to include a new set of indexes.
- Title - Specifies the title that is used for identification purposes.
- Source entity - Specifies the entity the indexes of which are included in this package.
- Indexes - Specifies the indexes from the selected entity that are included in this package.
- Filters - Specifies the filters that can be used to include only those records from the selected entity that meet the filter conditions.
- Indexes - Specifies the indexes that are included in this package. Select Add content to include a new set of indexes.
- On the Attachments tab, configure the attachments that will be included in the package if necessary.
- Attachments - Specifies the records attachments (documents and other files) that are included in this package. Select Add to choose attachments.
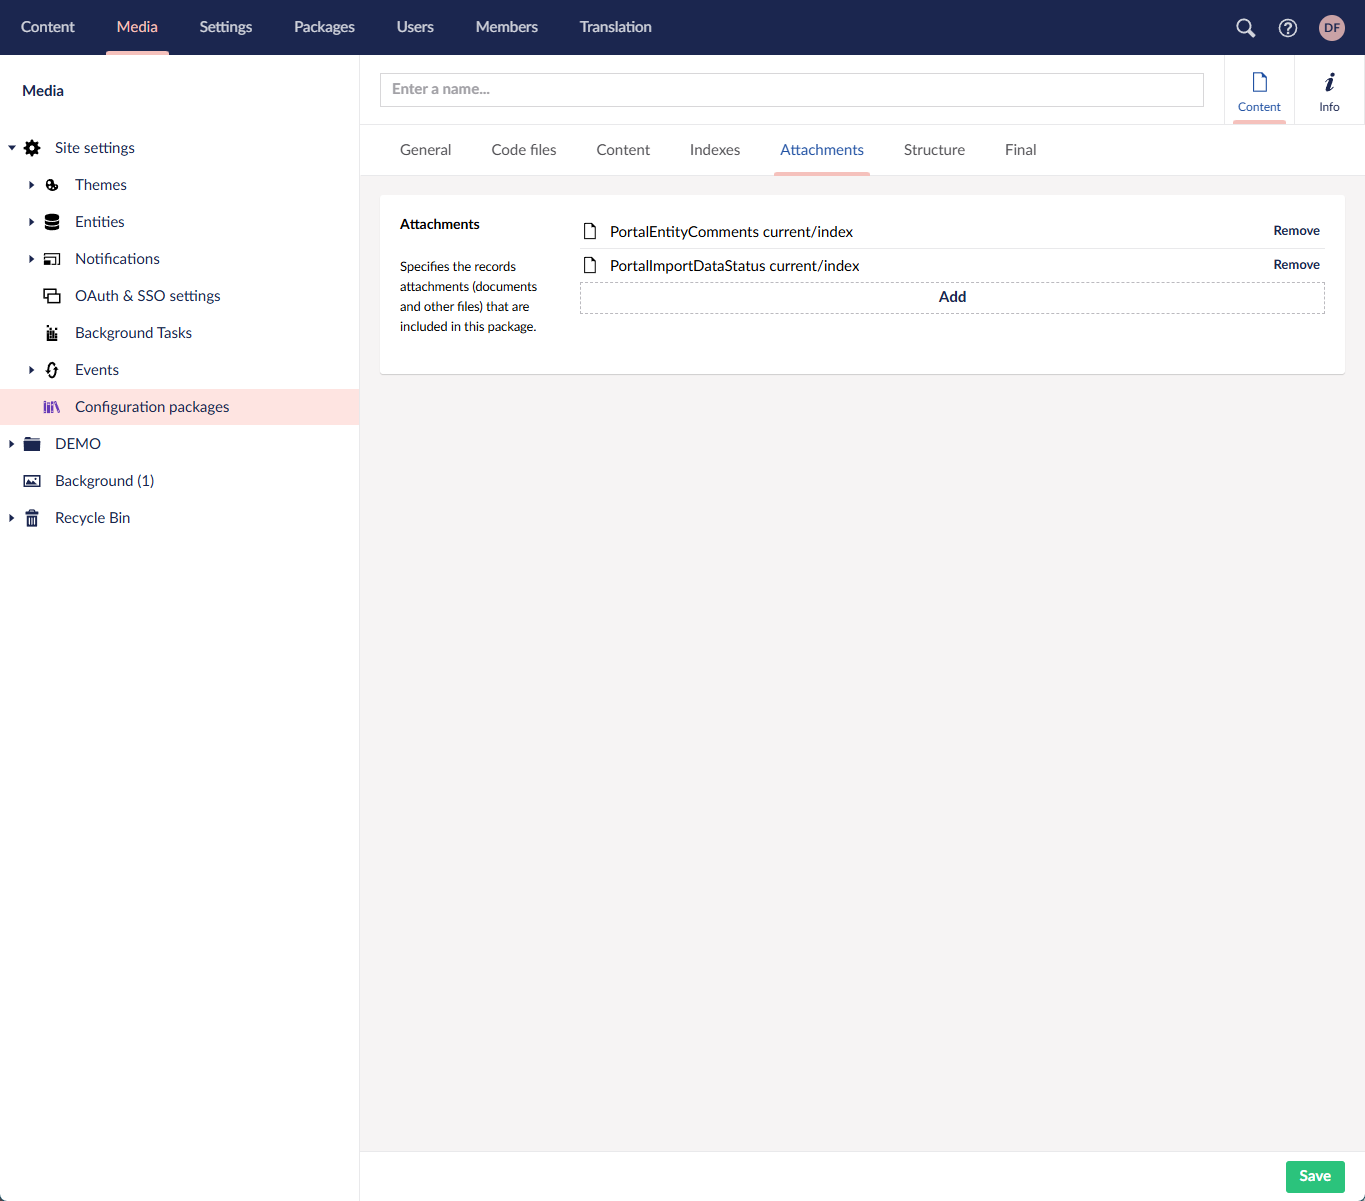
- Attachments - Specifies the records attachments (documents and other files) that are included in this package. Select Add to choose attachments.
- On the Structure tab, configure the portal structure elements you want to include in the package.
- Structure - Specifies the structure elements, such as dictionary items, data types, document types, etc. that are included in this package.

- Structure - Specifies the structure elements, such as dictionary items, data types, document types, etc. that are included in this package.
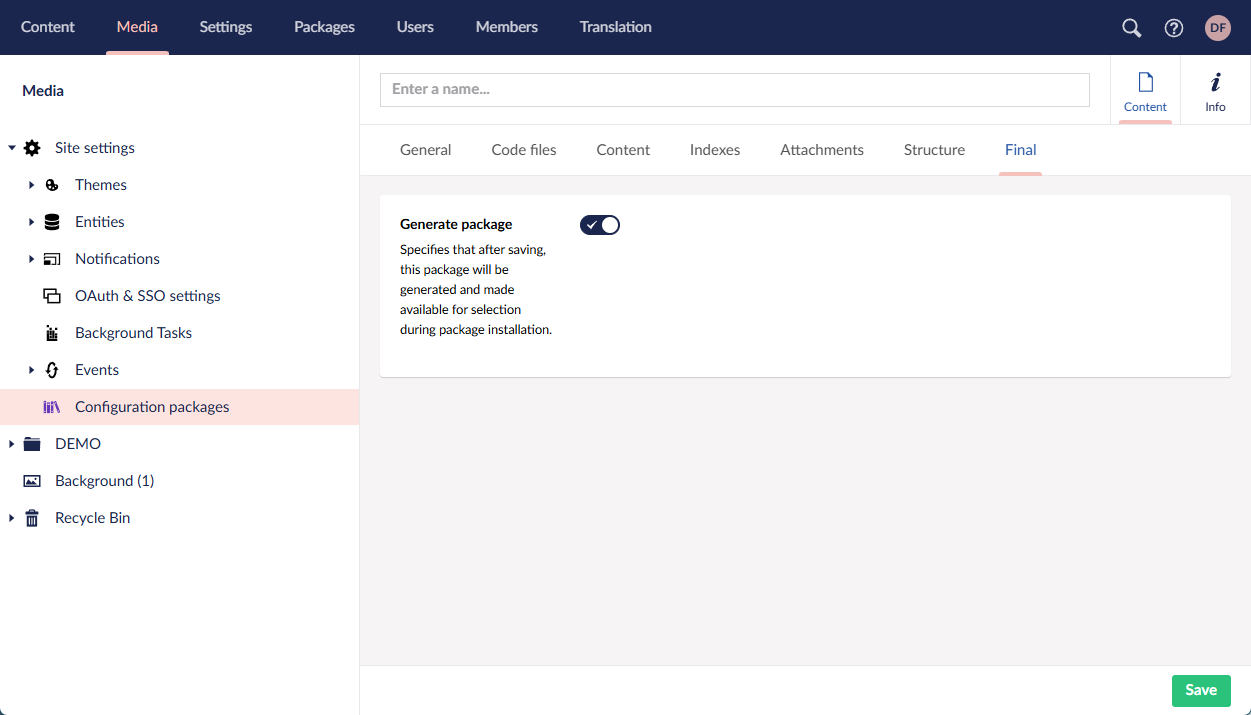
- On the Final tab, turn on the Generate package to generate the package as soon as you save the changes. If plan to complete the package configuration later, you can turn off this switch, and then return to this step once the package content is fully configured.
- Select Save to save the changes and generate the package with the configured content (if the Generate package switch is enabled on the Final tab).
|
The configuration package generation may take some time. |
A generated package is saved in the ZIP format and ready to be deployed on any portal. You can download the generated package by clicking the ZIP file that becomes available under the corresponding package node. The log.txt file shows technical information about the generated package, which may be useful for debugging purposes; you only need the ZIP file for deployment.
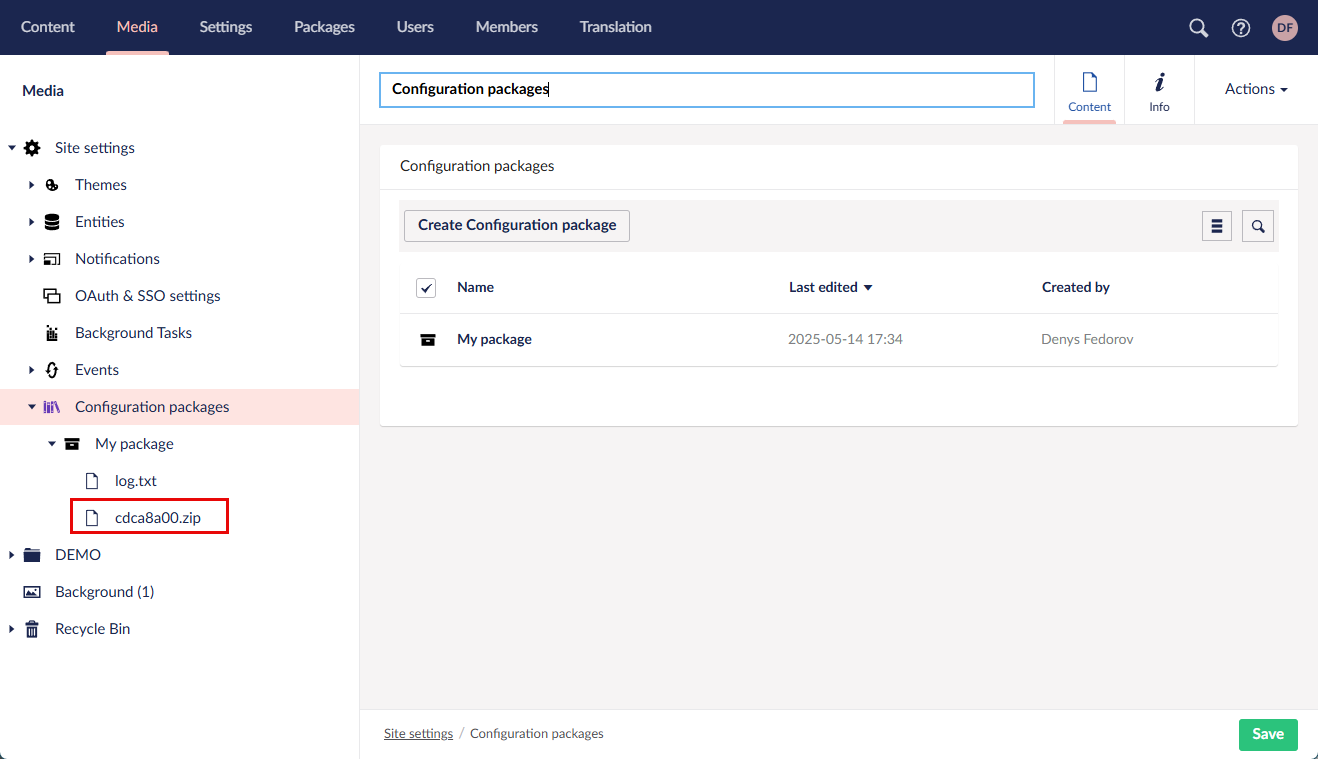
You can make changes within the configuration package node and regenrate the package—this will overwrite the previously created package file.
Delete a package node or package file
Once a package is installed, it cannot be uninstalled. However, you can delete the generate package files and package nodes:
- In the backoffice, go to Media > Site settings > Configuration packages.
- Select and hold (right-click) the node with the configuration package settings or the generated package file, and then select Delete.
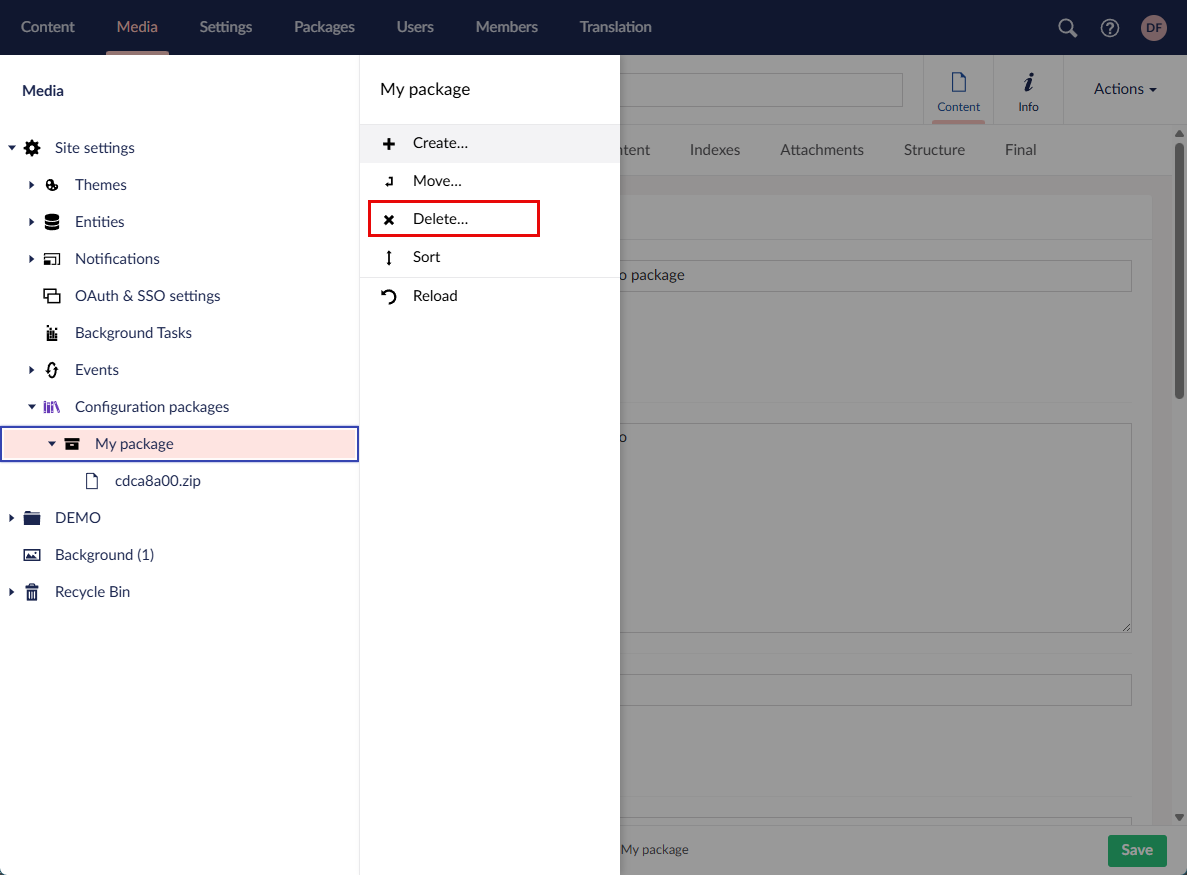
- Select Yes, delete on the confirmation message that appears.
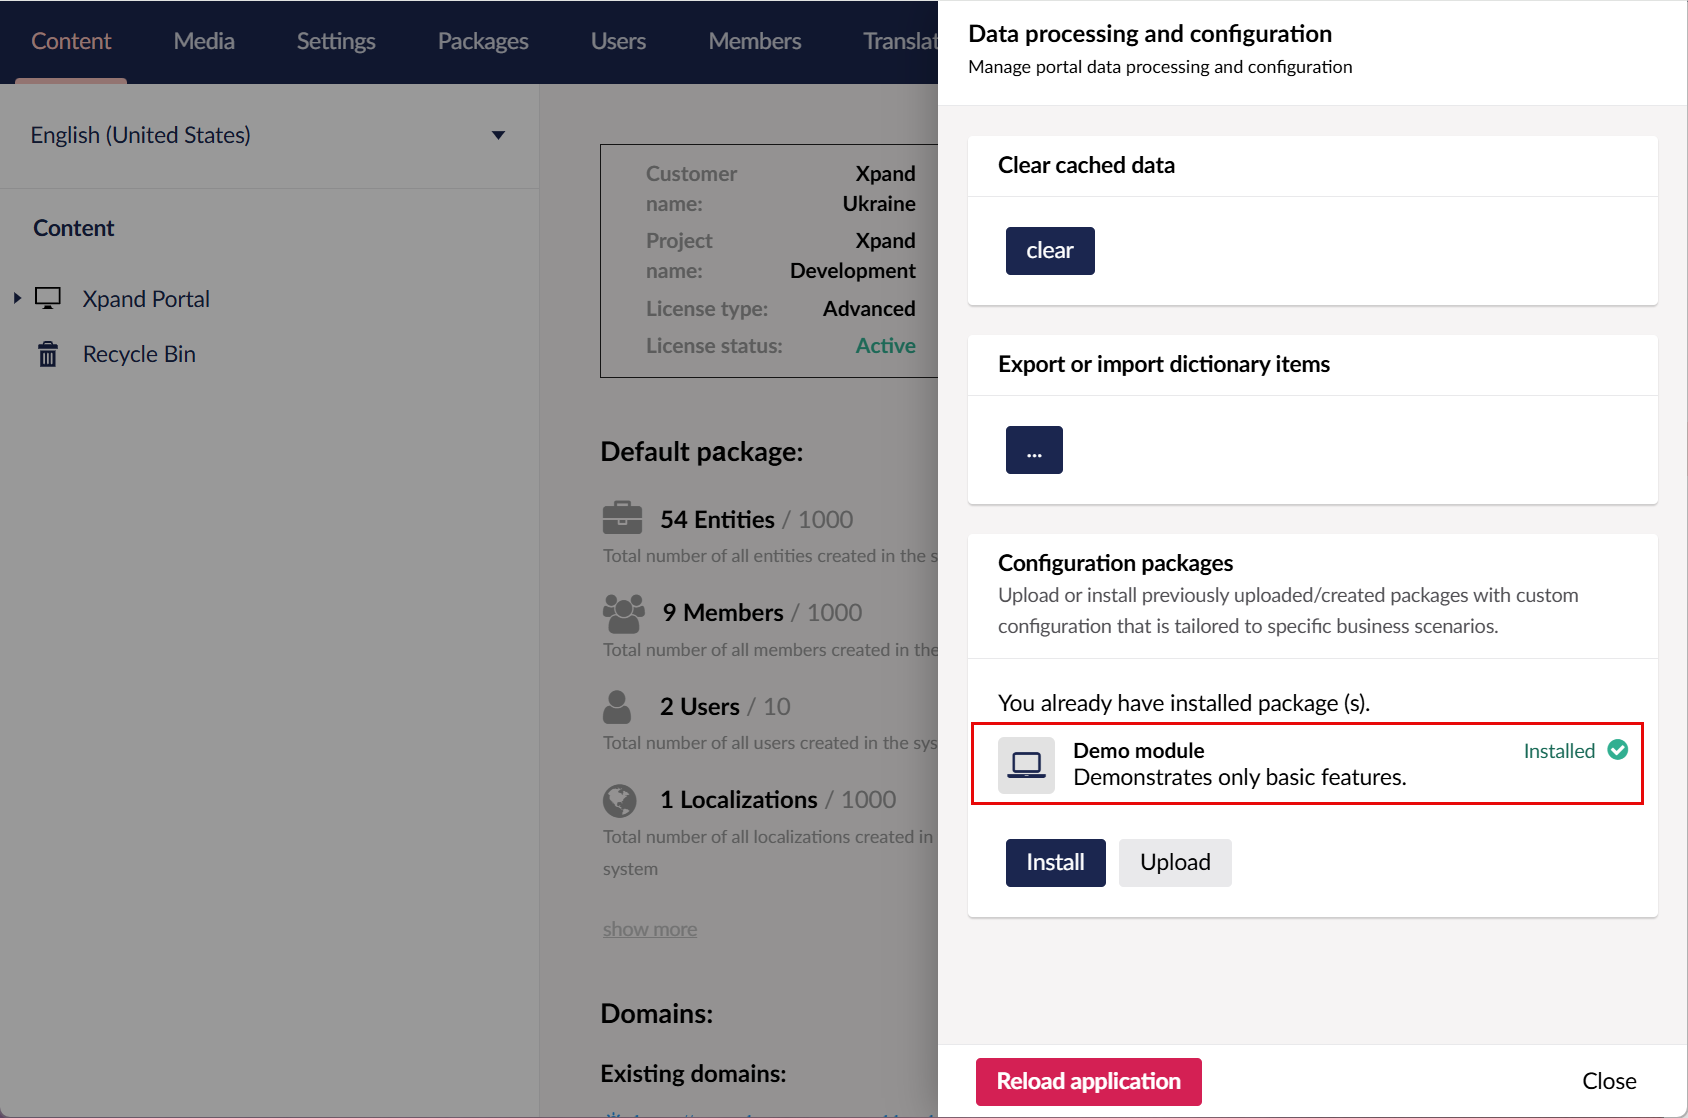
Deploy a configuration package or module
The deployment of a previously created configuration package or custom Xpand Portal module involves two phases: uploading a configuration package or module, and then installing it. Both manually created configuration packages and custom business-specific license-based modules are deployed using the same functionality.
|
After Xpand Portal installation, on your first sign-in to the backoffice, a request window appears where you can deploy Xpand Portal modules available to you according to your license. This step can be cancelled. Configuration packages or modules can be deployed later at any time. |
|
Installing a configuration package will not replace your current portal configuration; all package content will be added on top of your existing content if it is available, and any elements that coincide will be overwritten. Packages or license-based modules cannot be uninstalled. To have a clean portal environment, you need to reinstall the portal. |
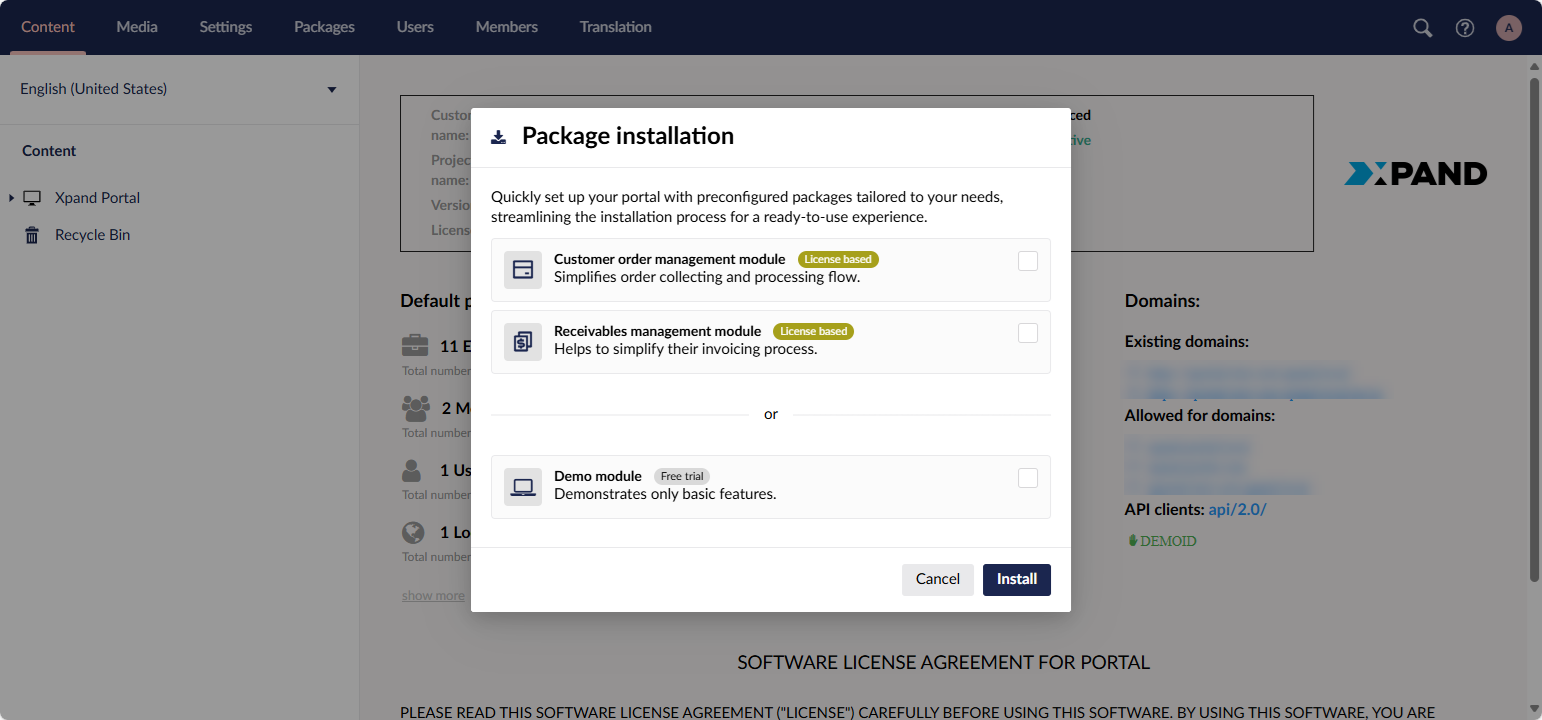
To deploy a configuration package or module:
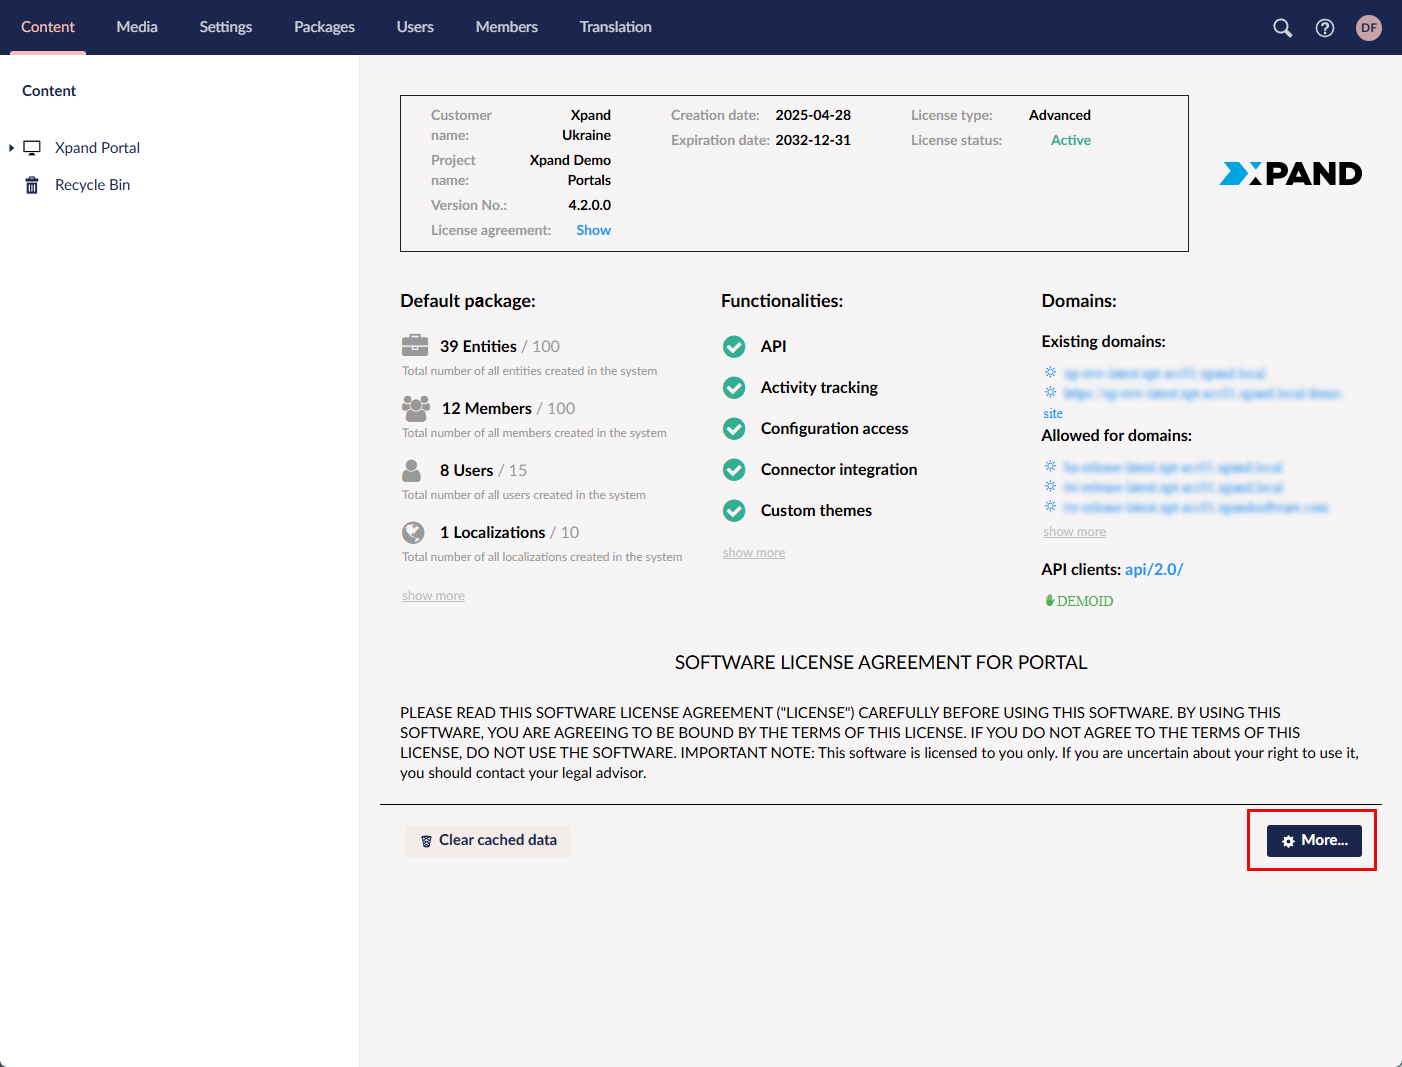
- In the backoffice, go to Content > More.
- Under Configuration packages, select Upload. Skip steps 2 through 4 if the package you want to install has already been imported before.
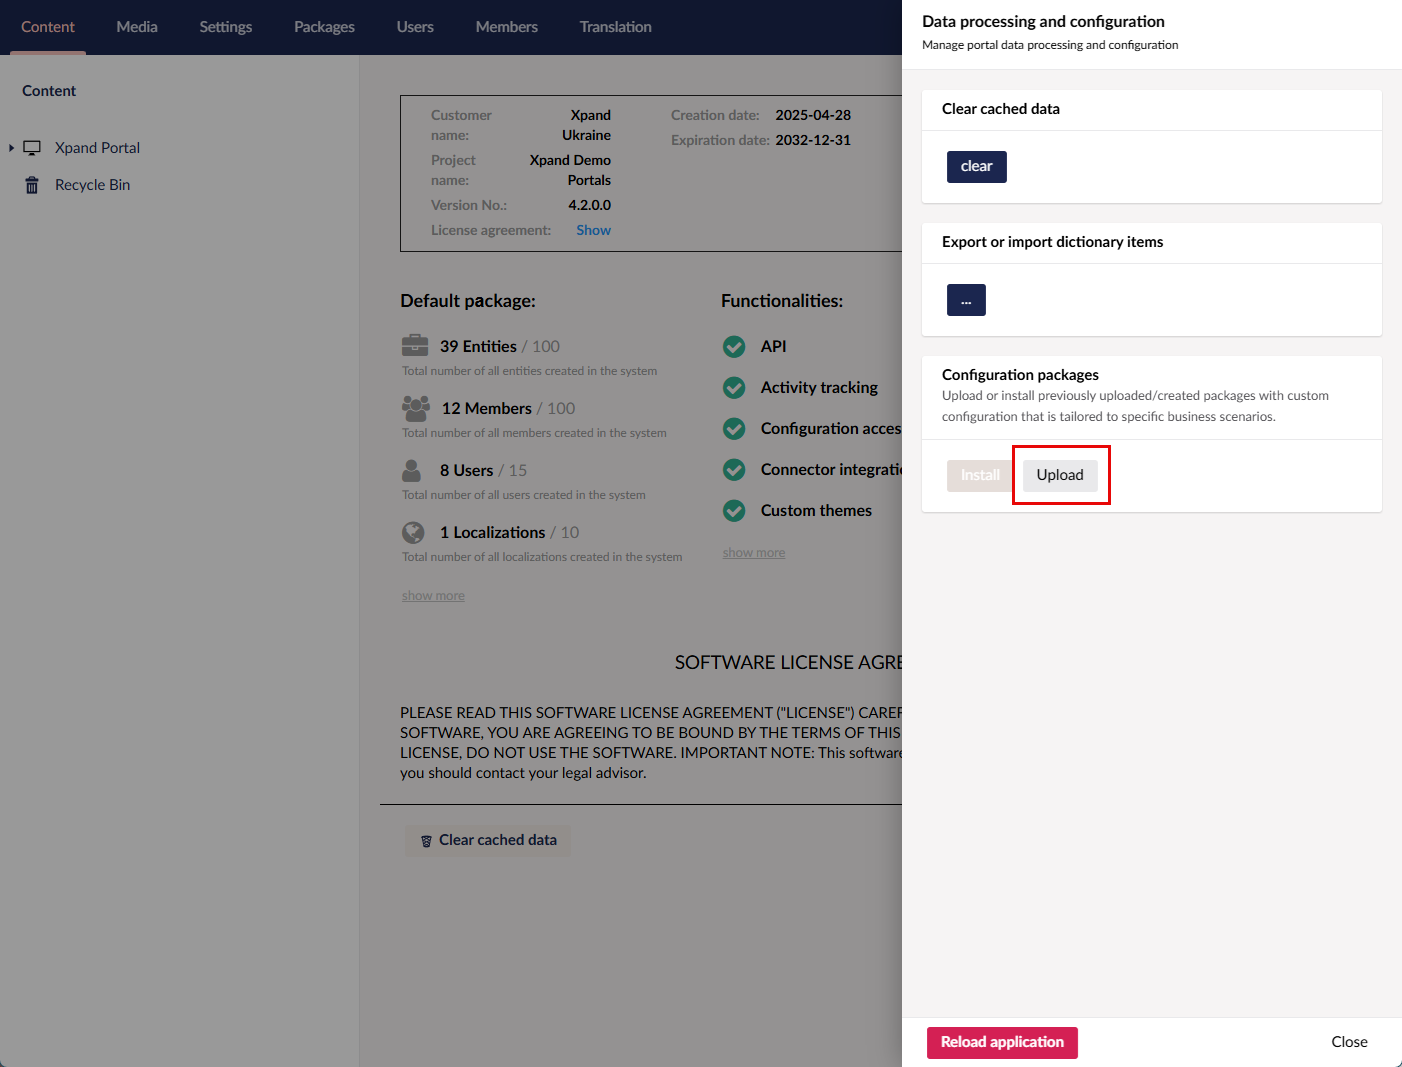
- In the Upload Package window, select Choose file, and then choose a ZIP archive with the configuration package or module.
- Select Upload to import the selected package file.
- Close the Upload Package window.
- Under Configuration packages, select Install.
- In the Package installation dialog window, the packages that were uploaded (or added during Xpand Portal installation) are available for selection to be installed.
- Select the checkbox next to the package you want to install.
 Note
NoteYou can install mutiple modules or packages at a time, however, you cannot install both the license-based module(s) and the free Demo module on the same portal.
- Select the Install button to begin the package installation. Installation may take some time.
- To apply the changes, reload the portal application (Content > More > Reload application).
The installed packages are displayed in the Data processing and configuration pane as well as in the Package installation dialog window.