Creating a portal back end backup
You can back up portal back end setup pages including setup values from the following areas:
- Members (portal members and member groups)
- Content (setup pages and setting values)
- Media (setup pages from this area)
What exactly is backed up depends on the backup configuration that is used for backup. A backup configuration must be created prior to backup. Alternatively, you can create or edit a backup configuration , and create a backup along with saving the configuration.
To create a portal backup
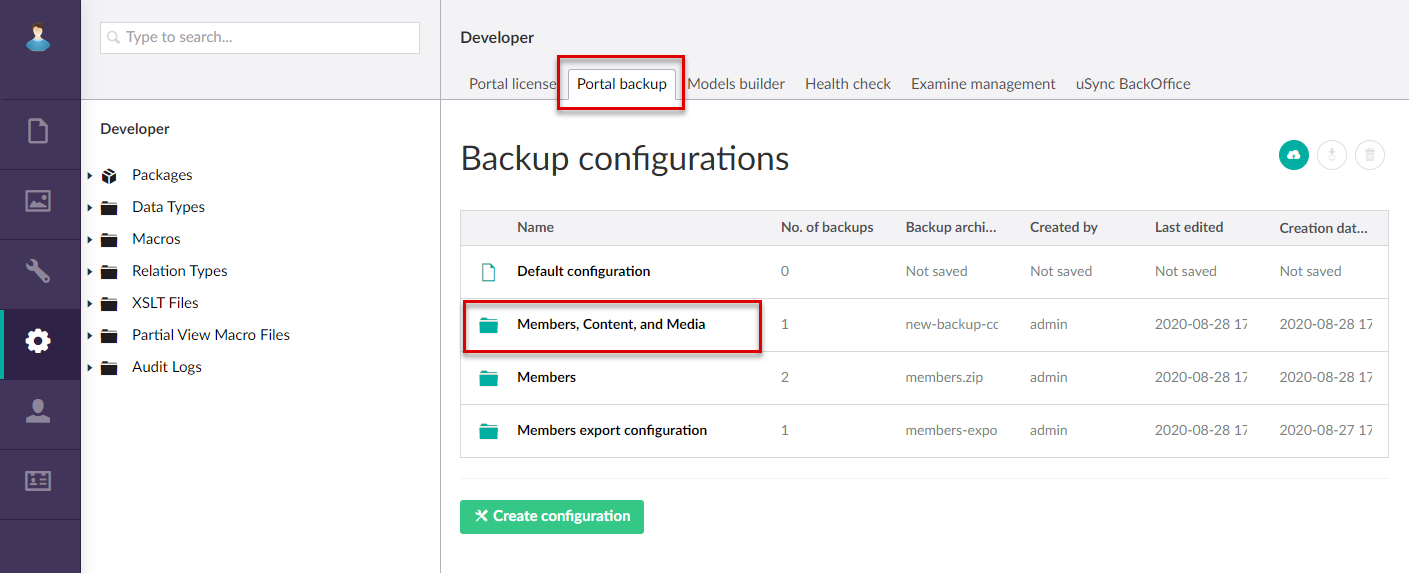
- In the backoffice, go to Developer, and then select the Portal backup tab.
- Select the line of the backup configuration the settings of which you want to use for backup.
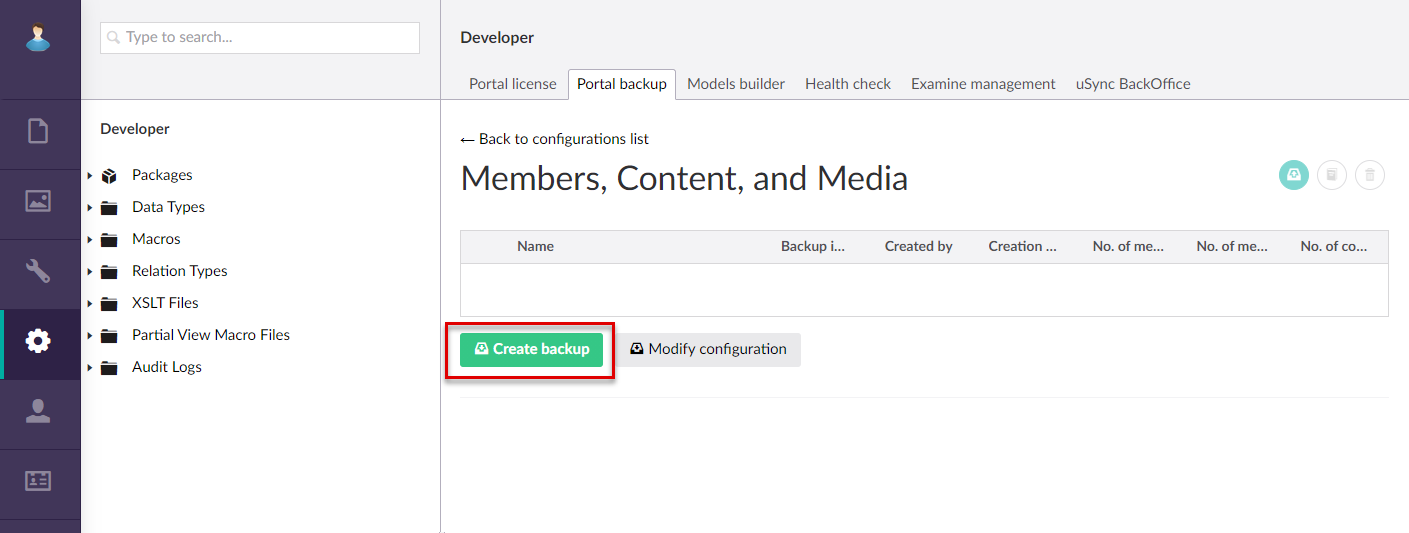
- Select Create backup.
 Note
NoteAlternatively, select Modify configuration, and then select Select Save configuration. Alternatively, select Save configuration & Create backup. Also, when you create a new backup configuration, you also have an option to save configuration and create a backup.
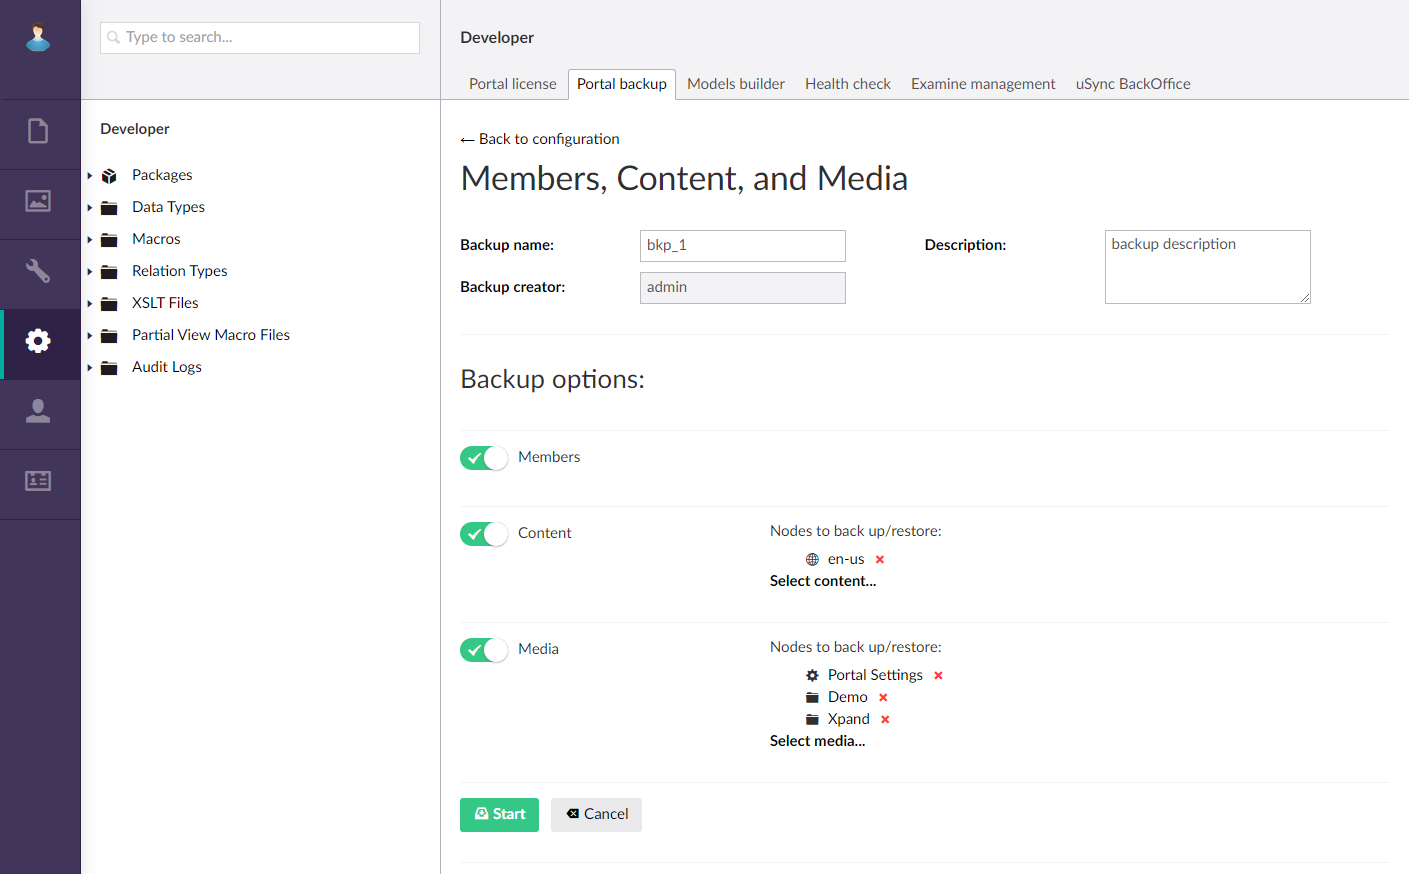
- Review the backup settings and make changes if necessary:
- Under the backup configuration name, fill in or change the fields if necessary:
- Backup name – Specifies the name of the backup.
- Backup creator – Specifies the creator of this backup. This field is automatically filled in with the name of the currently signed in backoffice user and cannot be changed manually.
- Description – Specifies a description of this backup.
- Under Backup options, review the options and change them if necessary:
- Members – Toggle this switch ON to back up members and member groups.
- Content– Toggle this switch ON to back up nodes from the Content area. Select Select content next to the switch to select which nodes will be backed up. Select the
 icon next to the node to remove it from the backup. If you do not select any nodes, all nodes will be backed up.
 - Media– Toggle this switch ON to back up nodes from the Media area. Select Select content next to the switch to select which media content will be backed up. Select the
 icon next to the node to remove it from the backup. If you do not select any content, all media nodes will be backed up.
- Under the backup configuration name, fill in or change the fields if necessary:
- Select Start.
- Select OK on the confirmation message that appears.
- Wait until the backup process is completed. You can see the log of the process (you will also be able to view the full log after the backup process is completed). You can select Stop to cancel the backup process.
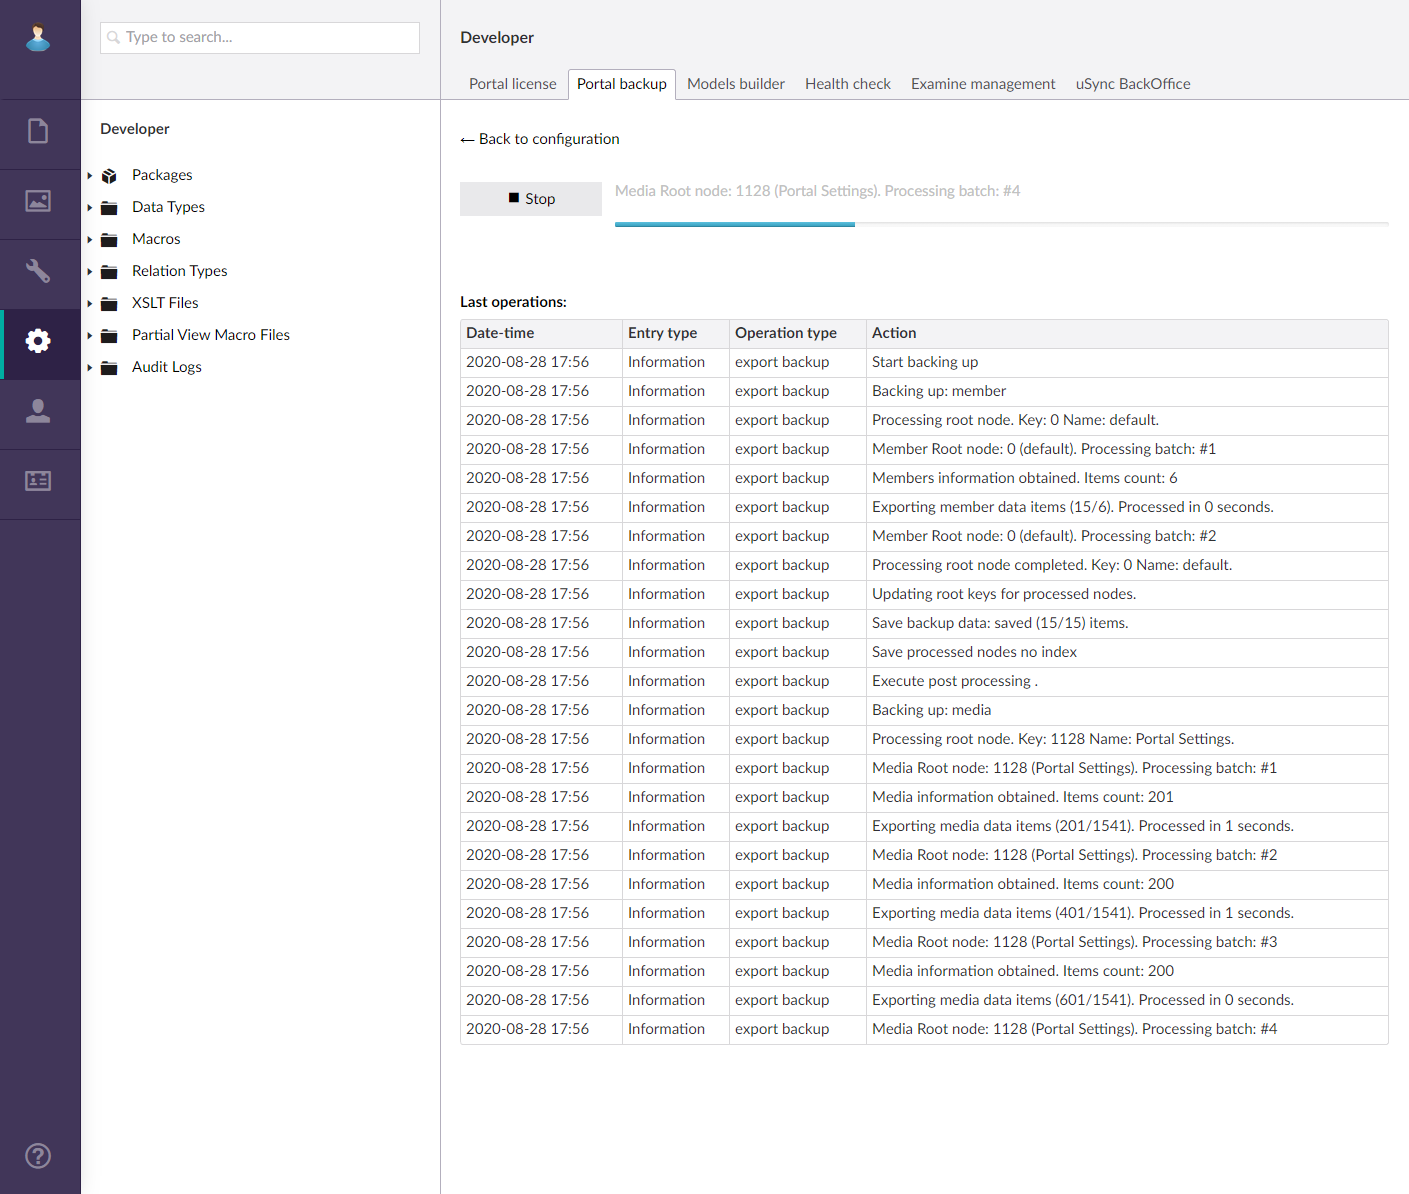
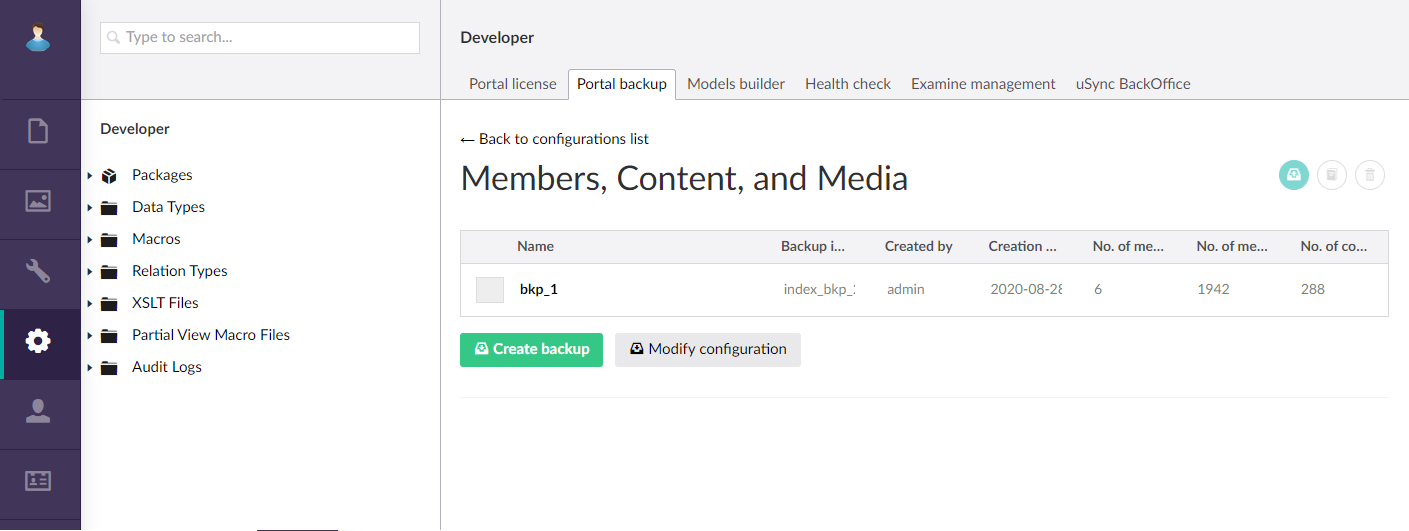
The created backup becomes available in the list of backups within the backup configuration folder that was used to create the backup. You can see the backup index name, backup creator, creation date, number of members, media nodes, and content nodes in each backup.
