JavaScript client events
Xpand Portal supports JavaScript-based client events to automate certain processes. For example, you can add dependencies between fields on records so that a field value is automatically calculated or automatically retrieved from a related grid when another field(s) is filled in or when a certain condition is met.
Examples of how JavaScript-based events can be implemented on your portal:
- Value of the field A is taken from the related grid after the field B is filled in
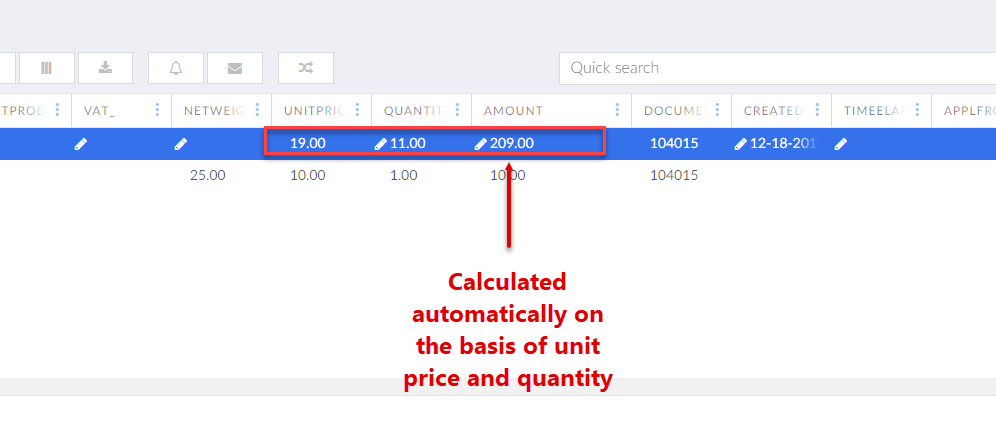
- Value of the field C is calculated automatically using values from the field A and field B
- Value of the field A is calculated automatically on condition that value of the field B meets a specific criterion (e.g. becomes more than 100).
JavaScript client events cannot be created directly from the backoffice; there are created outside Xpand Portal, and then uploaded to your portal. Once uploaded to the portal, the JavaScript events can be added to grid and detail pages.
To upload JavaScript client event(s)
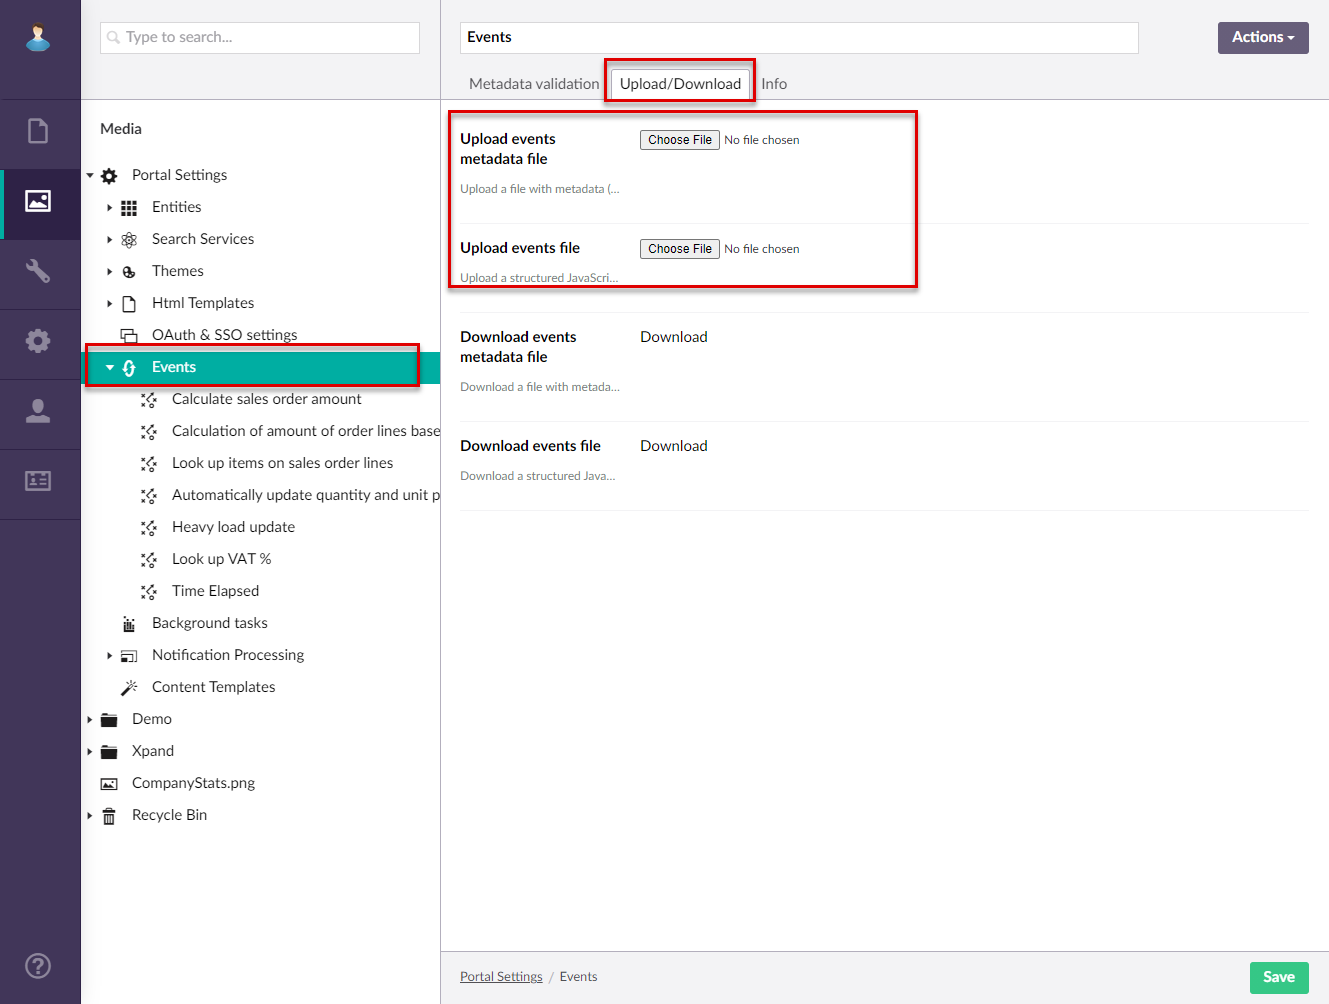
- In the backoffice, go to Media > Site settings > Events.
- Select the Upload/Download tab.
- Next to Upload events metadata file, select Click to upload, browse to a file with the metadata (structure) of the client events, and then click Open.
 Note
NoteThe metadata of existing client events will not be overwritten.
- Next to Upload events file, select Click to upload, browse to a structured JavaScript file with code (functions, methods, etc.) for the client events that can be used to automate various processes on the Front-End, and then click Open.
Note
Existing client events will not be overwritten.
- Select Save.
- To ensure that the metadata of uploaded events has been verified successfully, go to the Metadata validation tab and view the values in the following fields:
- Last uploaded events metadata title – Specifies the title of the last uploaded events metadata file.
- Last uploaded events metadata description – Specifies the description of the last uploaded events metadata file.
- Last uploaded events metadata validation – Specifies issues that were detected during the last validation of the last uploaded events metadata file.
Uploaded JavaScript events can be added to grid and detail pages.
To view uploaded JavaScript client events
|
JavaScript client events cannot be created directly from this menu. |
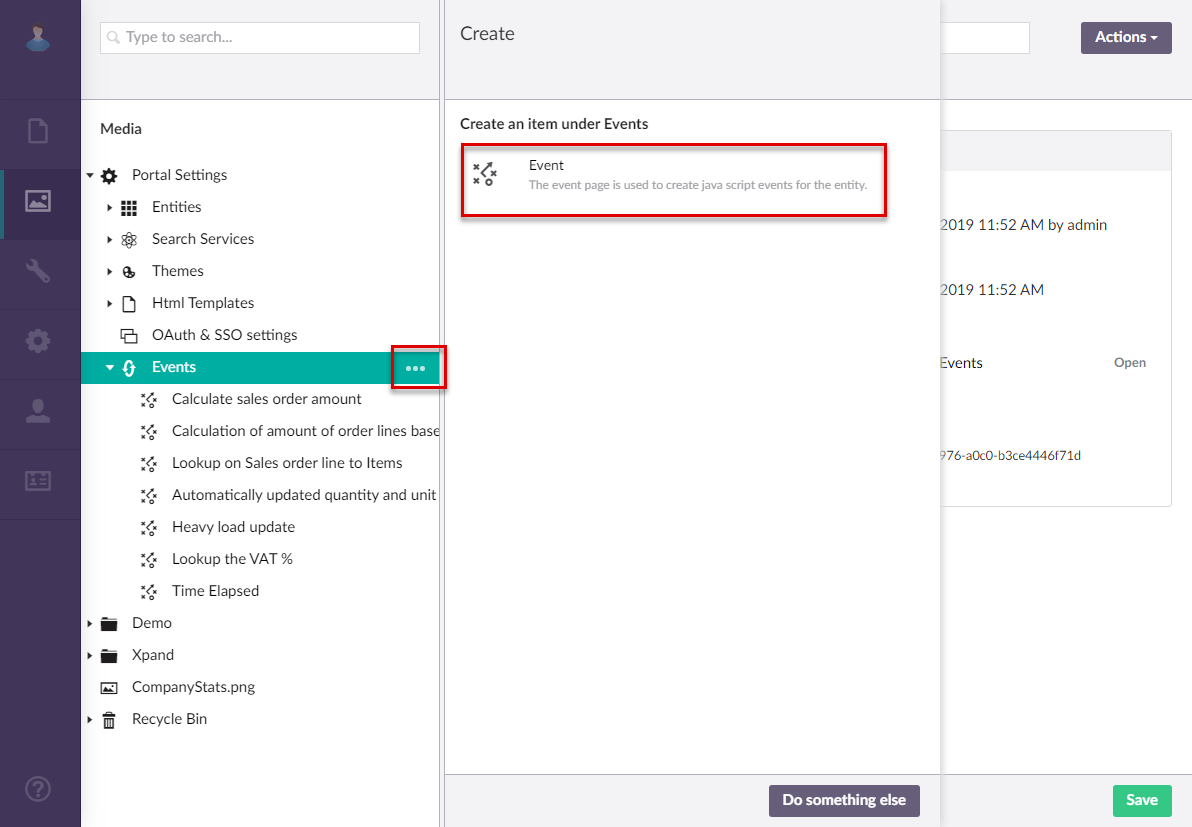
- In the backoffice, go to Media > Site settings > Events.
- Select the
 icon next to Events, and then select an event
  you want to view.
On the header, the name of the event that is used to identify it in the backoffice is shown.
The following information is shown about an event:
- Entity - Specifies the portal entity for which this event will be applicable.
Note
You will be able to add this event to a grid or detail (card) page the data source of which uses the portal entity that you specify here.
- Event title - Specifies the title of the event that will be displayed in the drop-down list when you are adding an event to a grid or detail page.
- Comment/description - Specifies a description of the event or a comment about it.
- Unique event name - Specifies the unique event name that will be used to identify it.
- Event content - Specifies the JavaScript code that will be run in this event.
If the JavaScript event code uses related entities (in addition to the entity specified in the Entity field), these related entities and their pages are specified under Related entity:
- Entity name – Specifies the name of the related entity, which is used in the event code.
- Event entity – Specifies the title of the related entity.
- Related entity page – Specifies the page of the related entity.
To download JavaScript client event(s)
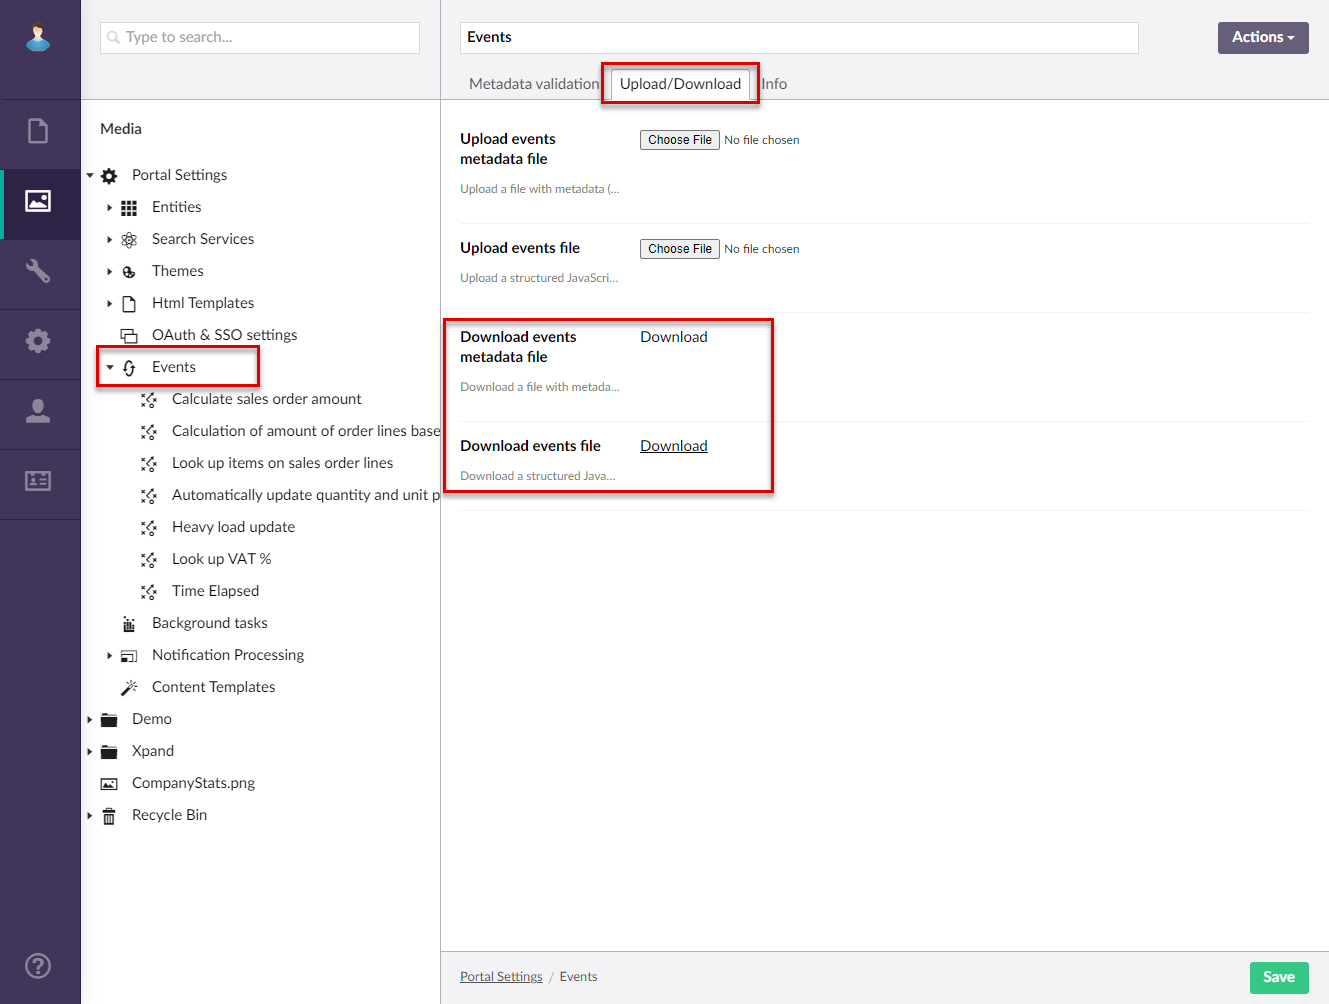
- In the backoffice, go to Media > Site settings > Events.
- Select the Upload/Download tab.
- Next to Download events metadata file, select Download current metadata file to save a JSON file with the metadata (structure) of the client events.
- Next to Download events file, select Download all uploaded events at one time to save a ZIP file with all uploaded portal client events.
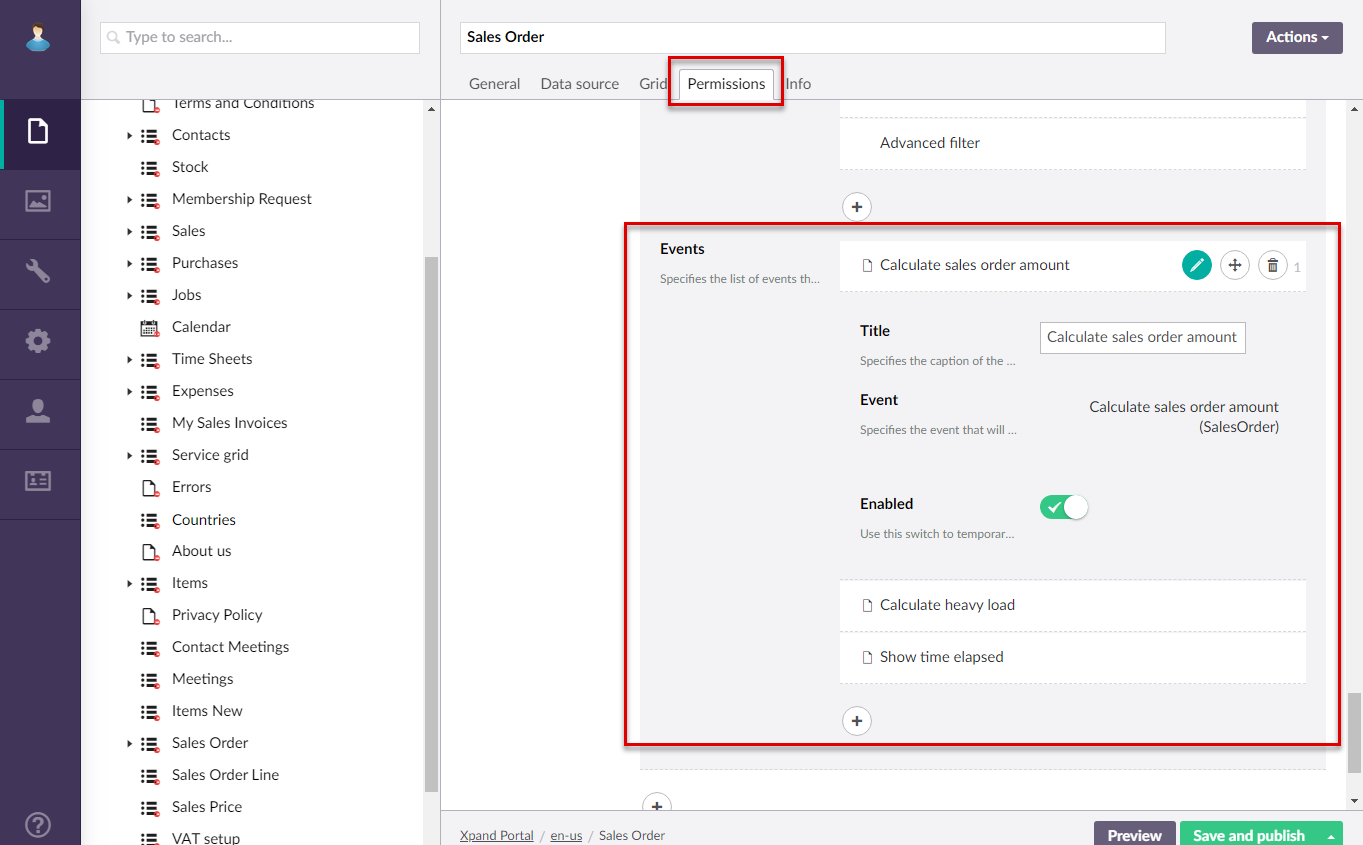
To add an event to a grid page
- Open the settings for the grid page where you want to add an event.
- On the Permissions tab, expand a permission set next to Member group permissions, and then select Add Event next to Events.
- In the Title field, type the title of the event.
- In the Event field, select an event that will be automatically run for this member group. What exactly will happen in the selected event and under which conditions depends on the event code.
NoteOnly events created for the portal entity specified on the Data source tab of the grid page will be available for selection.
- Set the Enabled switch to ON. You can use this switch to temporarily disable the event without deleting the setting.
- Add more events for this permission set if necessary.
- Add more events for other permission sets if necessary.
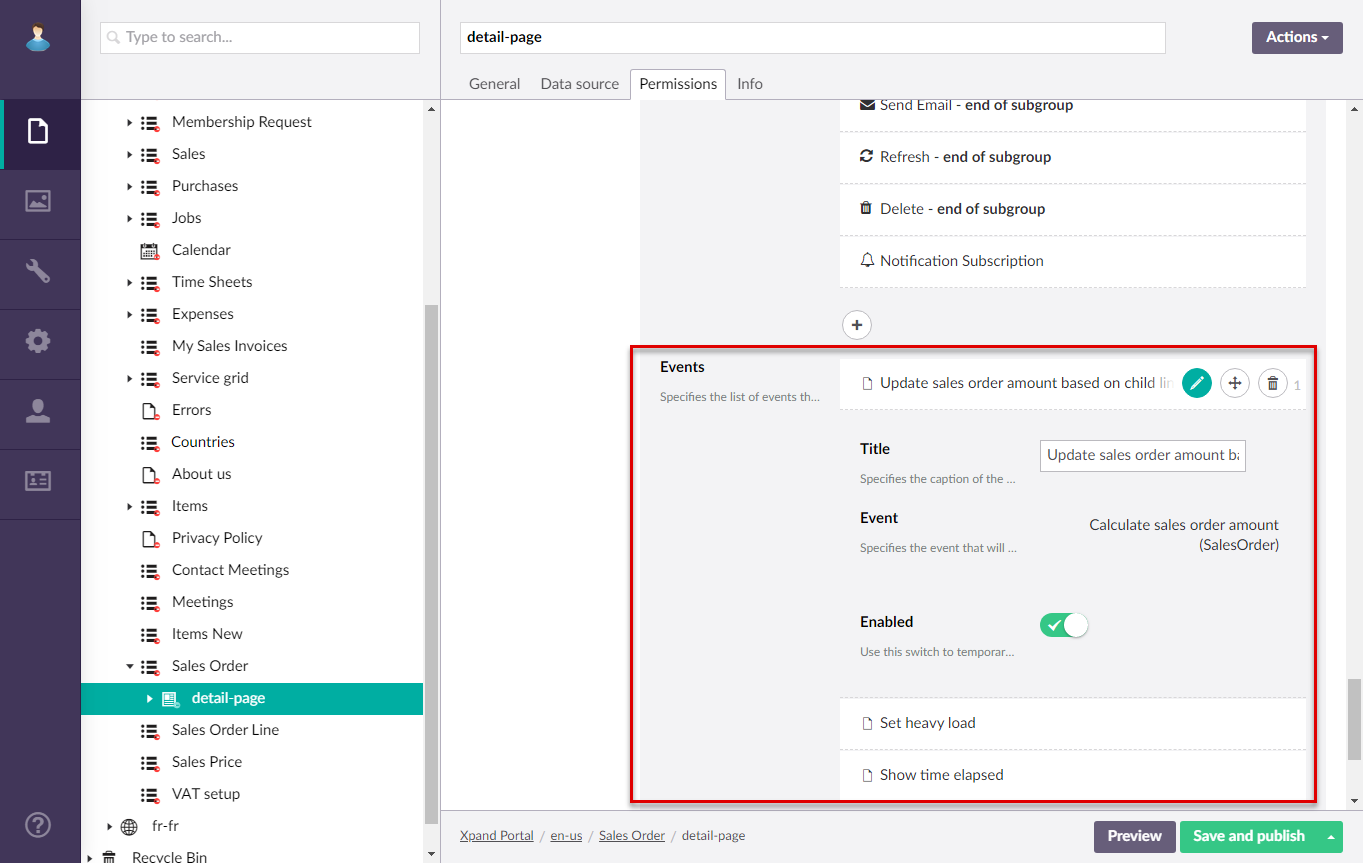
To add an event to detail page
- Open the settings for the detail page where you want to add an event.
- On the Permissions tab, expand a permission set next to Member group permissions, and then select Add Event next to Events.
- In the Title field, type the title of the event.
- In the Event field, select an event that will be automatically run for this member group. What exactly will happen in the selected event and under which conditions depends on the event code.
NoteOnly events created for the portal entity specified on the Data source tab of the detail page will be available for selection.
- Set the Enabled switch to ON. You can use this switch to temporarily disable the event without deleting the setting.
- Add more events for this permission set if necessary.
- Add more events for other permission sets if necessary.