Restricting public access to portal pages
By default, after site creation, portal pages are available for all visitors both registered and non-registered.
|
If you want to protect your data, you must restrict public access to select or all portal pages. We recommend configuring public access right after portal deployment. When you add new pages or members/member groups, you may need to update the public access settings for your portal pages. |
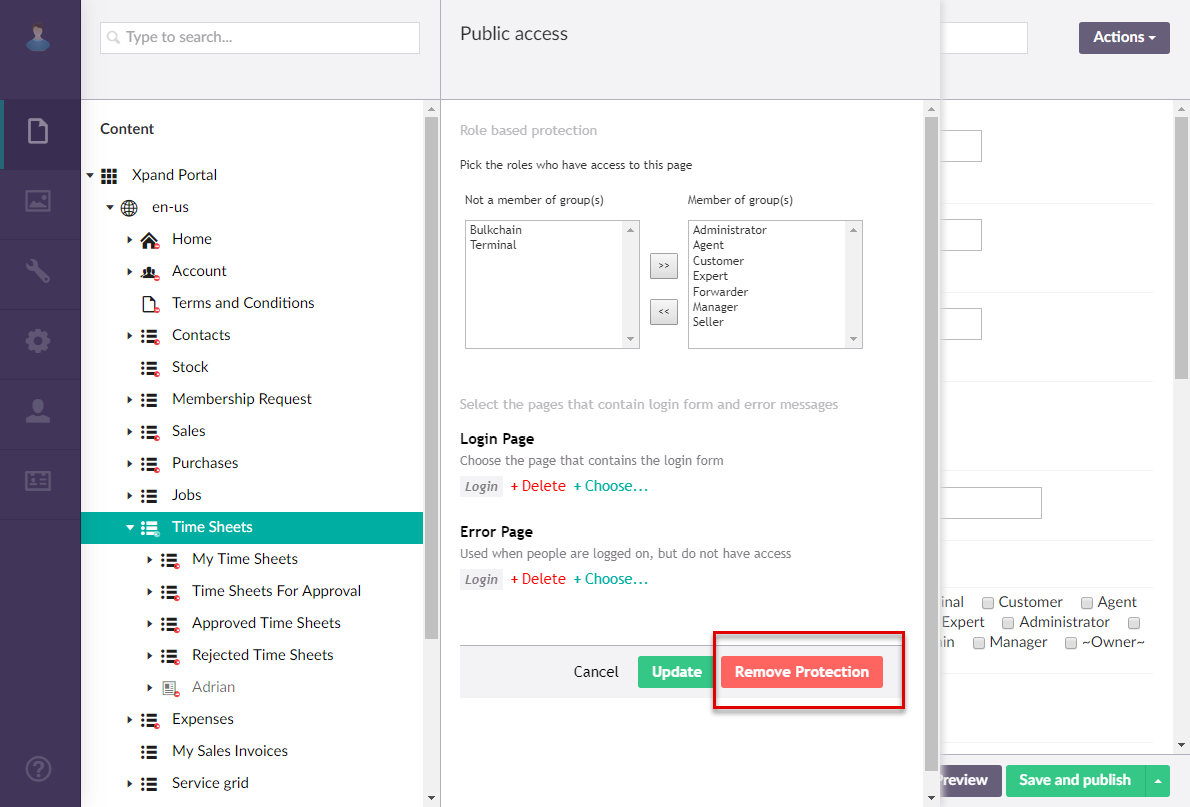
The public access settings enable you to restrict access to certain pages either for specific portal member groups or to a single member. When public access is restricted for a page, only the selected member groups or members can access it, and only when they are signed in.
Public access settings that you configure for a page will be applied to all child pages as well on condition that the child pages do not have their own public access settings. If a child page (a page on a lower node level) has its own public access settings, they will be used instead of those of the parent page. For example, if you restrict public access for the site localization page, these settings will be applied to all pages in that localization with the ability to configure page-specific public access settings for every child page on top of that.
To restrict public access for portal pages
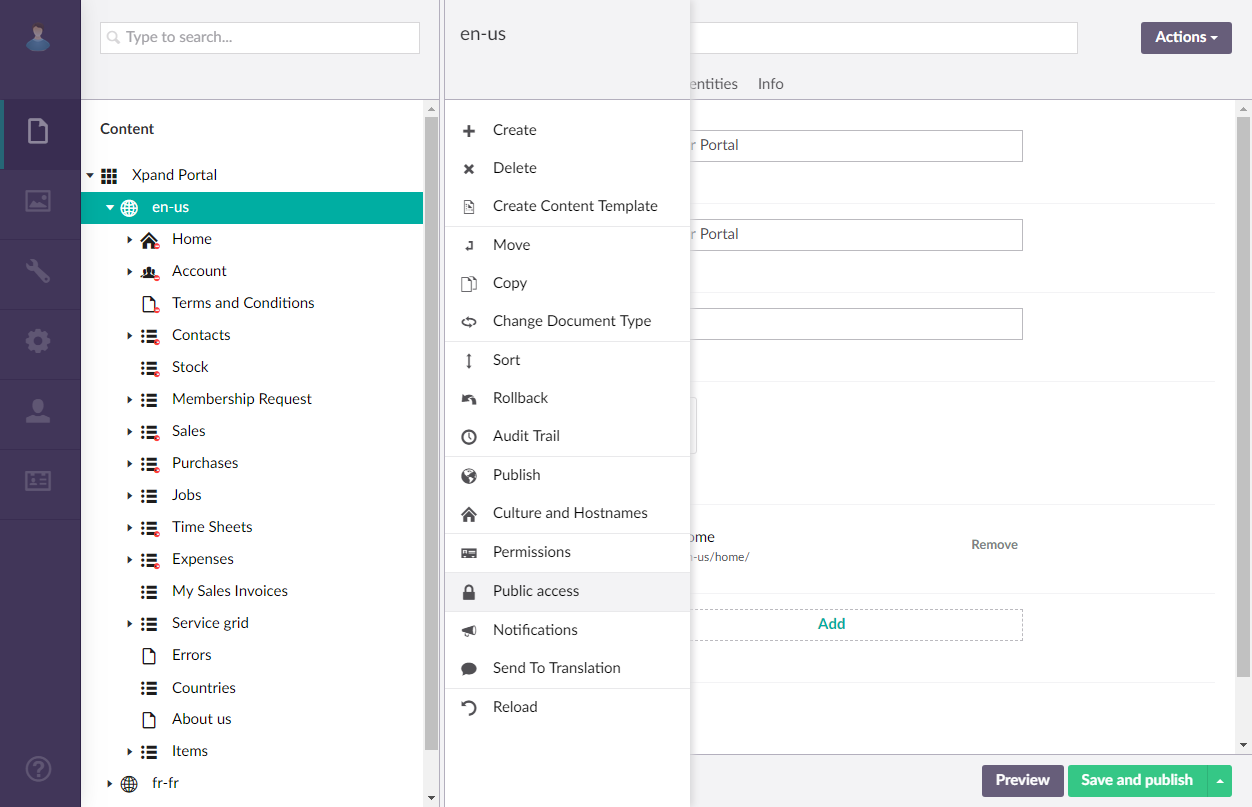
- In the backoffice, go to Content.
- Select and hold (or right-click) the page for which you want to restrict public access, and then select Restrict public access.
 Tip
TipIt is recommended that you configure public access for the
 site localization page first so that these settings are applied to all pages in that localization, and then change public access settings for specific pages if necessary.
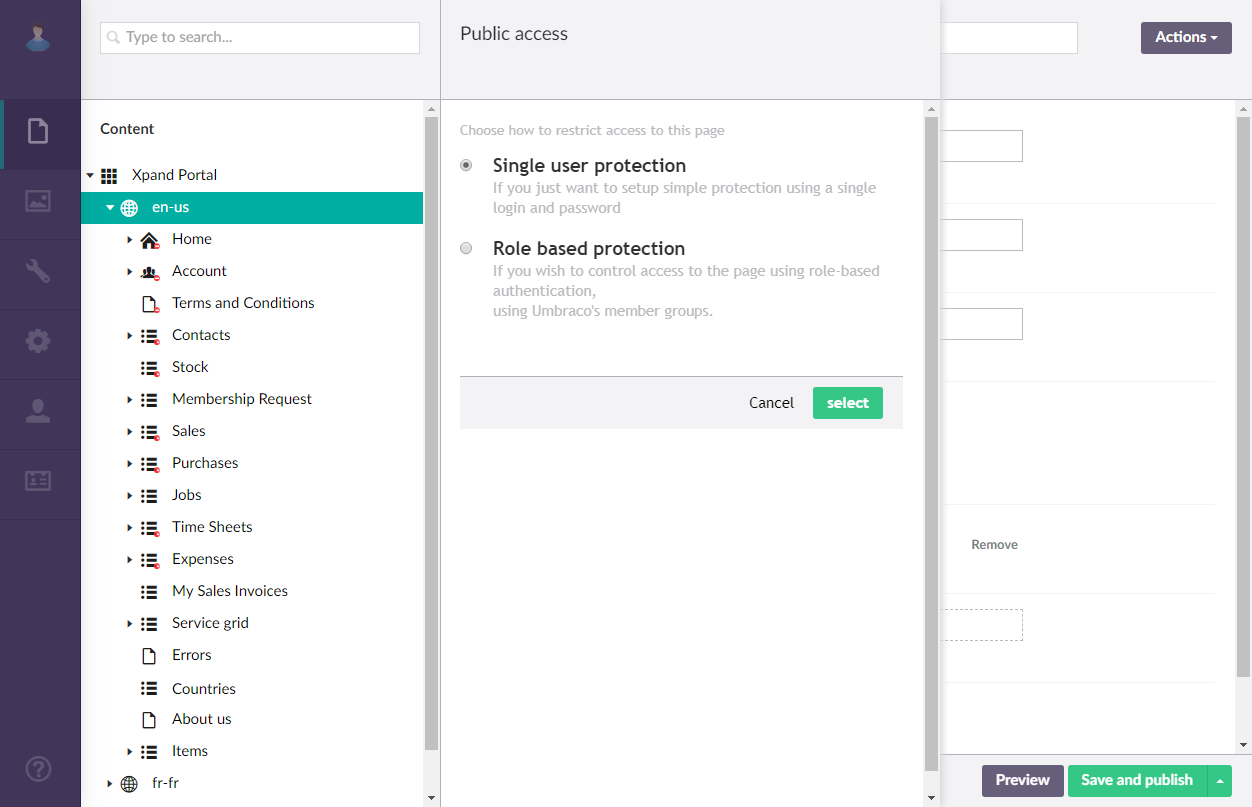
 - Choose how you want to restrict access to the selected page and its child pages:
- Specific members protection - Select this option to restrict access to the page in such a way that a portal visitor will need to only enter the login and password that you configure here.
- Group based protection - Select this option if you want to restrict access to the page to only specific portal member groups.
|
These options are displayed only if public access has not been set up for this page yet. Otherwise, this step is skipped. |
- Set up public access depending on the option you selected in the previous step:
- If you selected Specific member protection:
- Select members who will have access to the page.
- Under Login Page, select the login page that will be opened when the user tries to open this page. The page must already be created.
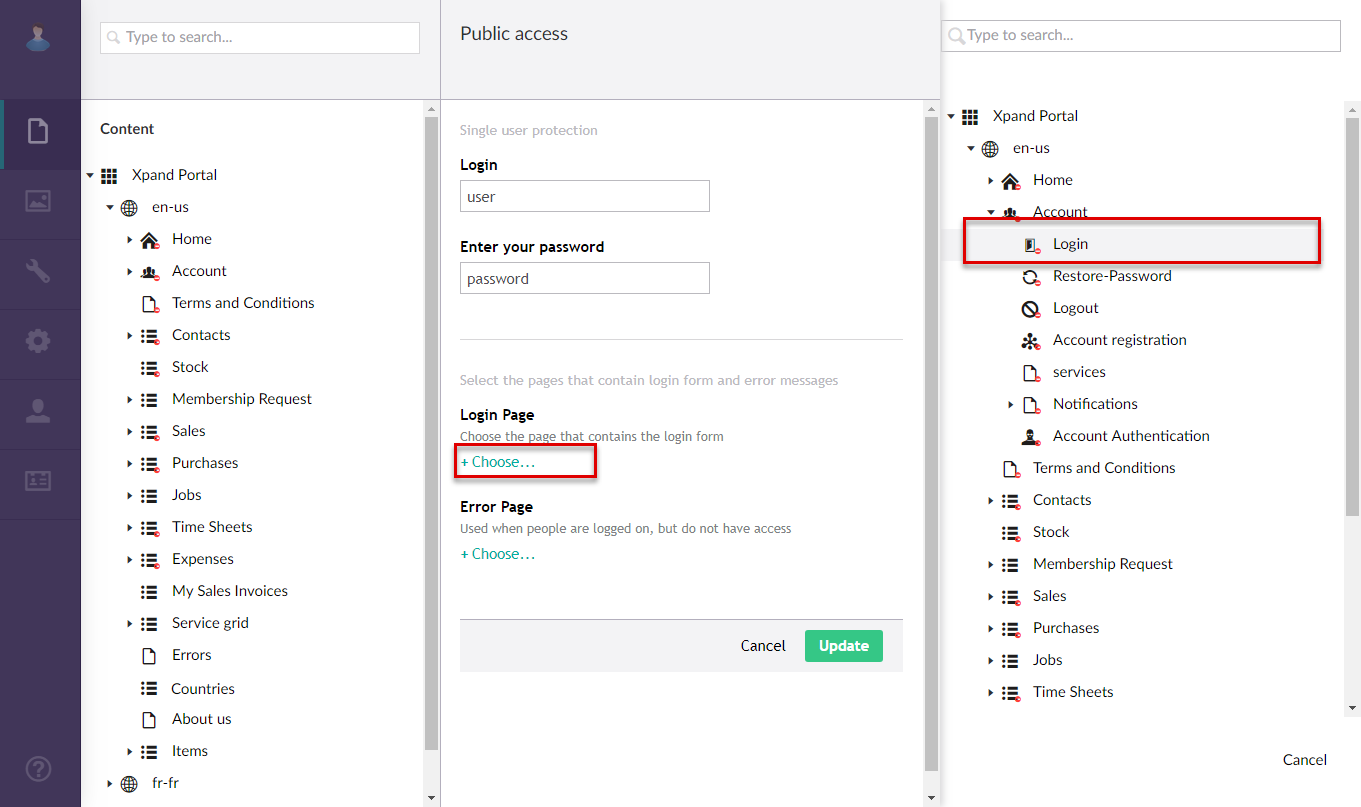
- Under Error Page, select a page that will be opened when the user has signed in successfully, but does not have appropriate permissions to access the page.
- Select Save to update the public access settings for this page and child pages.
- If you selected Group based protection:
- Select the portal member groups the members of which will be allowed to access this page.
- Under Login Page, select the sign-in page that will be opened when the user tries to open this page. The page must already be created.
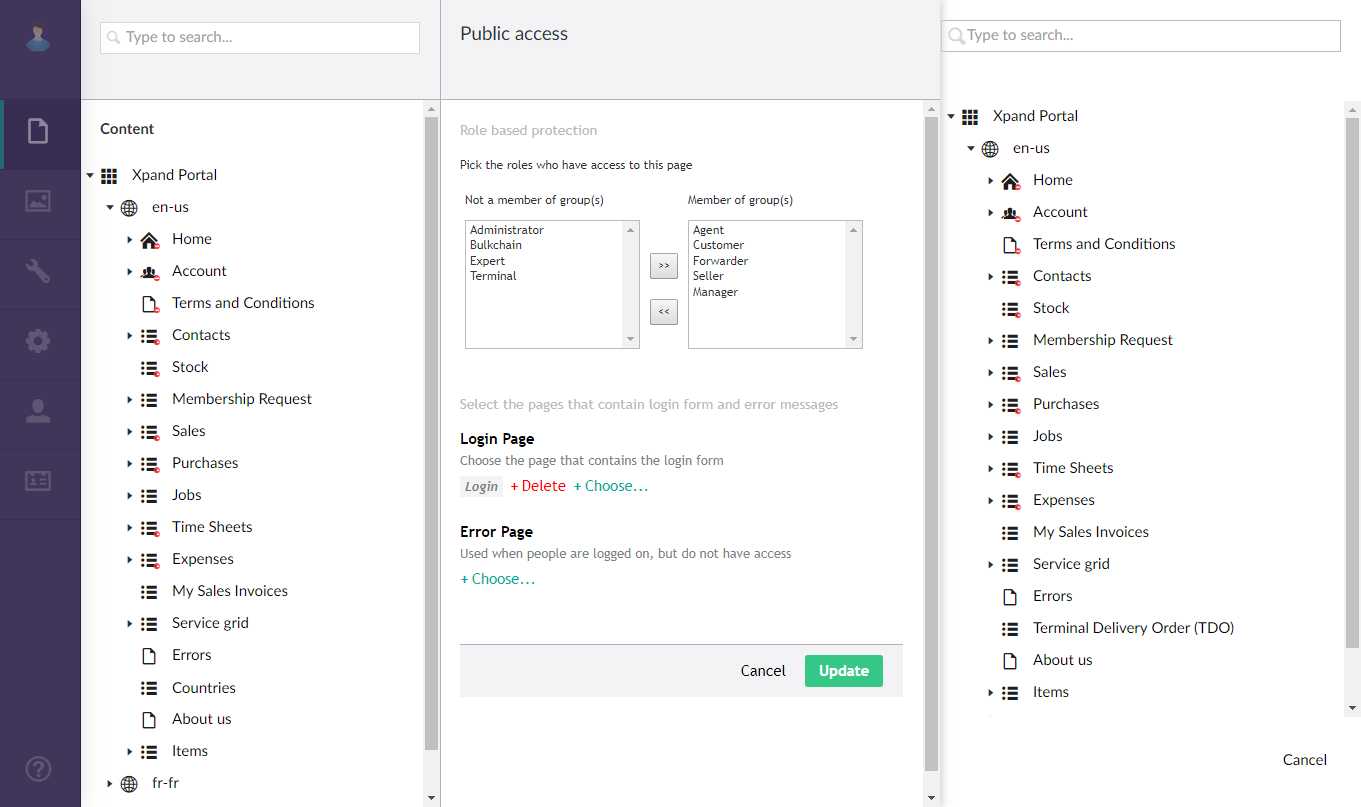
- Under Error Page, select a page that will be opened when the user has signed in successfully, but does not have appropriate permissions to access the page. For example, you can create a simple content page to display this information for the user.
- Select Save to update the public access settings for this page and child pages.
- If you selected Specific member protection:
- Select OK on the information message that appears.
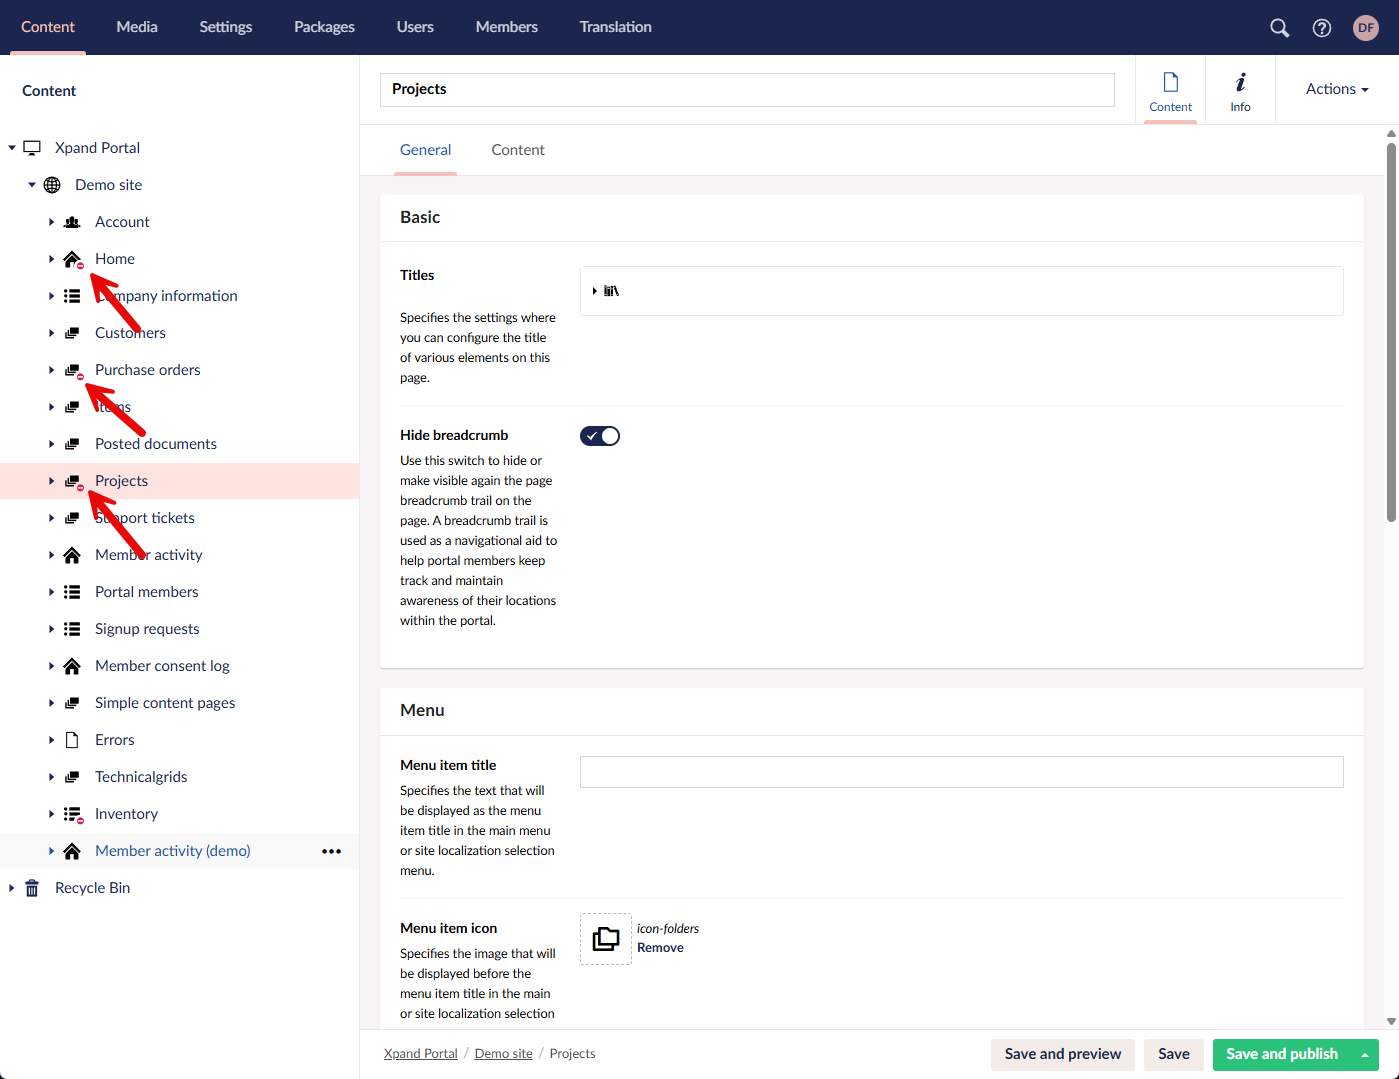
When public access for a page is restricted, the page has a red indication ![]() next to its icon in the site tree.
next to its icon in the site tree.
To remove protection and grant public access
|
Removing protection grants public access to the page for any portal visitor without the necessity to sign in. However, if public access settings are configured for a parent page, the parent page's public access permissions will apply. |
To grant public access:
- In the backoffice, go to Content.
- Select and hold (or right-click) a page for which public accessed was previously restricted, and then select Restrict public access.
- Select Remove Protection. This option is available only if you public access has already been restricted.
- Select Confirm on the confirmation message that appears.
- Select OK on the information message that appears.