Password Recovery page
The Password Recovery page is a portal page that will be opened when a portal member is trying to recover their password. When a portal member clicks the Forgot your password? link on the login page, they receive a notification email with a link to the Password Recovery page where they will be able to reset the password and specify a new one. The body of the email notification is configurable in the Password Recover page settings.
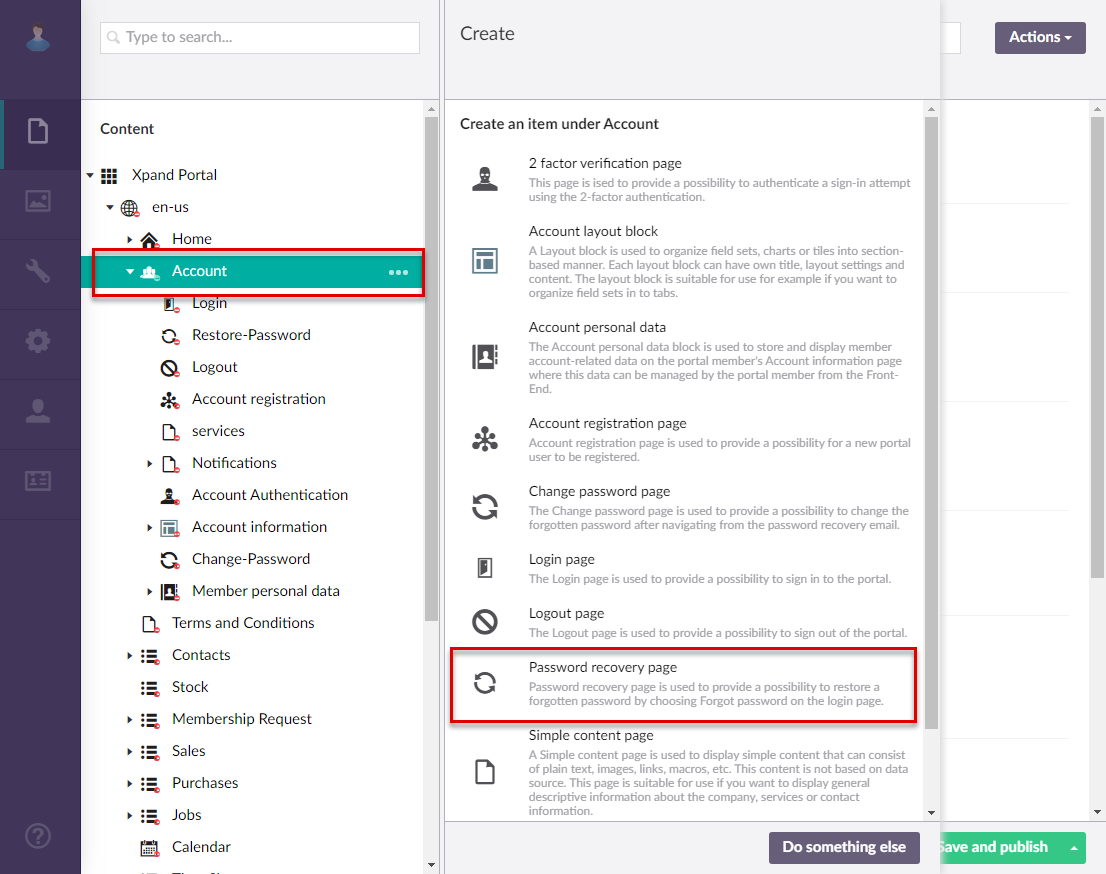
To create a Password Recovery page for your portal
- In the backoffice, go to Content.
- Select the
 icon next to the node with the
  icon (or select and hold (or right-click) the node, and then select Create).
 Note
NoteThe
icon identifies the My Account page. The name of the page, which is also displayed as the node name, is customizable and can be different in your case. - In the Create pane, select
 Password recovery page.
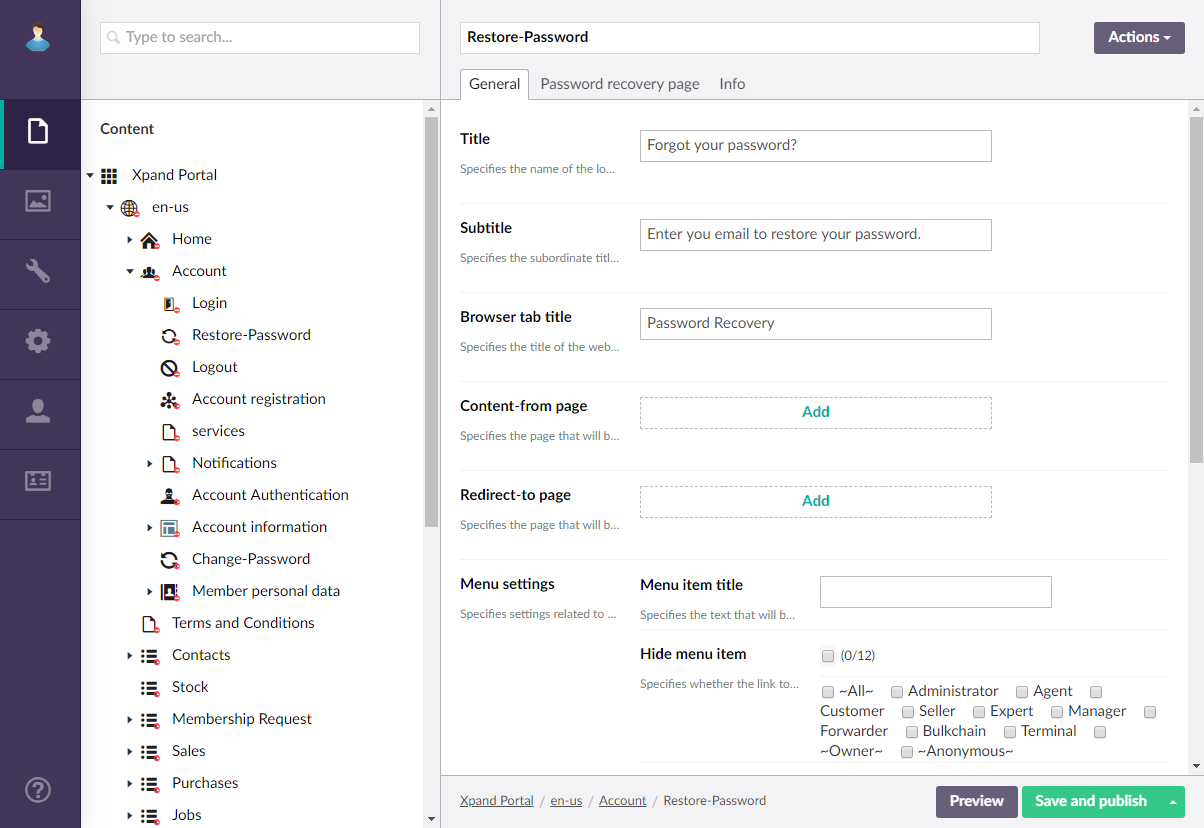
- On the header, type the name of the page, which will also be displayed as the node name in the site localization tree.
- On the General tab, configure the settings as described below.
Basic
- Titles - Specifies the settings where you can configure the title of various elements on this page.
- Title - Specifies the title that will be displayed in the header of the Password recovery page.
- Subtitle - Specifies the subtitle that will be displayed in the header of the Password recovery page.
- Browser tab title - Specifies the title of the web browser tab that will be displayed when the Password recovery page is opened and the member point to the browser tab.
Menu
- Menu item title -Specifies the title of the menu item, which will be displayed in the navigation pane for this page.
- Menu item icon - Specifies the icon of the menu item for this page. Select the square and browse to the icon in the portal media library. Adding an icon is optional. You can leave this setting empty (in this case, the default icon, chosen by the development team, will be used) or choose an icon from one of the available icon libraries.
- Menu item color - Specifies the color of the menu item for this page.
- Divider after menu item - Specifies whether a split line will be displayed after this menu item. A divider can be added only on the first menu level.
- Hide menu item for - Specifies whether the menu item for this page will be hidden, and for which member groups. Only members that were added to the members groups that you select here will have this menu item available in their navigation pane. If you leave this check box cleared, the menu item will be visible to all member groups.
- Titles - Specifies the settings where you can configure the title of various elements on this page.
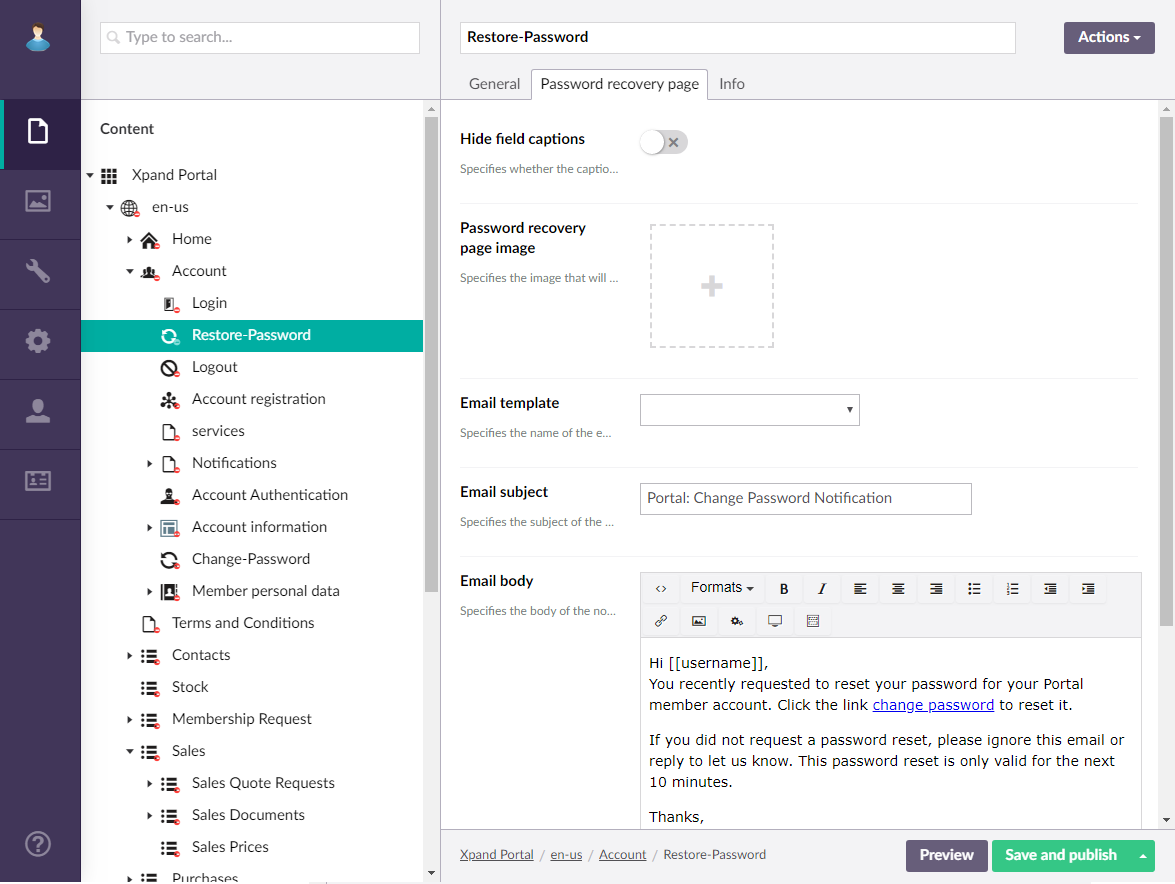
- On the Password recovery page tab, configure the settings as described below.
- Hide field captions - Use this switch to hide all field captions on the Password recovery page.
- Password recovery page image - Specifies the image that will be displayed on the Password recovery page. Select the
 icon to add an image. You can browse the portal media library to select an existing image or upload a custom one. To edit an already specified image as well as view its details, point to the image thumbnail and select the
  icon. To remove the image, point to the image thumbnail and select the
  icon.
icon. - Email template - Specifies the settings for the email template that will be used for emails that are sent to a portal member to notify them that someone has requested a password reset.
- Email template - Specifies the name of the email template that will be used for emails that are sent to a portal member to notify them that someone has requested a password reset. Select an email template from one of the email templates created in the site localization page settings on the Settings tab. You can leave this field empty and create the body of the email manually.
- Email subject - Specifies the subject of the notification email that will be sent to a portal member when they or someone else requests a password reset.
- Email body - Specifies the body of the notification email that will be sent to a portal member when they or someone else requests a password reset. You can type this body manually in this setting or select an email template in the Email template setting. Use double square brackets if you need to add variables, such as the portal member's name (e.g. [[username]]). Ensure that you add a hyperlink to the this Password recover page.
- Select Save and publish to save the changes and publish them on the front end. Optionally, if you were editing the page, you can select Save and preview to preview how the page will look like on the front end.
- Specify the created Password Recovery page on the My account page in the Password recovery page field.