Member account
A member account provides access for a user to the front end of Xpand Portal. Each member account belongs to one or several member roles that define the member permissions, such as pages that the member can access, available page features, access to specific data, etc.
A member account can be created in two ways:
- created by a portal administrator in the backoffice, who then either provides the person with sign-in credentials or sends an invitation email with sign-in instructions.
- created automatically when a portal visitor uses the Sign Up action on the sign-in page (if this possibility is enabled). In this case, a request to create a new member account is registered, which must be approved by the portal administrator before the person will be able to sign in with the new account.
Sign up
If you are a new portal visitor, and the portal administrator has not provided you with your sign-in credentials, you can sign up on the sign-in page to create a member account for yourself. In this case, a member registration request is registered with the information that you provide. This request must be approved by the portal administrator.
To sign up:
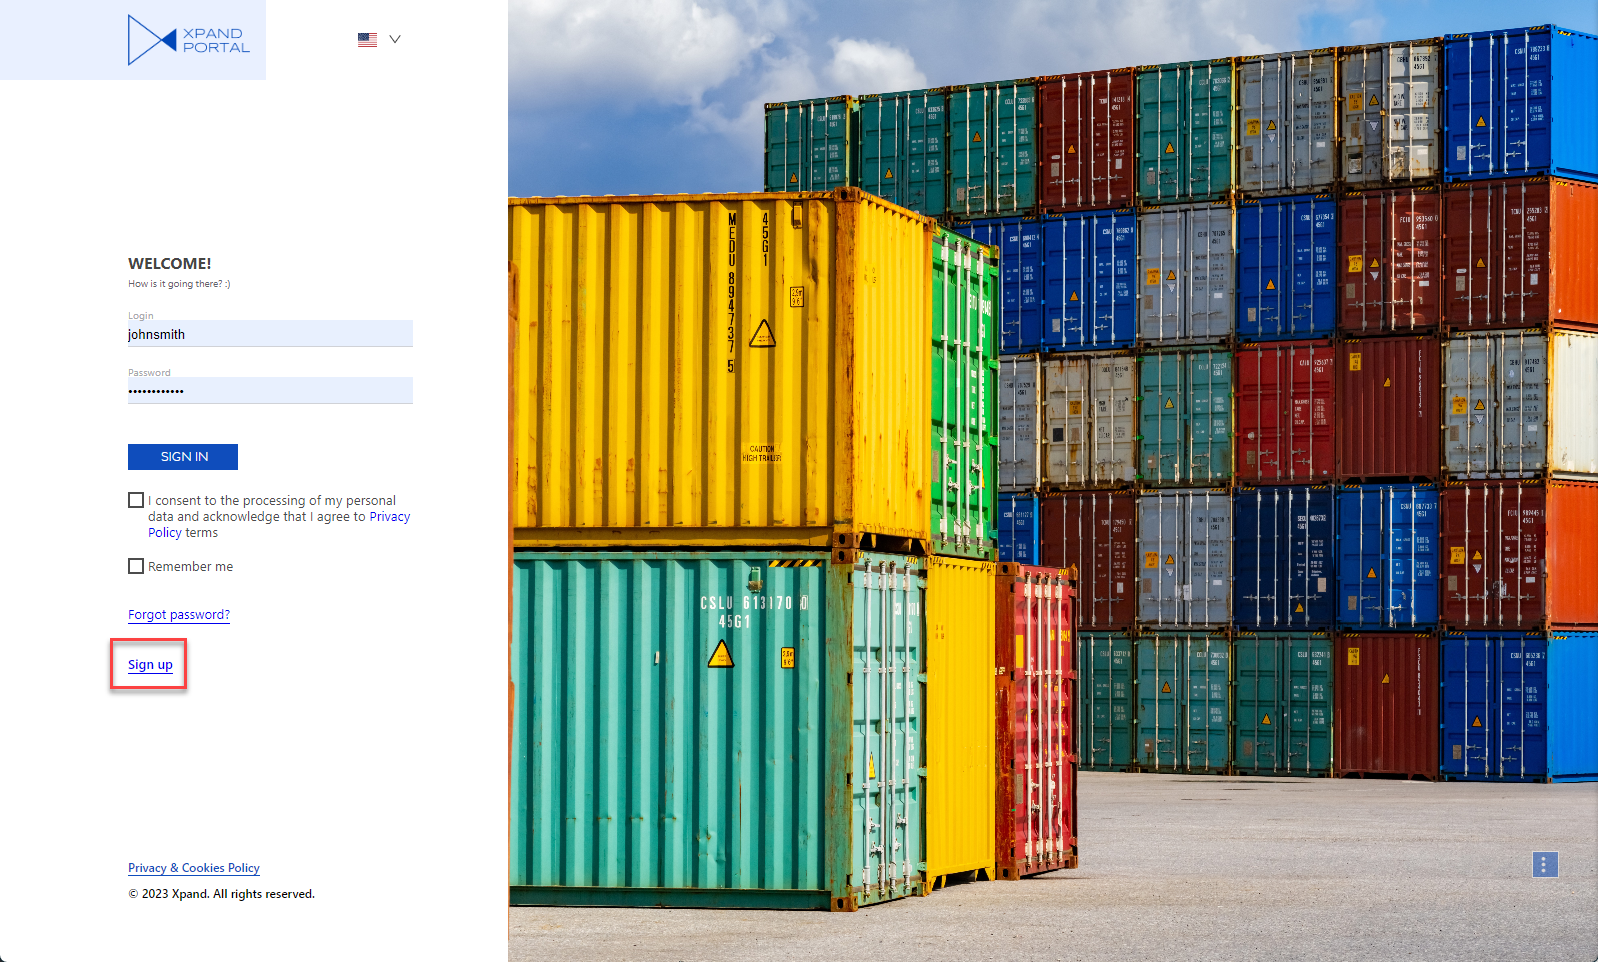
- On the portal sign-in page, select Sign up.
 Note
NoteThis possibility can be disabled. If the action is not available, contact the portal administrator to request an account.
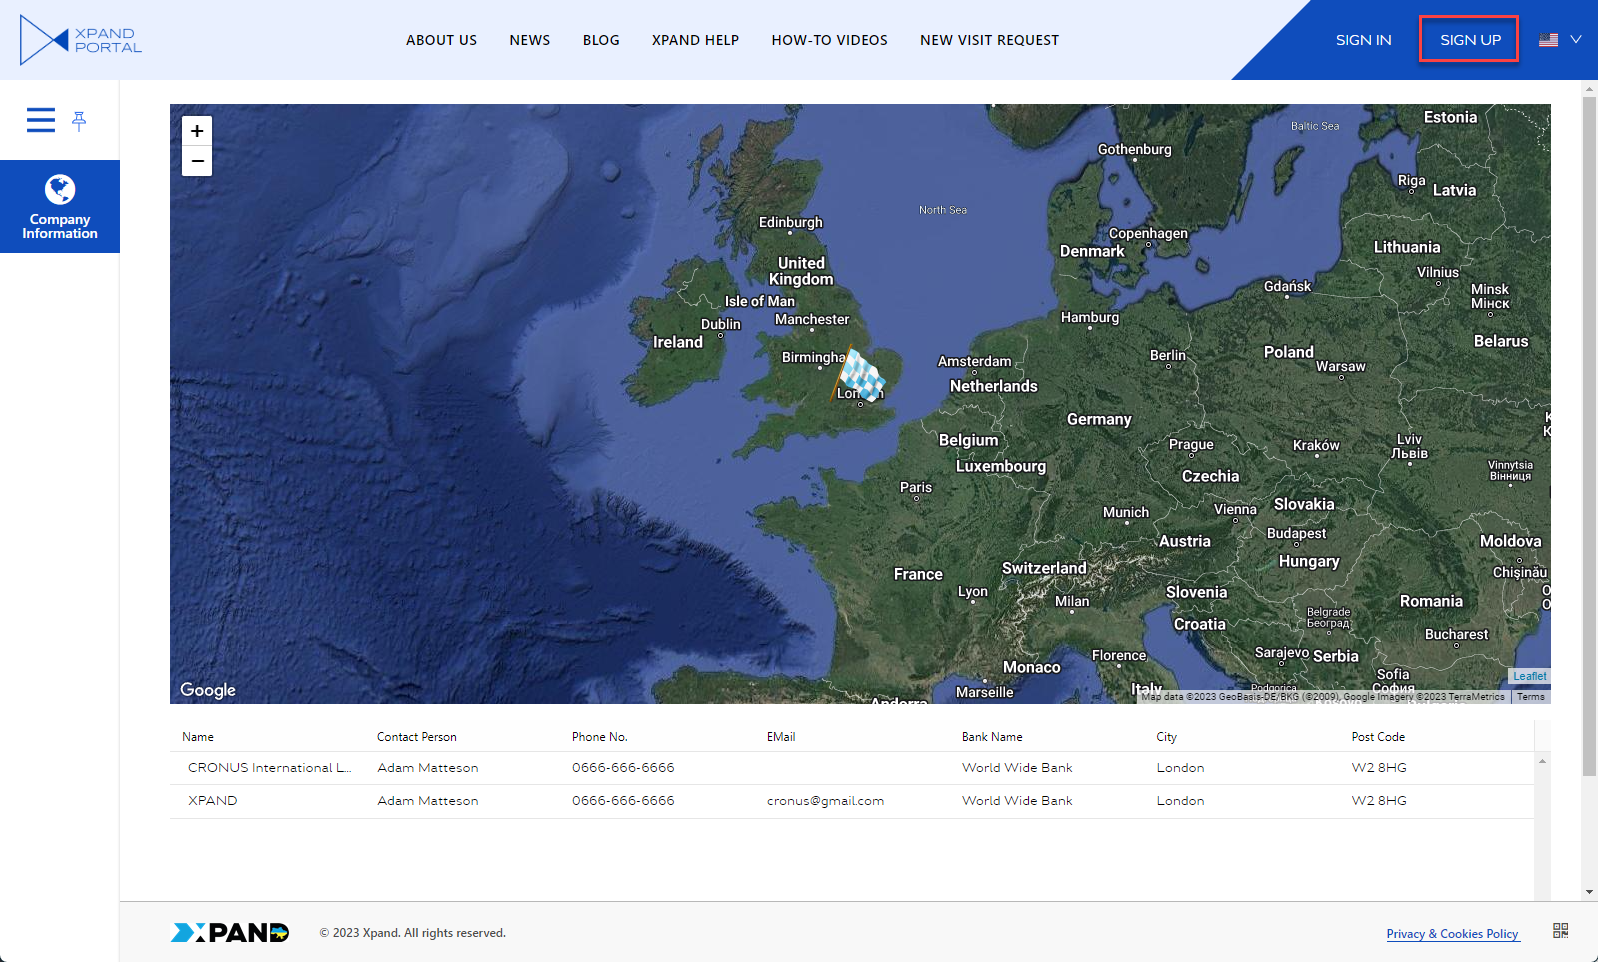
Alternatively, the Sign up action is also available on public pages (portal pages that can be accessed without a member account).
- On the Registration request page, enter information about your member account, including login and password.
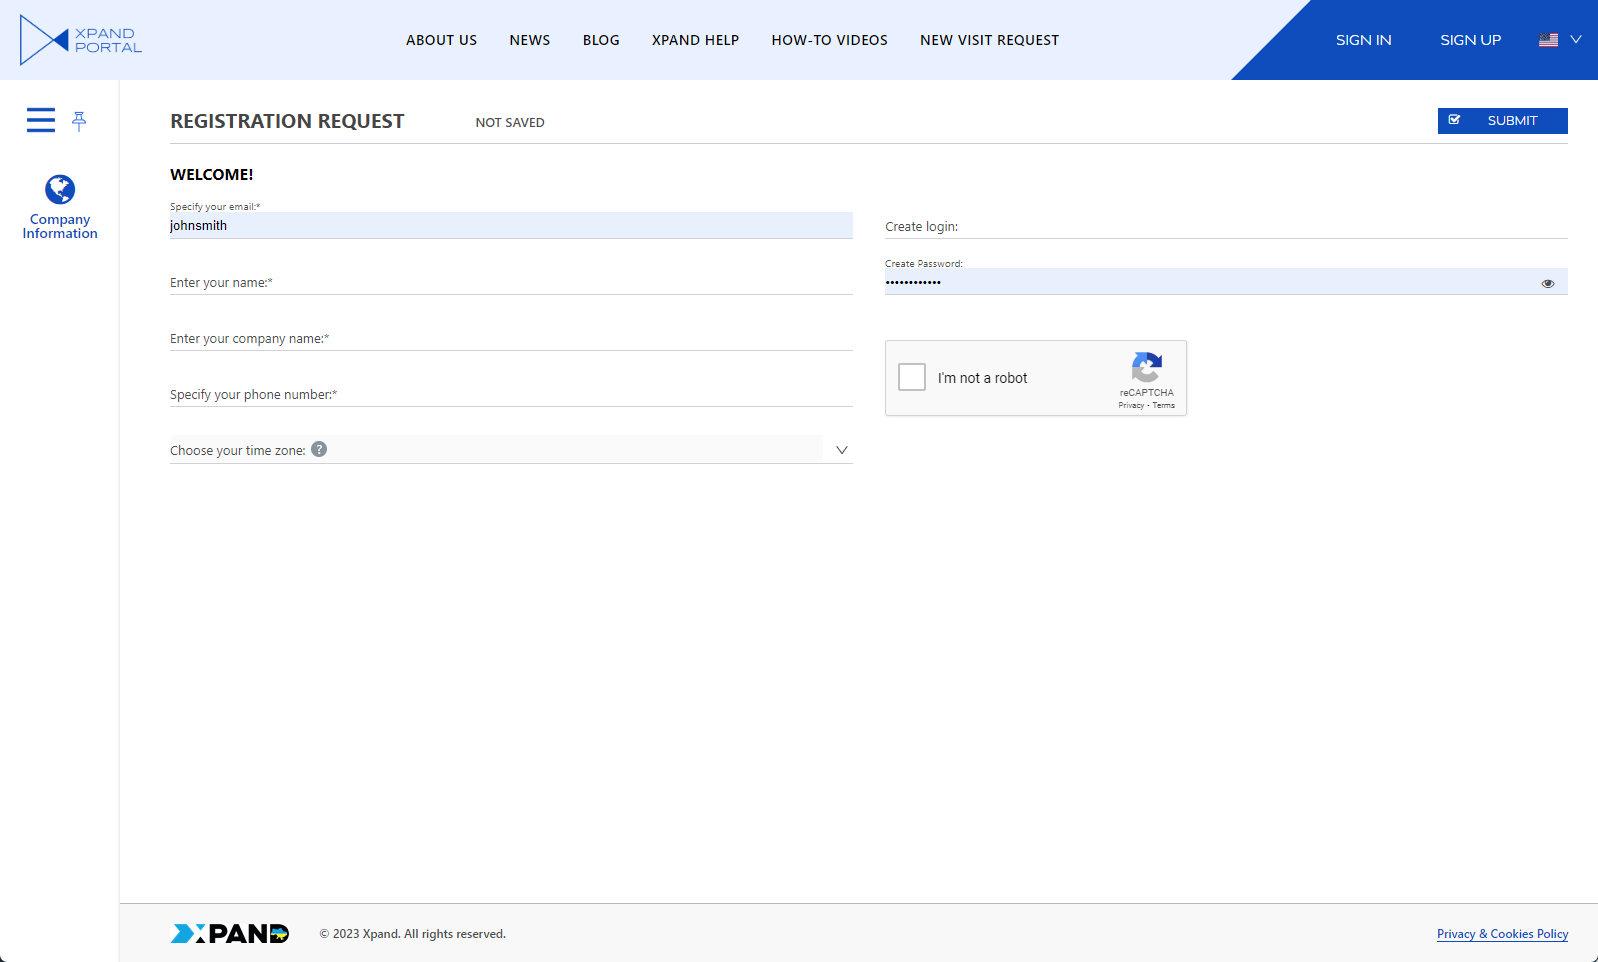
- Select the I'm not a robot checkbox, and then select the Submit button (the button name may look different in your case).
- Confirm your email in the email notification that is sent to you by following the link in the email.
This registers a request for member account creation. Later, you will be notified by email once the administrator approves or rejects your request. If your request is approved, you will receive an email with further instructions on how to access your account before you can sign in.
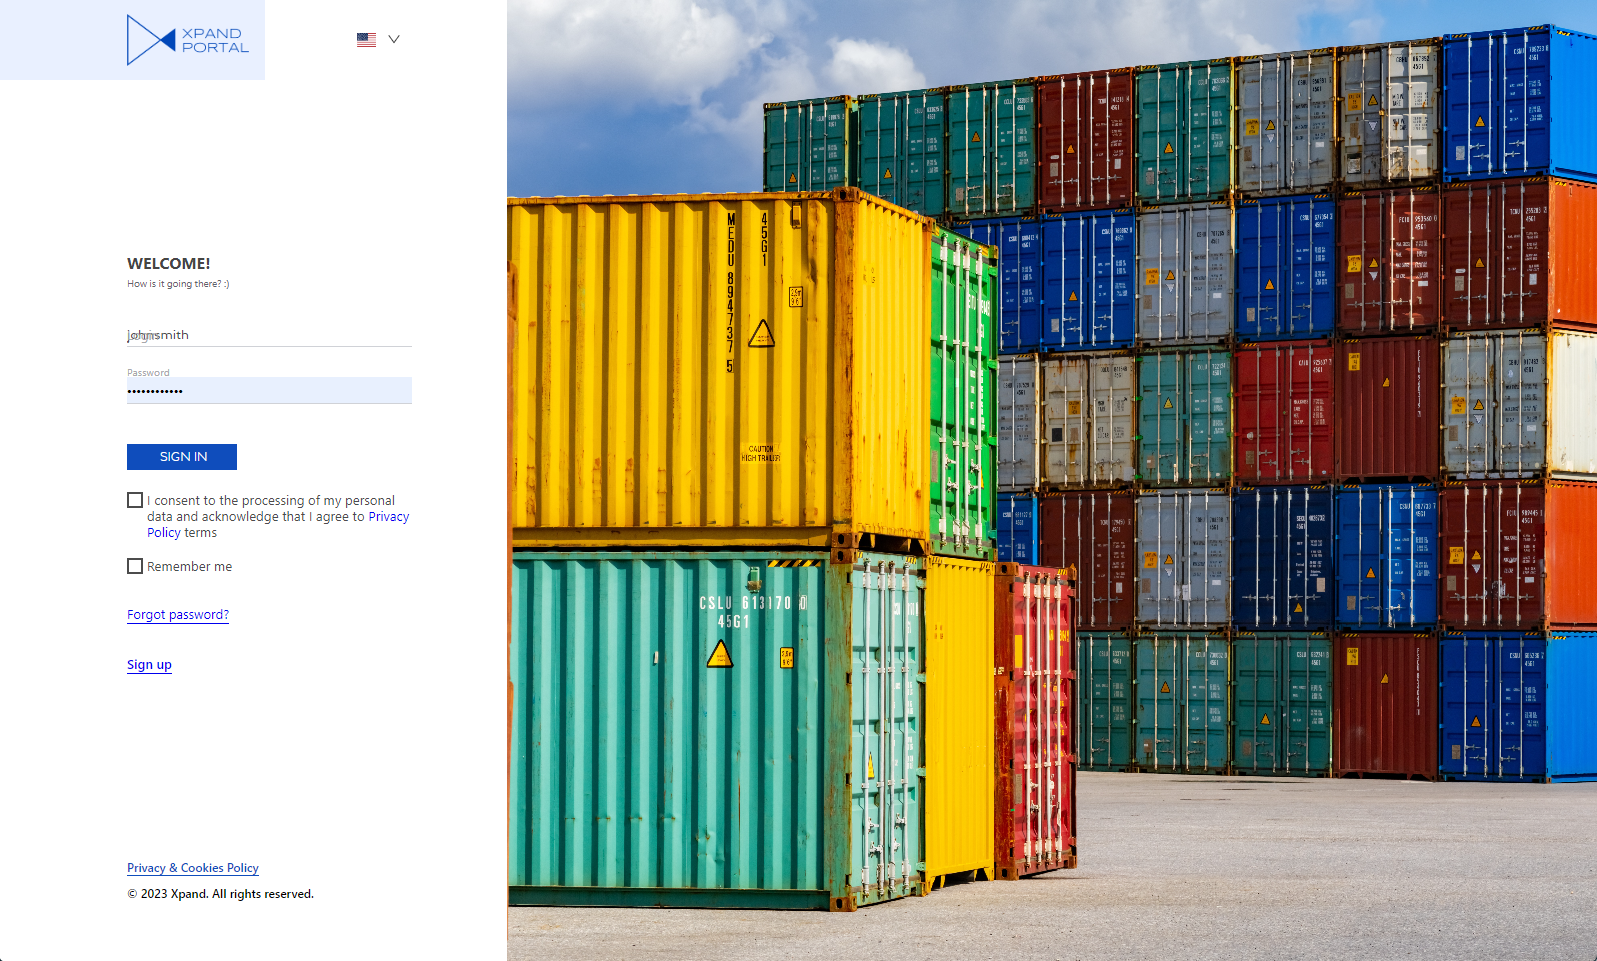
Sign in
When you sign in to Xpand Portal, you need to enter your login and password. On first sign-in, select the I consent to the processing of my personal data and acknowledge that I agree to Privacy Policy terms checkbox. You only need to give it once; on subsequent sign-ins, you don't have to select this checkbox.
On the sign-in page, you can also choose a portal localization in case your portal is localized into multiple languages. You will be able to change the language after you have signed in if necessary.
The elements on the sign-in page, such as the image or field captions are customizable and may look different in your environment. Some elements (for example, the captions, the sign-up link, or password recovery link) can be hidden if the portal login page is configured this way.
Single sign-on (SSO)
If the Single Sign-on (SSO) is configured (both on the sign-in page and in the SSO settings) and enabled, the login page may also have buttons to sign in with a social network account.
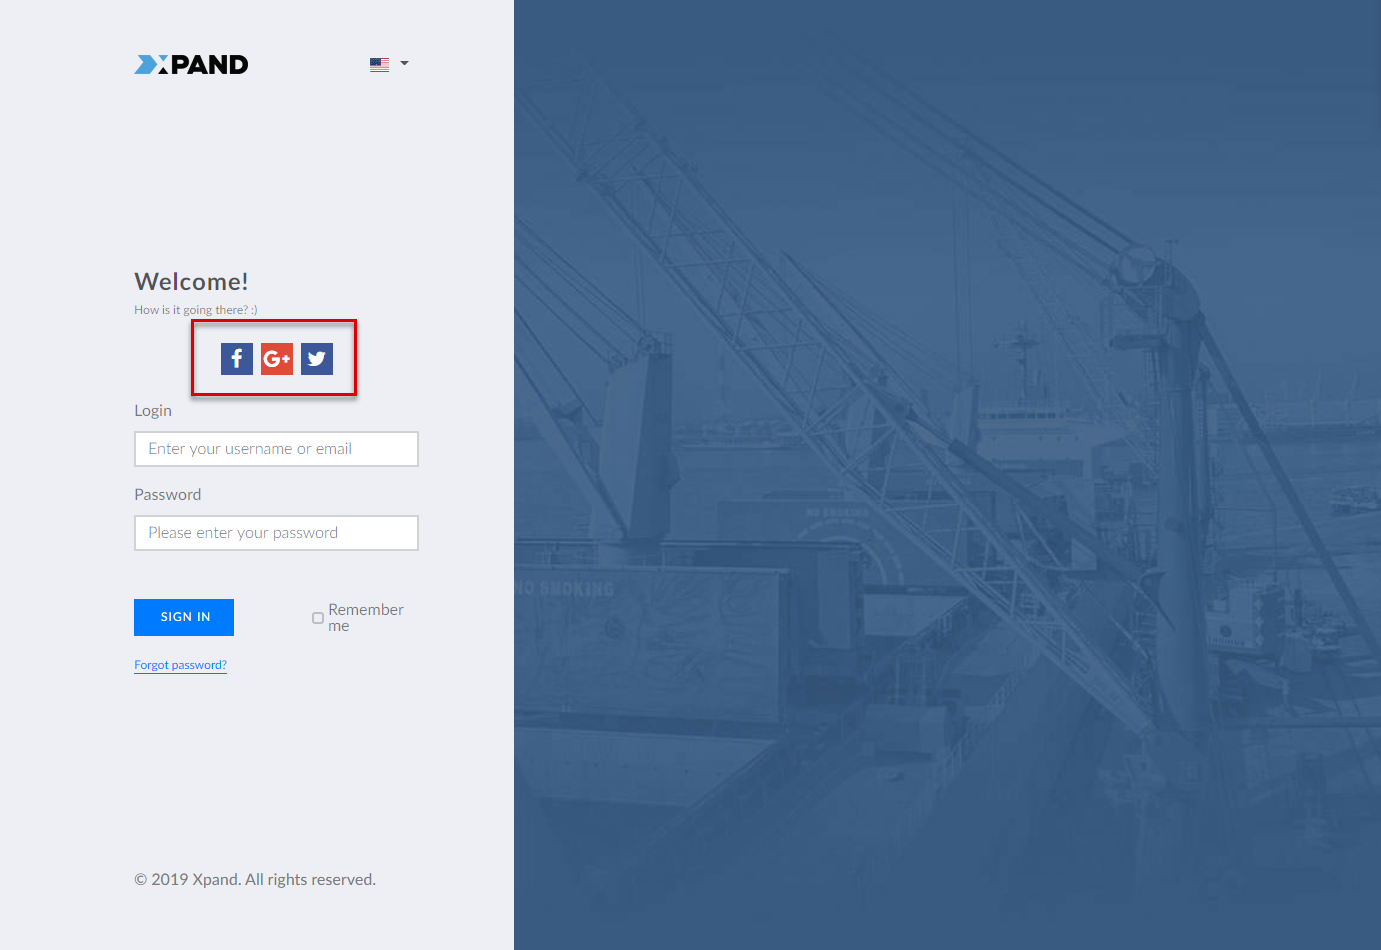
The following social network are supported:
- Microsoft
If you haven't linked your social network account with your portal member account yet, selecting the corresponding SSO button will open the window where you need to authenticate your account.
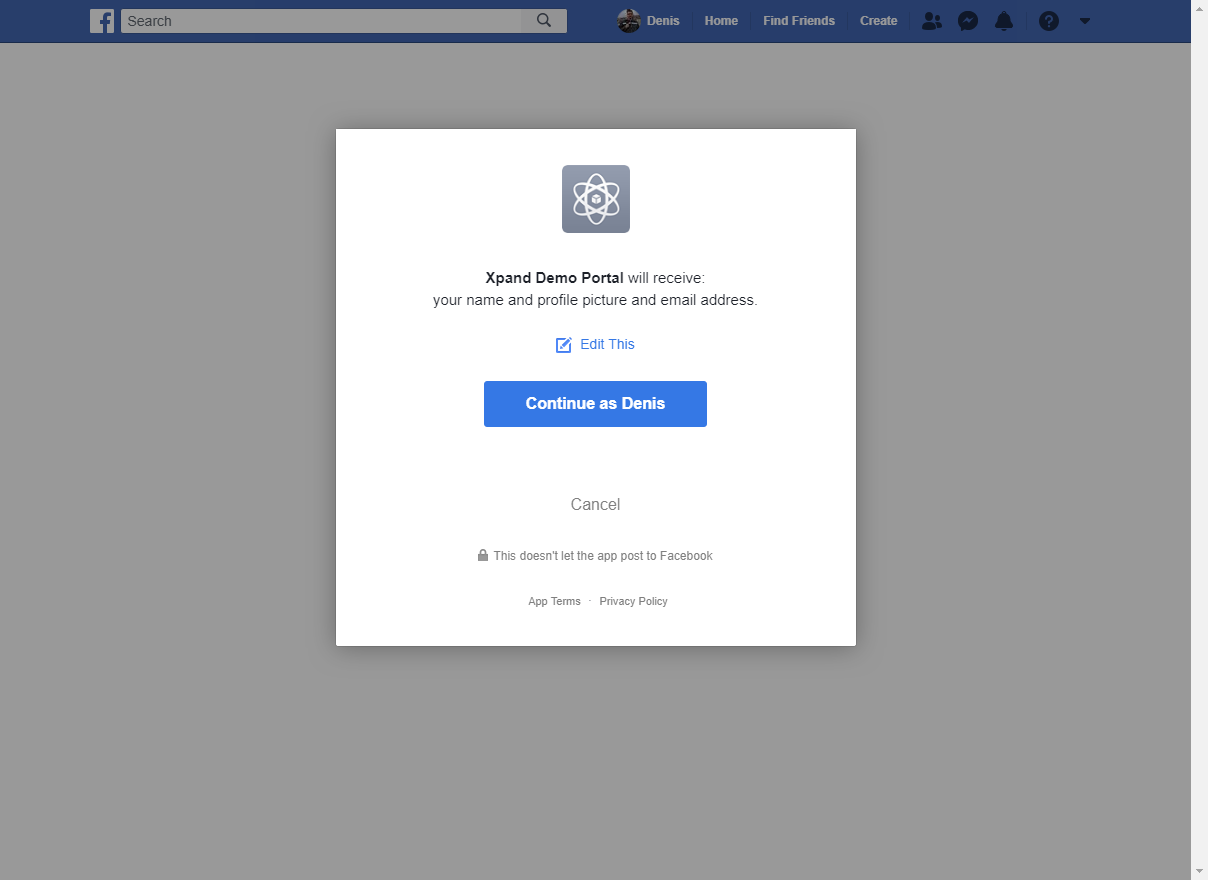
This needs to be done once, and then you'll be able to sign in with that account with a single click.
Link/unlink accounts
You can link your portal member account with a social network account or unlink a previously linked account from the social network account. You can do this after you have sign in by opening the member menu in the top right corner of any page, and then selecting the corresponding action.
|
Linking/unlinking must be allowed in the sign-in page settings. Action captions are customizable and can be different in your case. |

2-factor authorization
Xpand Portal supports 2-factor verification to authenticate your sign-in. This helps you protect your account in case it has been compromised.
If the account authentication page was set up with 2-factor verification enabled, portal members will need to set up an authenticator mobile up to add the portal account and authorize their sign-in requests with an authenticator app.
During sign-in with 2-factor verification enabled, members can use any authenticator app, however, we recommend and support the following authenticator apps:
To authenticate the sign-in when 2-factor verification is enabled:
- Install any authenticator app of your choice on your mobile device.
- On the Xpand Portal sign-in page enter your user name or email and password.
- On the Authentication page that is open, scan the QR code using your authenticator app on your device to add the portal account to the authenticator. Alternatively, you can manually enter the provided code. This step needs to be done only once to set up your authenticator app or in case you have deleted the portal account from your authenticator app. The QR code refreshes whenever the countdown reaches zero. The page background is configurable and may look different in your case.
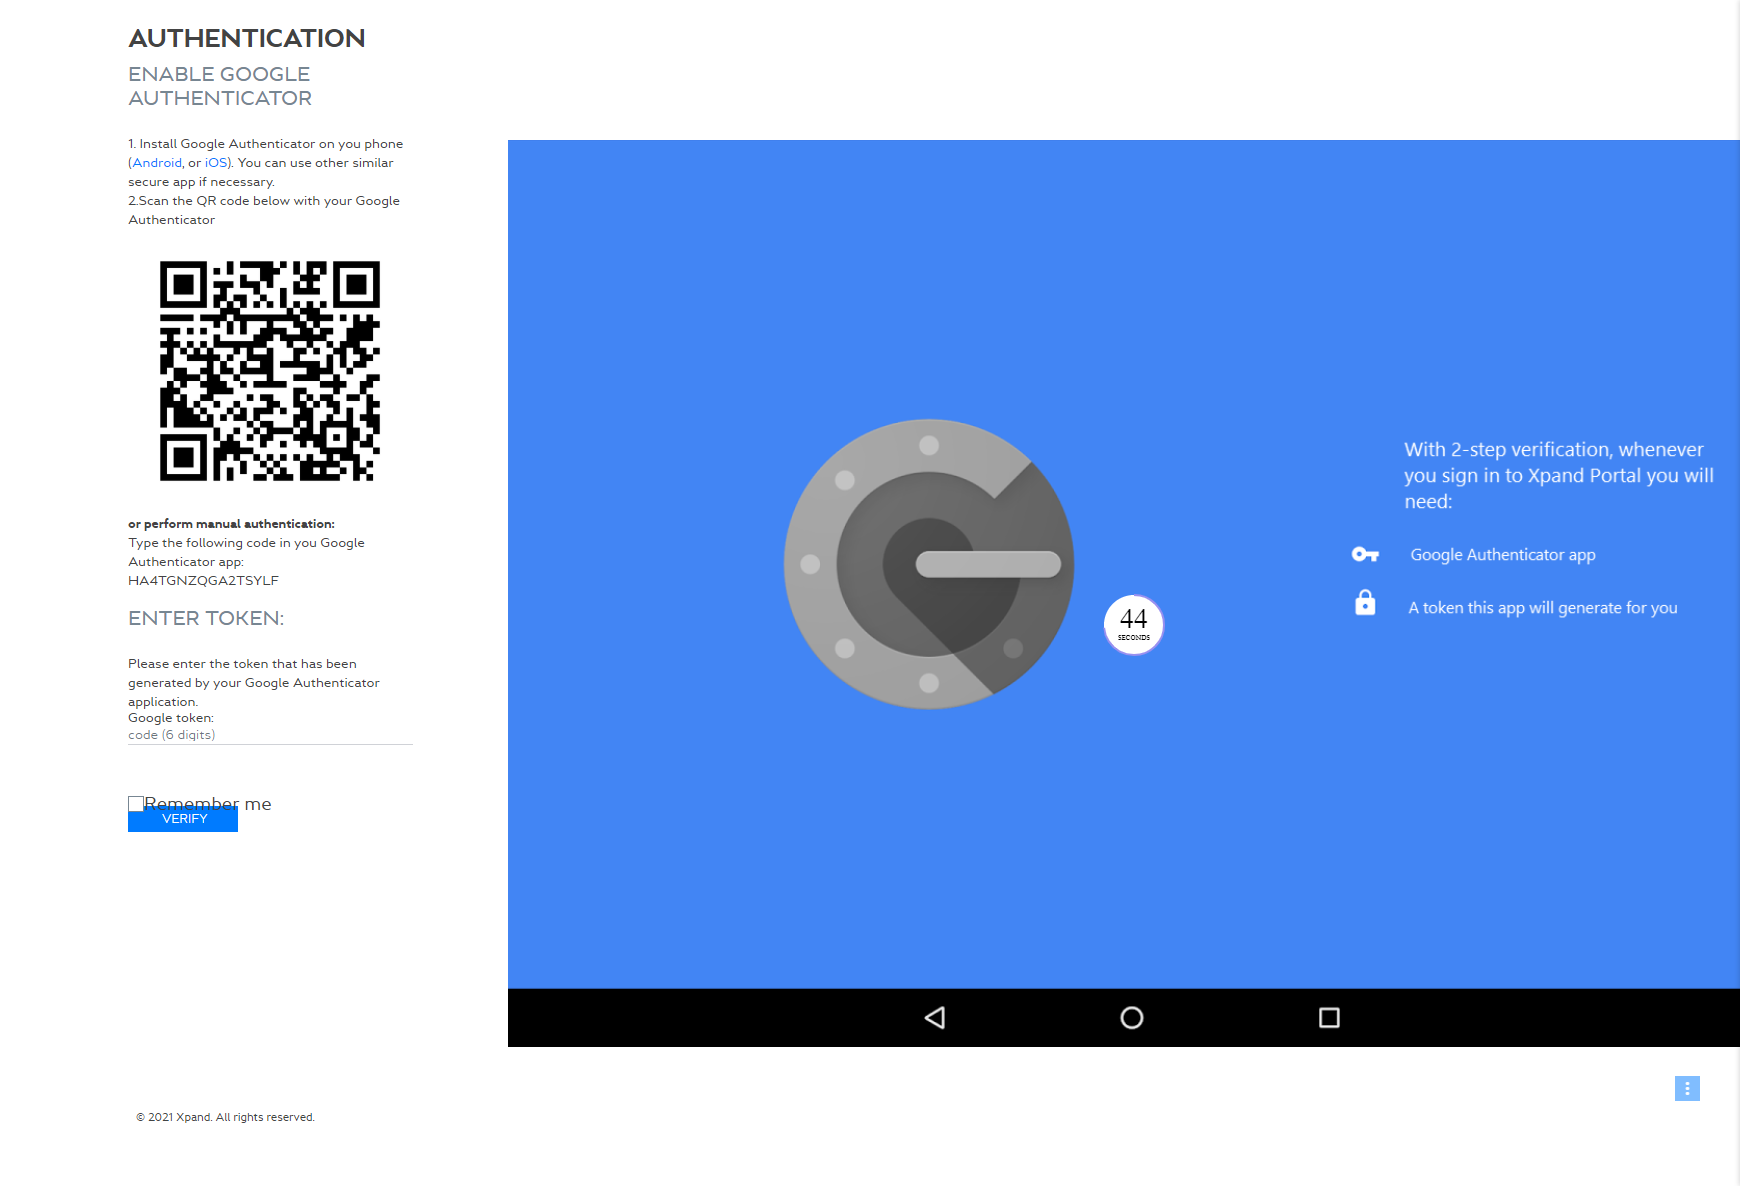
- Select Next to proceed to the step where you authenticate your sign-in request.
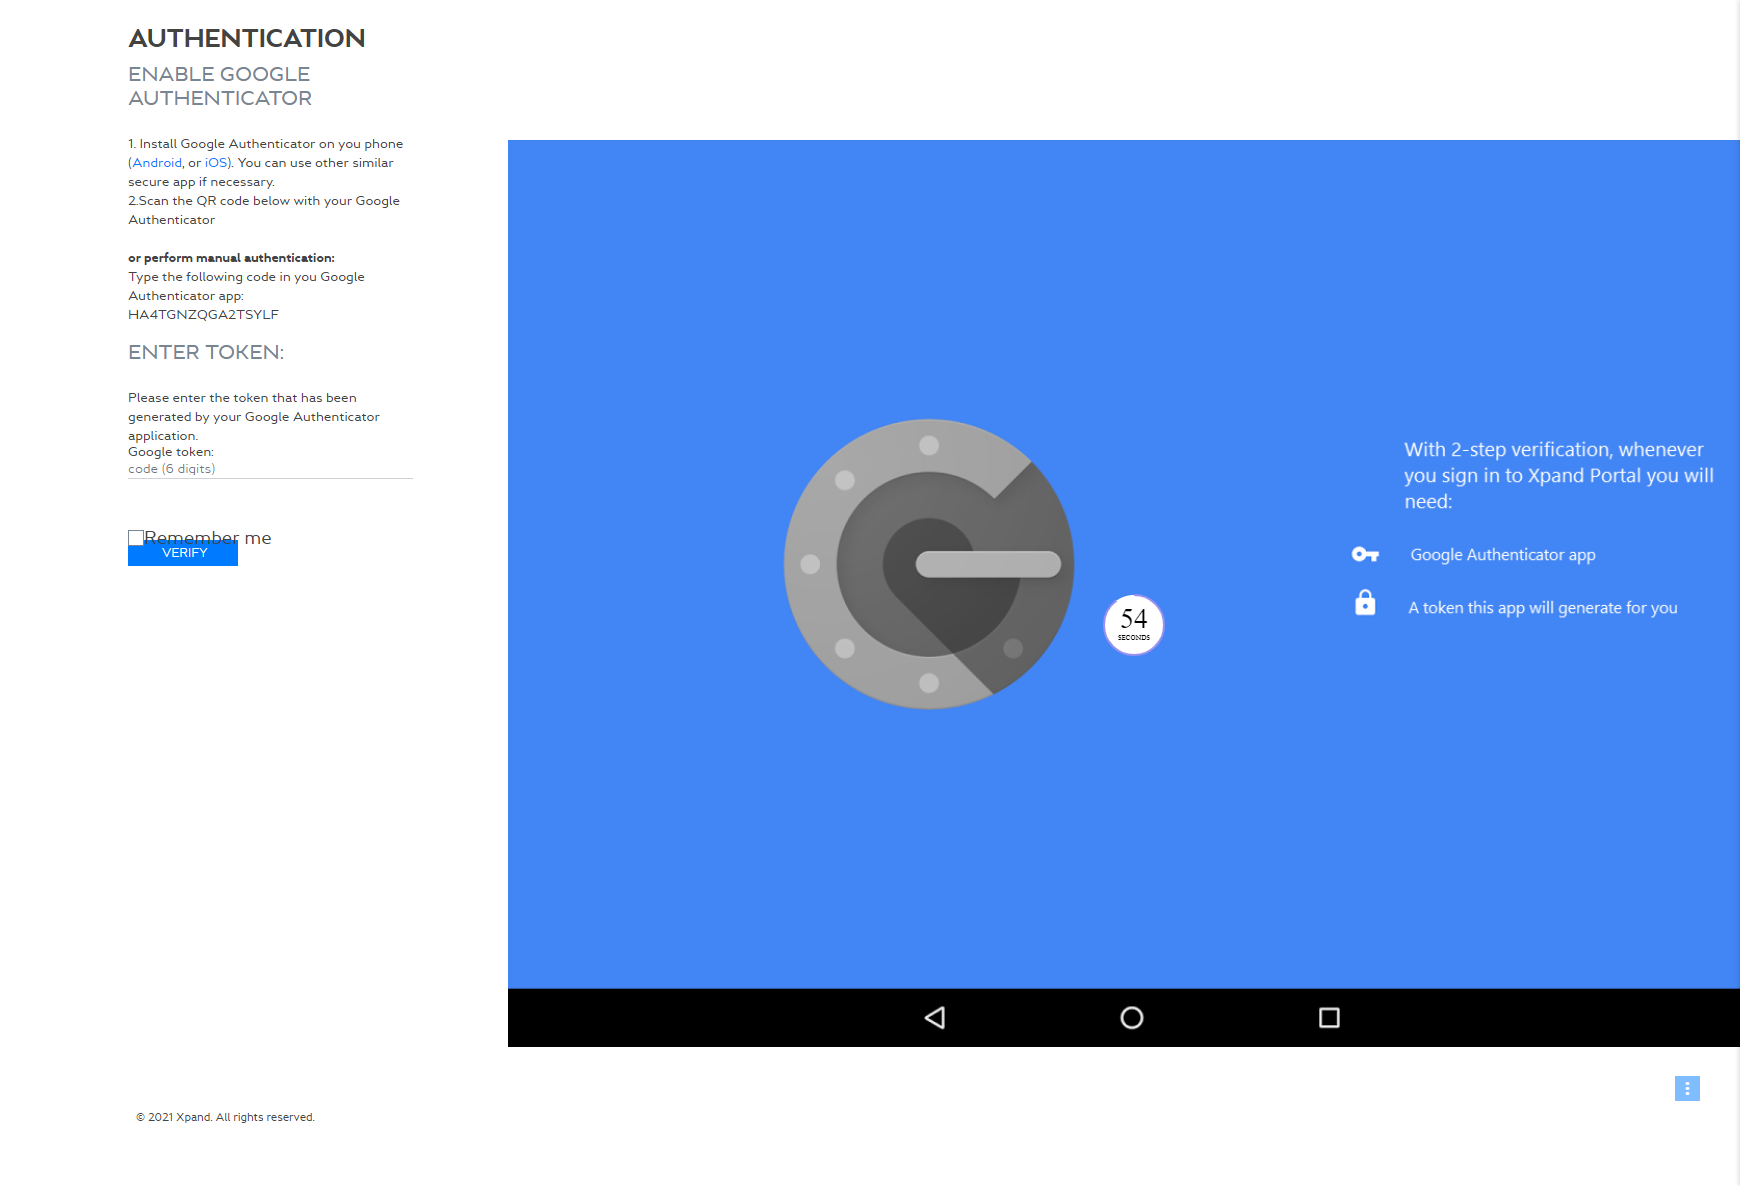
- Enter the generated 6-digit code generated by your authenticator app, and then select Verify.
On subsequent sign-in attempts, you will not be asked to scan the QR code or enter the provided key. You will only need to specify the generated token to verify your login request. However, you can return to the authenticator setup step if needed by following the corresponding link.
Remember your password
You can select the Remember me checkbox on the login page if want your user name and password remembered on this computer so that you do not have to specify it next time. Use this option with caution on a trusted PC.
|
This option may be hidden depending on the login page configuration. |
Password recovery
If you forgot your user name or password, you can recover it by selecting the Forgot password? link on the login page and following the instructions on screen.
|
This link may be hidden depending on the login page configuration. |
Change your password
After you have signed in, you can change your password directly from the front end without admin assistance.
To change your password from front end
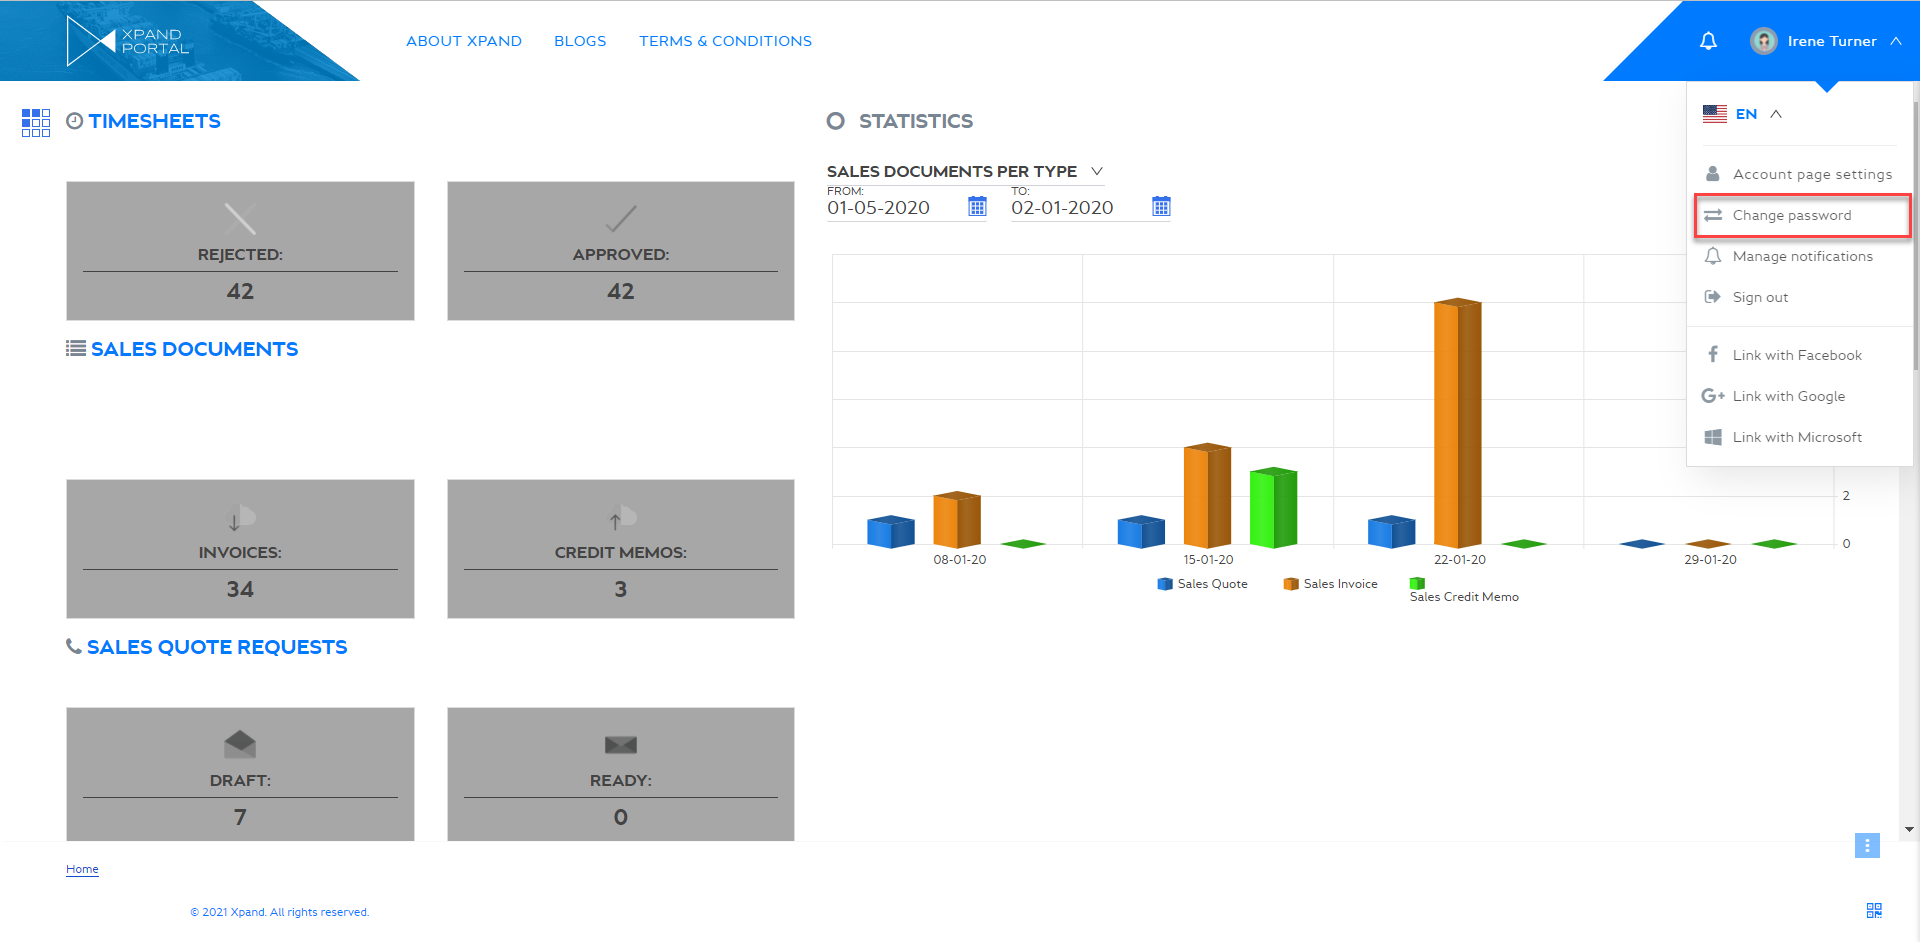
- On any portal page, open the member menu in the top right corner of any page, and then select Change password.
- In the dialog window that appears, in the Current password field, enter your current password.
- In the New password field, enter a new password.
- In the Confirm new password field, enter the new password again to confirm it.
- Select Save.
|
If you request the password change from the login page by selecting the Forgot password? link, a notification email will be sent to the email address, linked to your member account, with a link to the Password Recovery page, which must be configured for the portal. |
View and manage account information
After you have signed in to Xpand Portal, you can view information about your portal member account directly from front end, such as your user name and login, or personal data (configured by portal admin). Moreover, you can manage account information: change your user name and/or login, export personal data to Excel, or request that the portal admin delete your portal member account.
|
The Account Information page and related pages must be configured in the backoffice. In your environment, depending on your portal configuration, not all features on the Account Information page may be available or turned on. Also, the captions of the tabs and other UI elements are configurable and may be different in your case. |
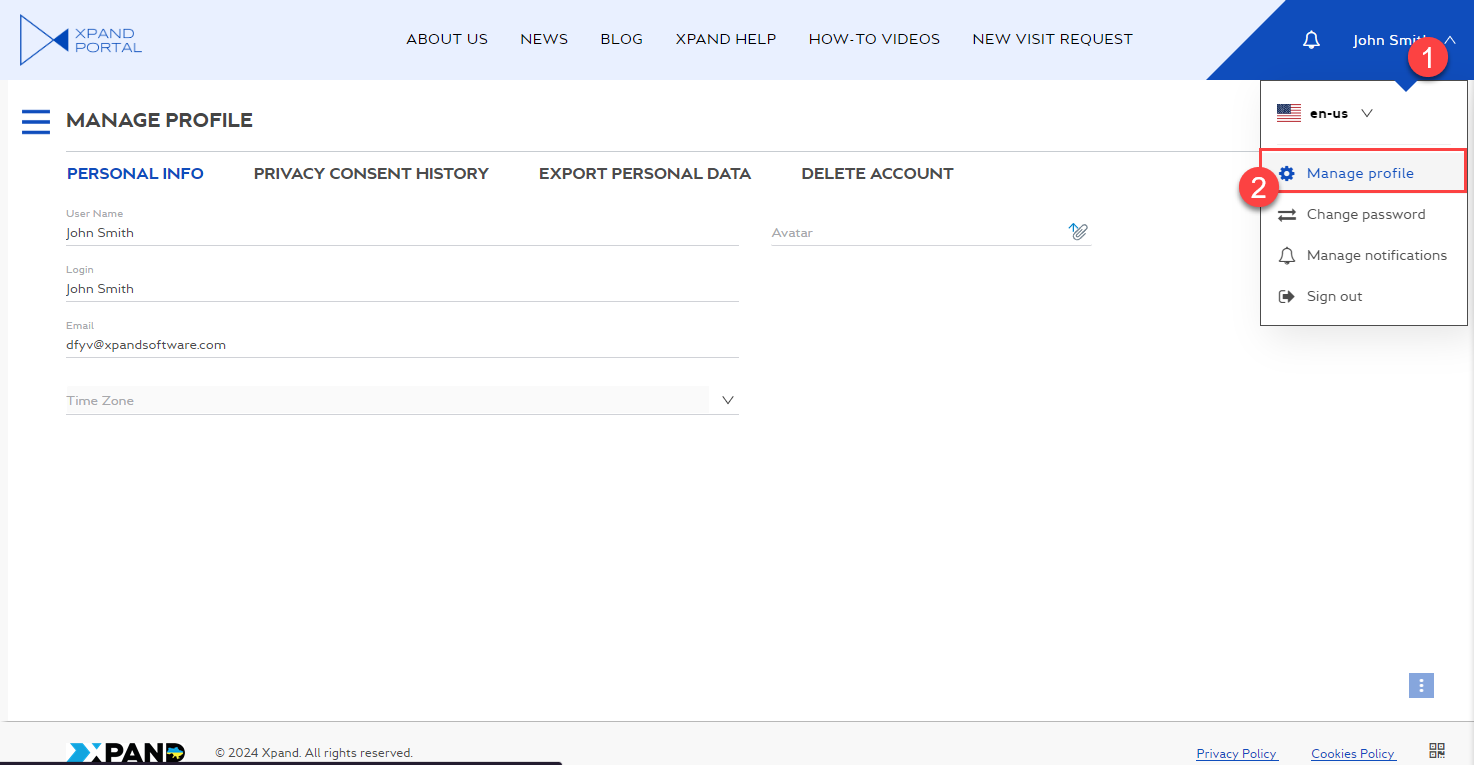
To access your account information, open the member menu in the top right corner of any page, and then select Manage profile (the menu item caption is configurable and may be different in your case).
Personal Info tab
On this tab, the name of which is configurable and may be different in your case, you can view and edit your user name (displayed on the header of the portal), your login (used to sign in), avatar, and the email associated with your member account. Also, you can specify/change a time zone that will be used for date and datetime fields on the grid, detail and notification pages. When it's not configured, the time zone settings from the PC will be applied. The time zone can also be configured on the member page in the back end. The setting is synchronized between the member account page in the front end and member page in the back end.
|
Depending on how the profile page is configured, there may be a different set of fields available for members to edit. |
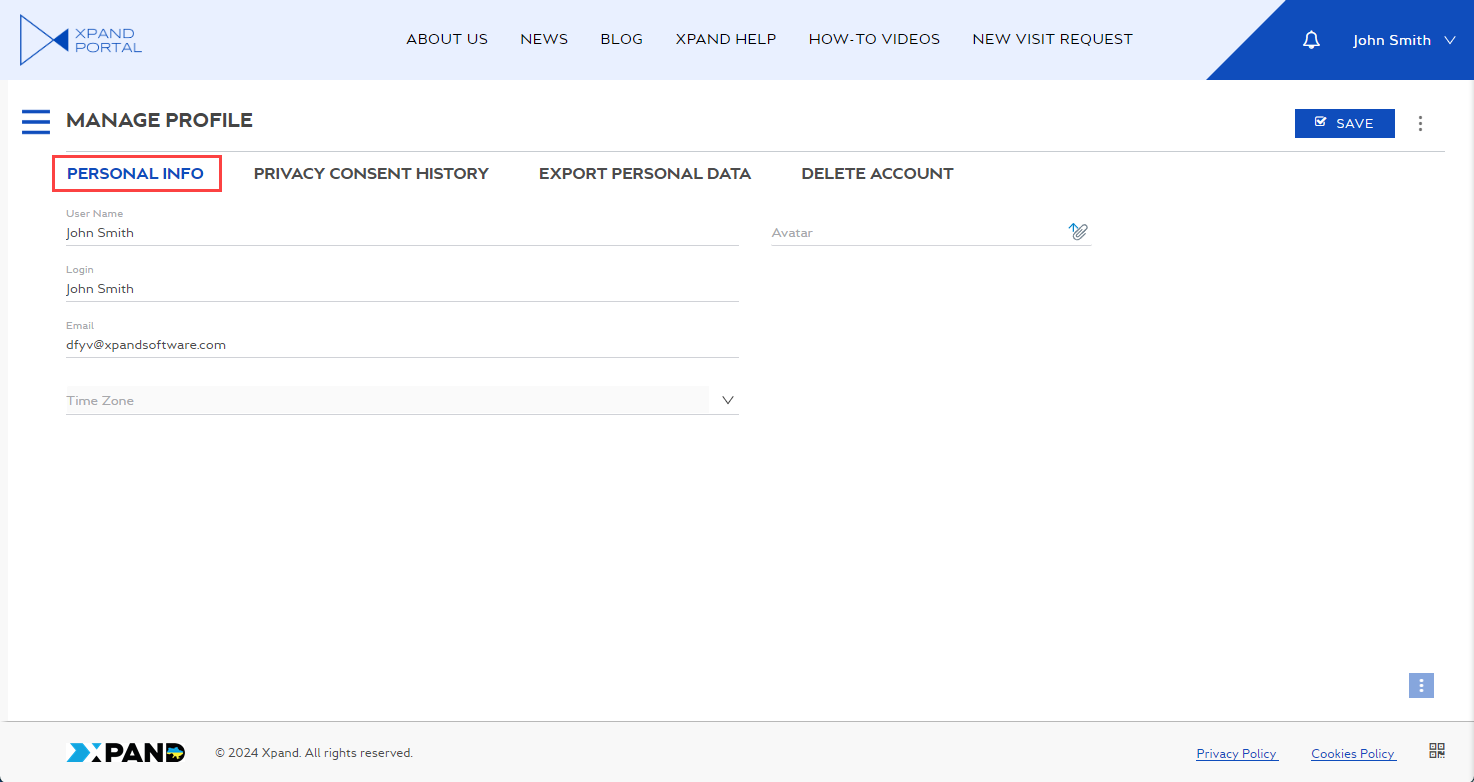
If you make changes, select Apply Changes to apply them.
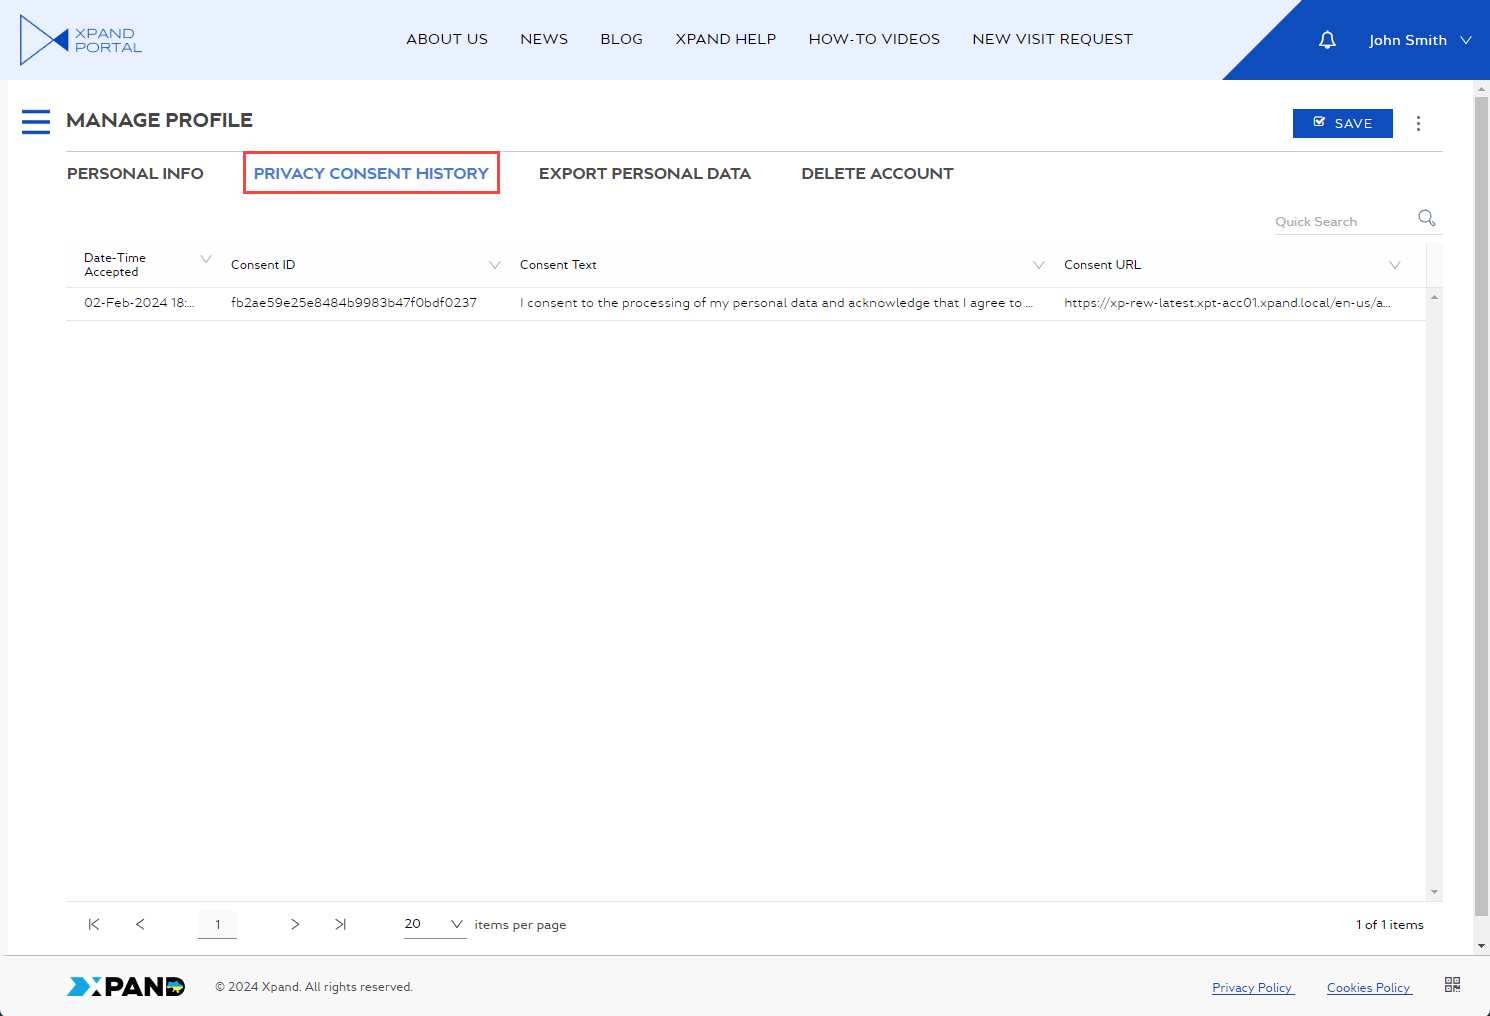
Privacy Consent History tab
On this tab, the name of which is configurable and may be different in your case, you can see the list of instances when you give privacy consent. This data is for information purposes only.
Export Personal Data tab
On this tab, you can export personal data to Microsoft Office Excel. Personal data that will be exported is shown in one or several grids at the bottom of the page. Select Export my data to export personal data (the button caption is configurable). This will open Excel with a separate Excel sheet created for each grid. The first sheet displayed information about the member who exported data.
|
What personal data is exported is configured in the backoffice by the portal admin. Personal data may still be present, but chosen to be hidden. In this case, this data will still be exported. The ability to export personal data can also be toggled on and off by the portal admin. |

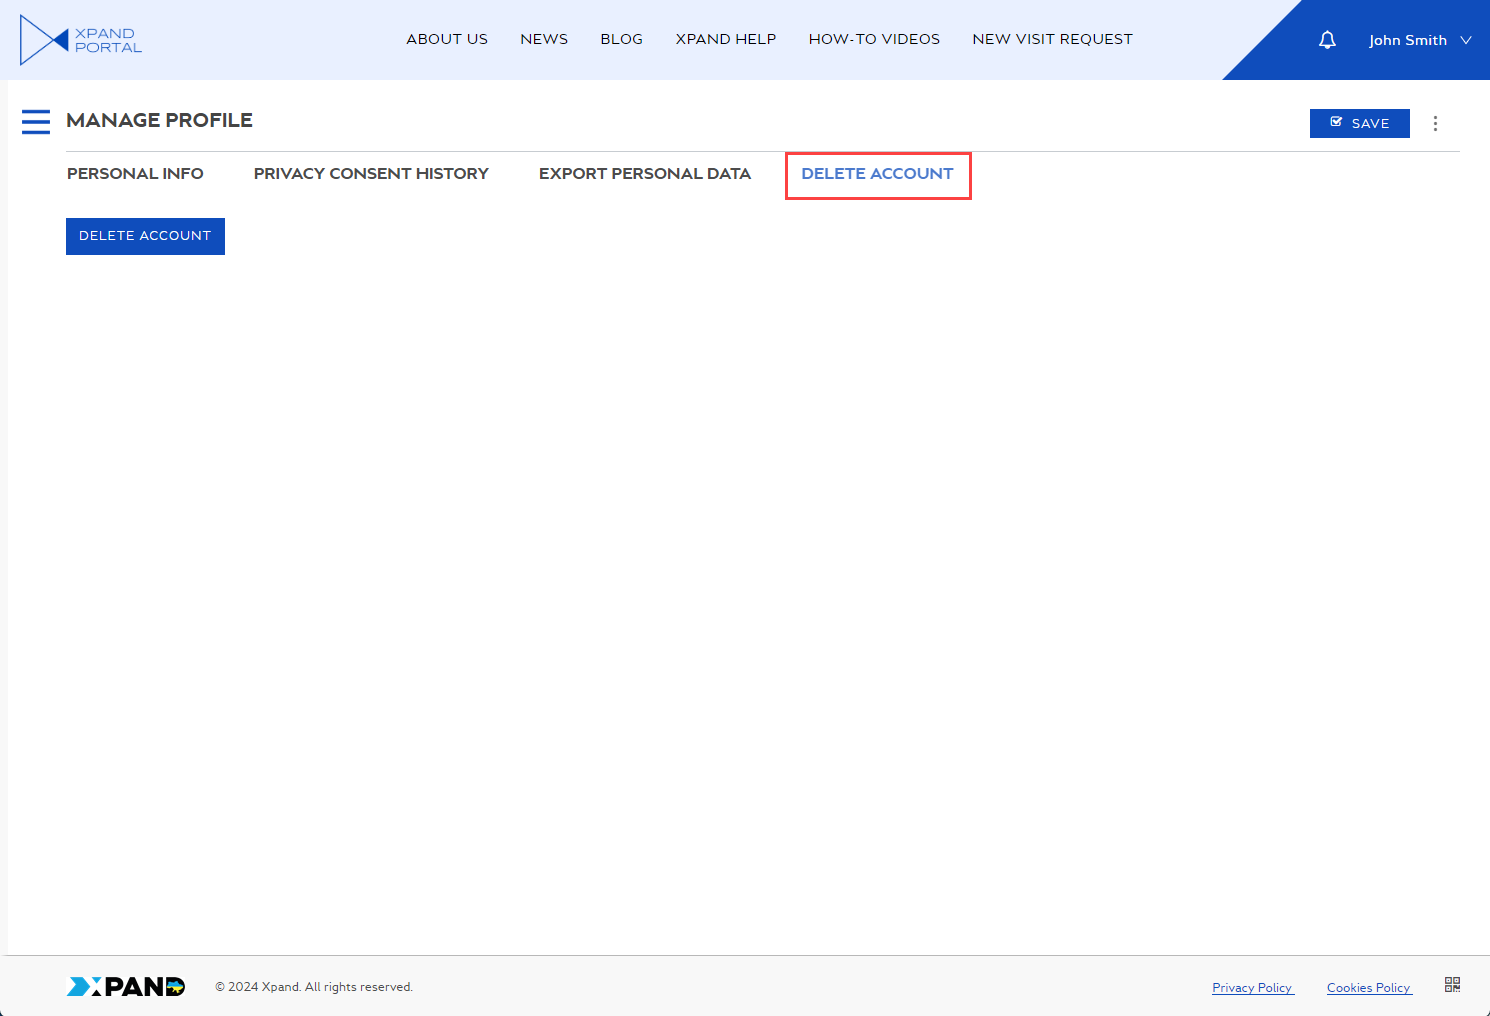
Delete Account tab
On this tab, you can request the portal admin to delete your portal member account. Select Request account deletion (the button caption is configurable) to request the account deletion. The portal admin will see the request in the backoffice in the portal member settings and delete your account.
|
The ability to request deletion of your member account can be toggled on and off by the portal admin. |
Act on behalf of another member
Xpand Portal can be configured to allow a portal member to act on behalf of other members. Acting on behalf of another member means you can sign in to the portal without entering or even knowing another member's credentials, however, that data and pages that you see on the portal are filtered by your, that is actor's, permissions.
If the member who is acting on behalf of another member creates a new record, information about the record creator is registered as follows:
- Created by - Shows the member on behalf of whom the record creator was acting.
- Created by representative - Shows the member who acted on behalf of another member.
On the front-end member card, a portal administrator can configure member groups or individual members that the member is allowed or disallowed to act on behalf of. If you are allowed to act on behalf of other members, you can do it as follows:
- Sign in to the portal as usual using your own credentials.
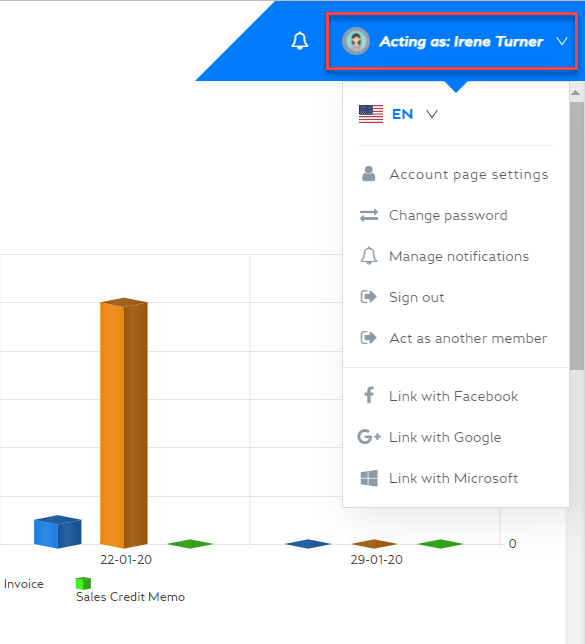
- In the member menu in the top right corner, select Act as another member.
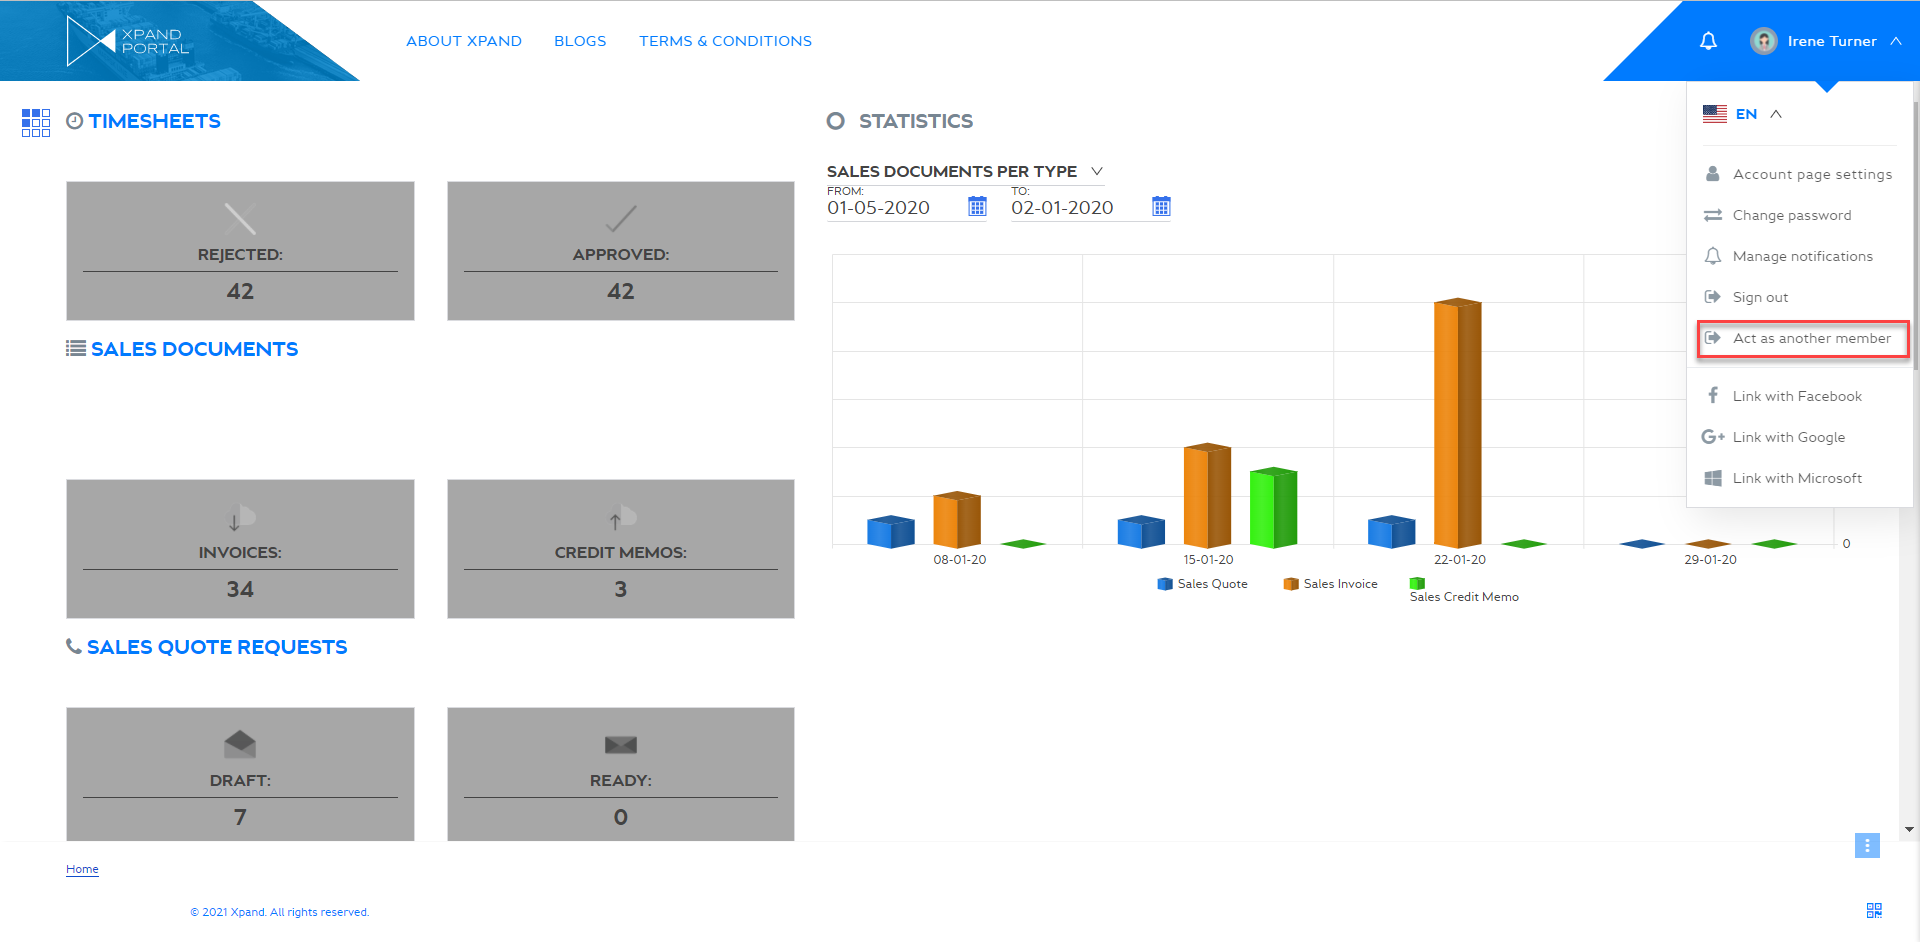 Note
NoteThe act as another member option is available only if the administrator allowed you acting on behalf of other members. This is configured in the member settings on the front end.
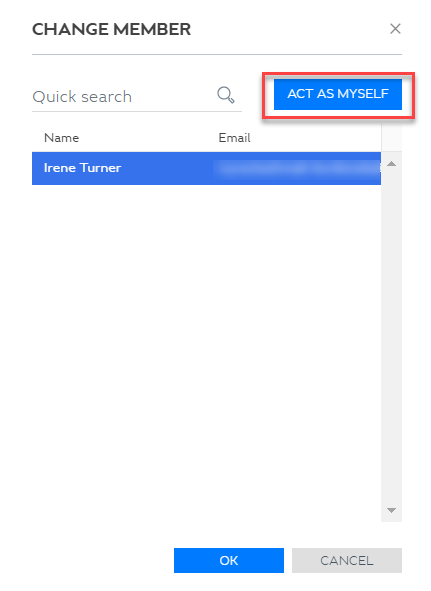
- In the Change member window, select a member you want to act on behalf of. Availability of members for selection depends on your member settings. If there are a lot of members to choose from, you can use the search box.
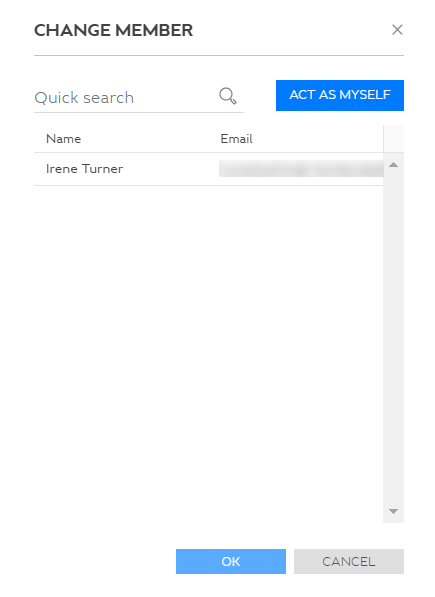
NoteYou won't need to enter another member's credentials to sign in.
- Select the OK button to sign in as the chosen member.
The member account name will change to "Acting as: [Member_Account_Name]" where [Member_Account_Name] is the name of the member account you are currently acting on behalf of and will be marked bold and set in italic type to help you identify that you're not currently acting as yourself. The avatar will still be yours.
If you close the browser while acting on behalf of another member, a confirmation message will be displayed the next time you open a portal page asking you whether you want to want to continue acting as another member.
To act as yourself again:
- In the member menu in the top right corner, select Act as another member.
- In the Change member dialog window, select the Act as myself button.