Editing records
Portal members can edit records directly on the portal if this ability is allowed and enabled for their member role. Depending on the permissions configured for the page, different fields may be editable for different member roles.
There are several ways to edit a record:
- Change the value in an editable field directly on the grid page (inline edit)
- Open the associated detail page and change the values in editable fields (if an associated detail page is available)
- Use the Complex modify action to make changes in a record as well as records in related pages according to the rules configured for this action
|
- Editability of fields is set up separately for the grid and detail pages. Thus, the same field may be editable on the grid, but not editable on the detail card, and vice versa, depending on where you try to edit a record from. - For the Enable editing - The Save action is configured separately for grid and detail pages and can be different for each member group. Even if the Save action is not added to the page, and there is at least one field that the member's role is allowed to edit or create a record with, changes are saved automatically with default save settings, and the save status will be displayed. - At present, editing values in an embedded detail page is not allowed. |
To edit a grid page record
- Open a grid page where you want to edit a record.
-
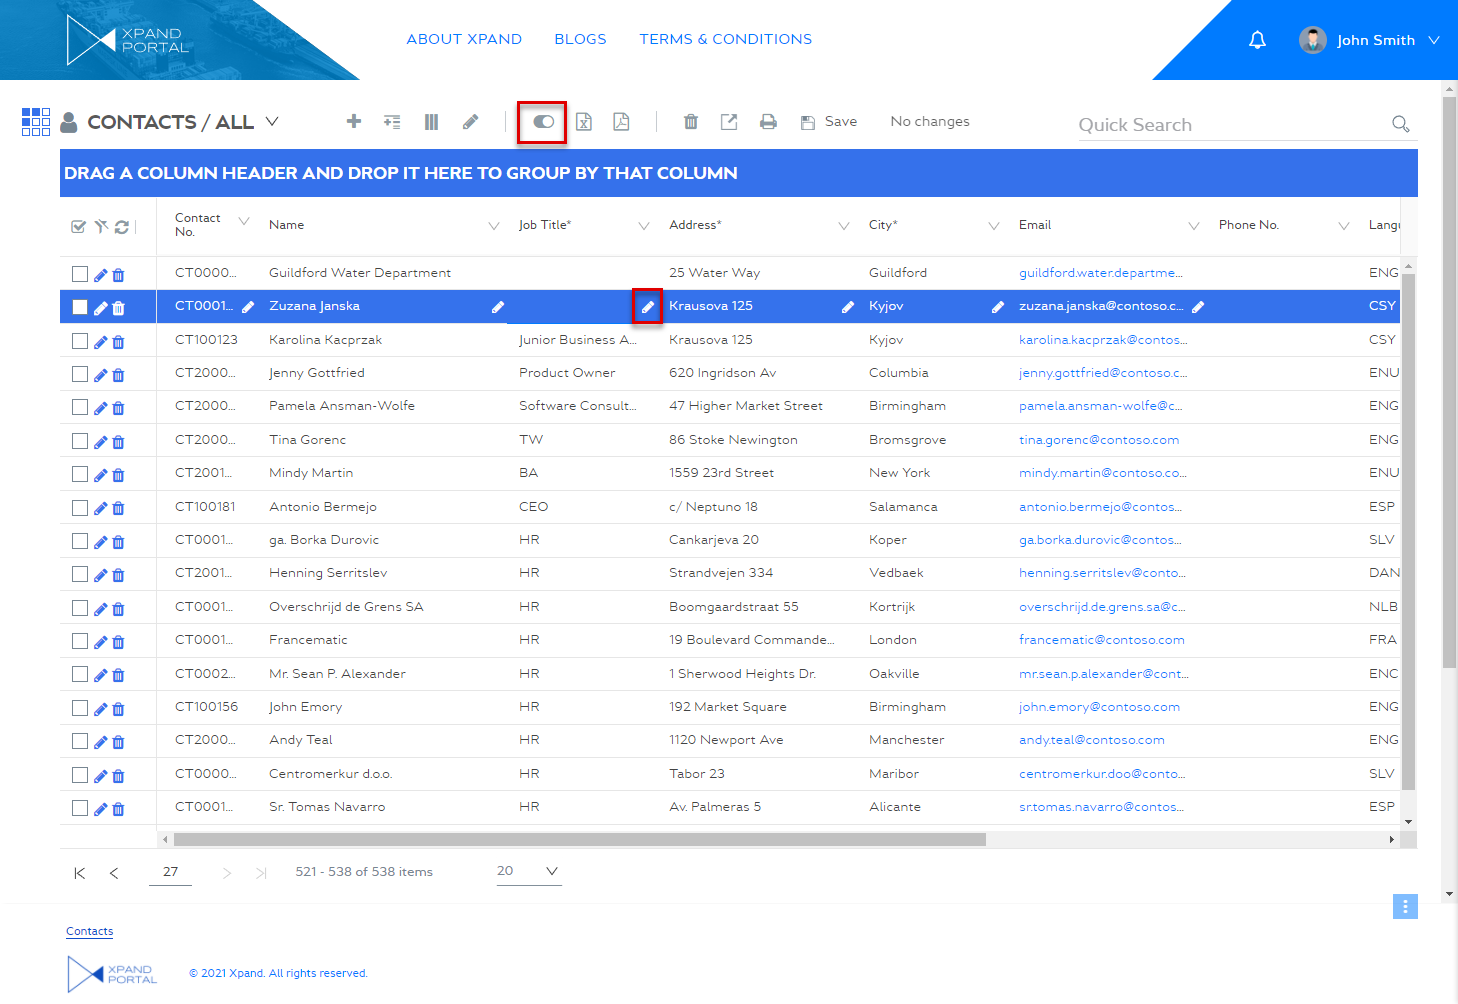
On the grid action bar, set the Enable editting
 switch to ON (the slider caption and icon are customizable and may be different in your case). This action must be added to the grid page and allowed for your member role.
 Note
NoteIf the grid page is a child grid within a detail page, there is no need to use the slider; on such a grid, you can edit a field (if it is an editable field) by selecting it and changing its value.
NoteIf the switch is not editable, check your current page view – you may be using a personalized view that was saved with this switch disabled. When you save a custom grid view, it also saves the current page editability state.
-
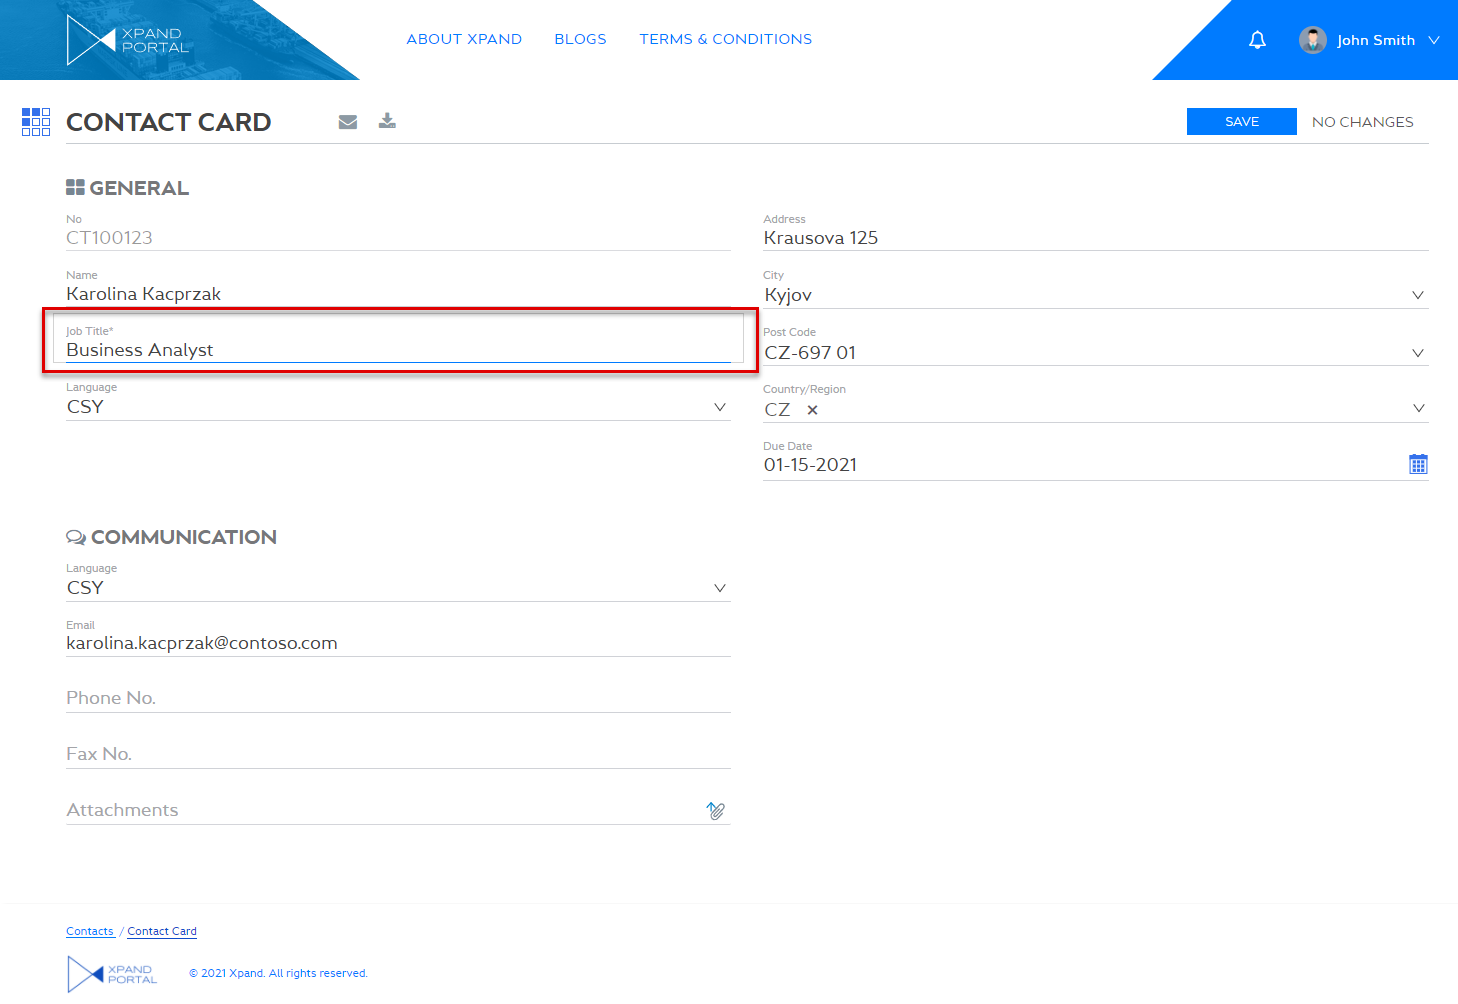
On the record where you want to change a field value, select the field. Editable fields for your member role are marked with the
 icon when you hover over a record.
-
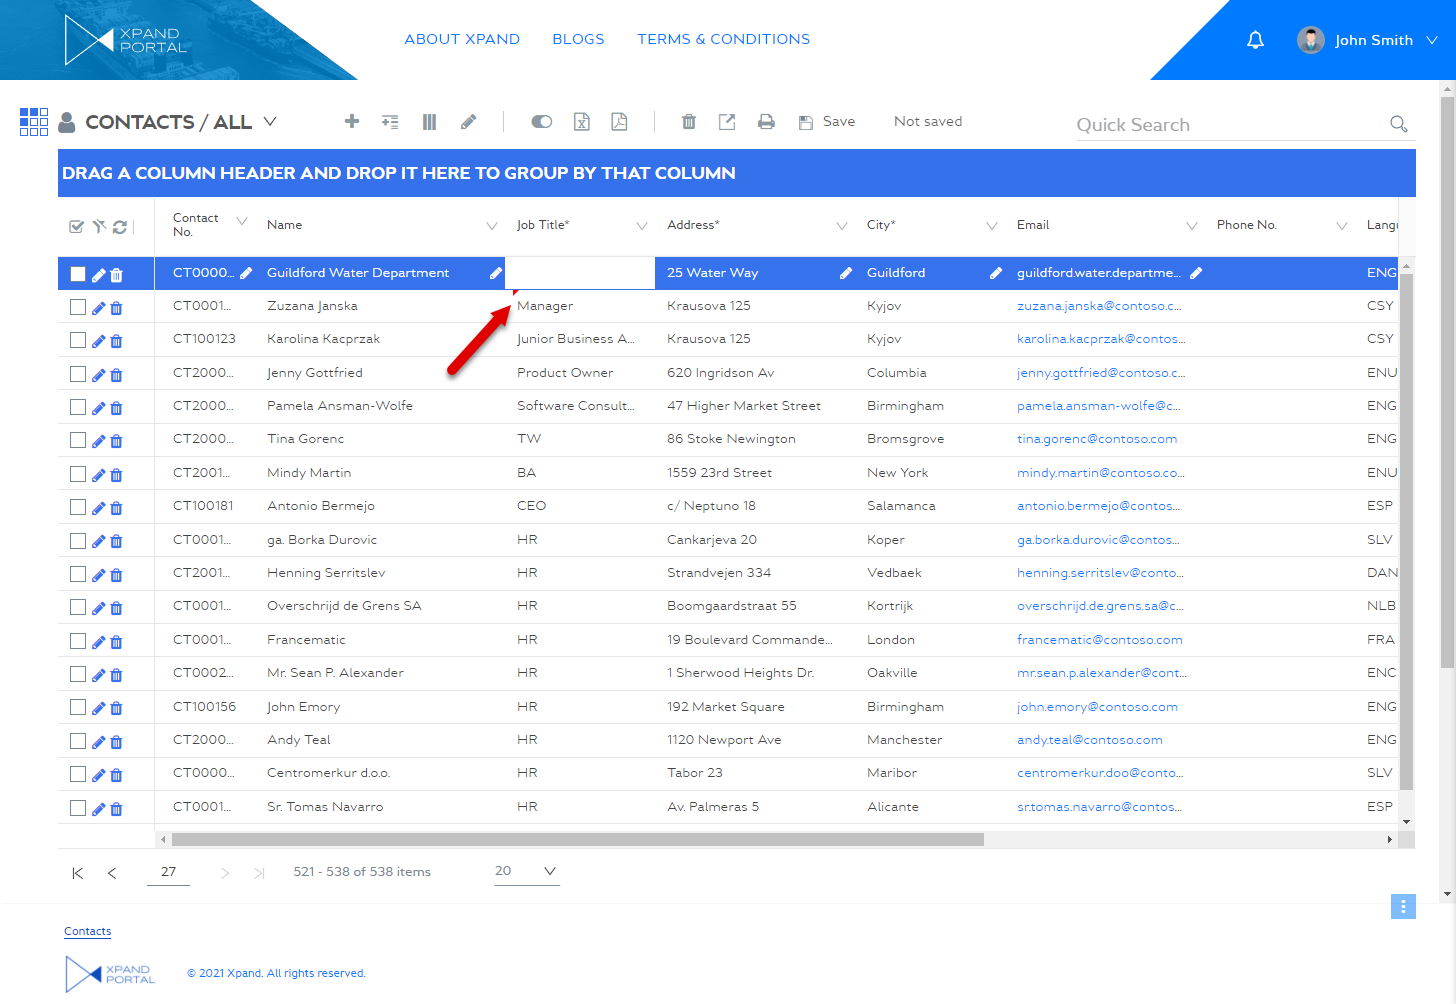
Change the field value. Depending on the field type (e.g. text field, date field, lookup field, etc.), the corresponding control may be available to help you fill in the field, such as the AssistButton or the date selection pop-up window. If the value contains a hyperlink, the hyperlink is shown as plain text during editing.
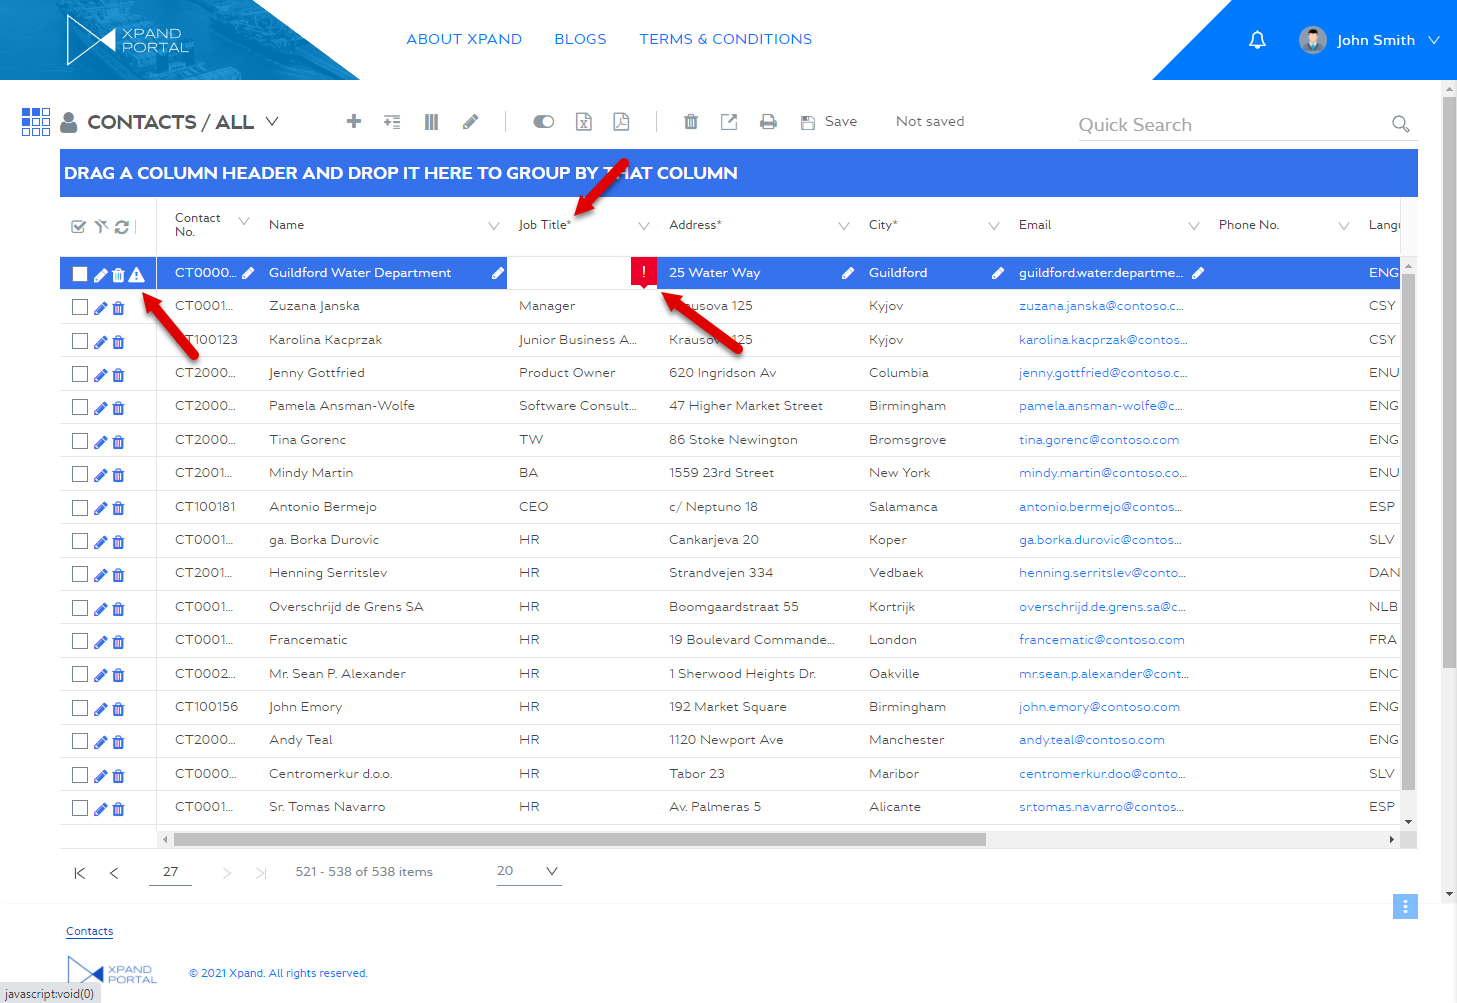
When you stop editing the field, and switch to a different field, a red mark is shown in the field value to indicate the value is pending save. When saving is completed, this mark is no longer displayed.
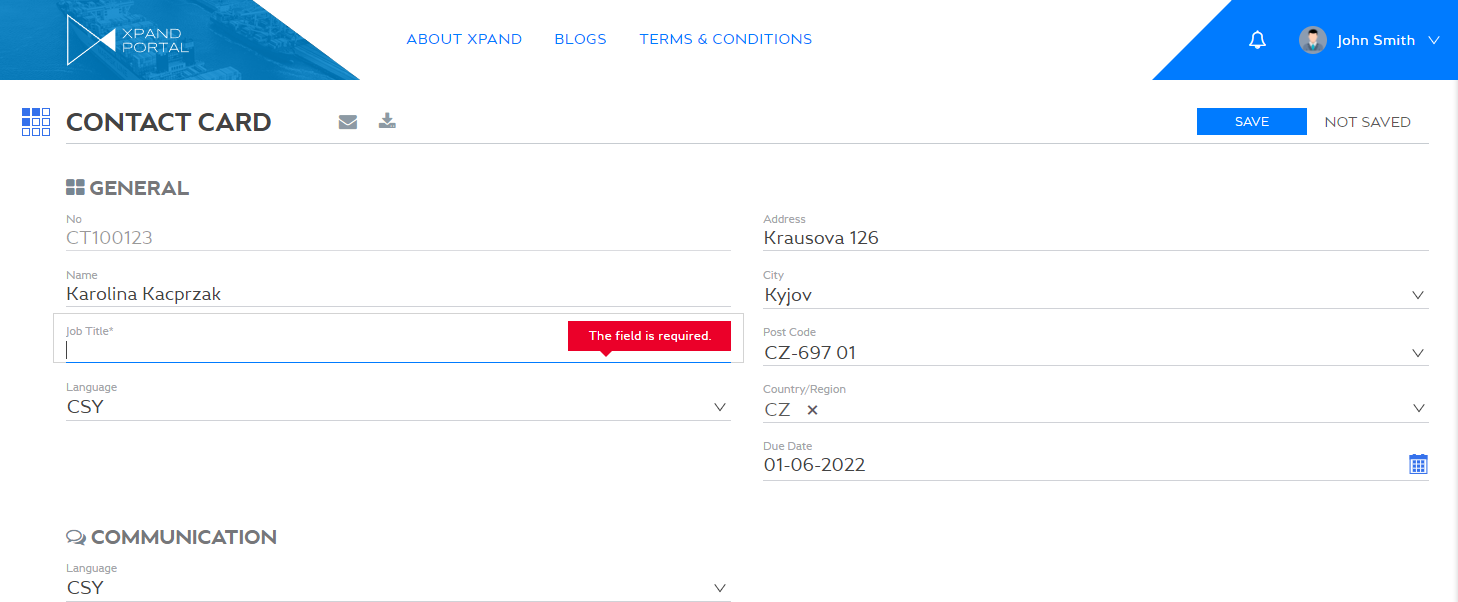
If a grid field is configured as required, such a field will have an asterisk next to its caption. If you leave a required field without value, the is shown in the field value.
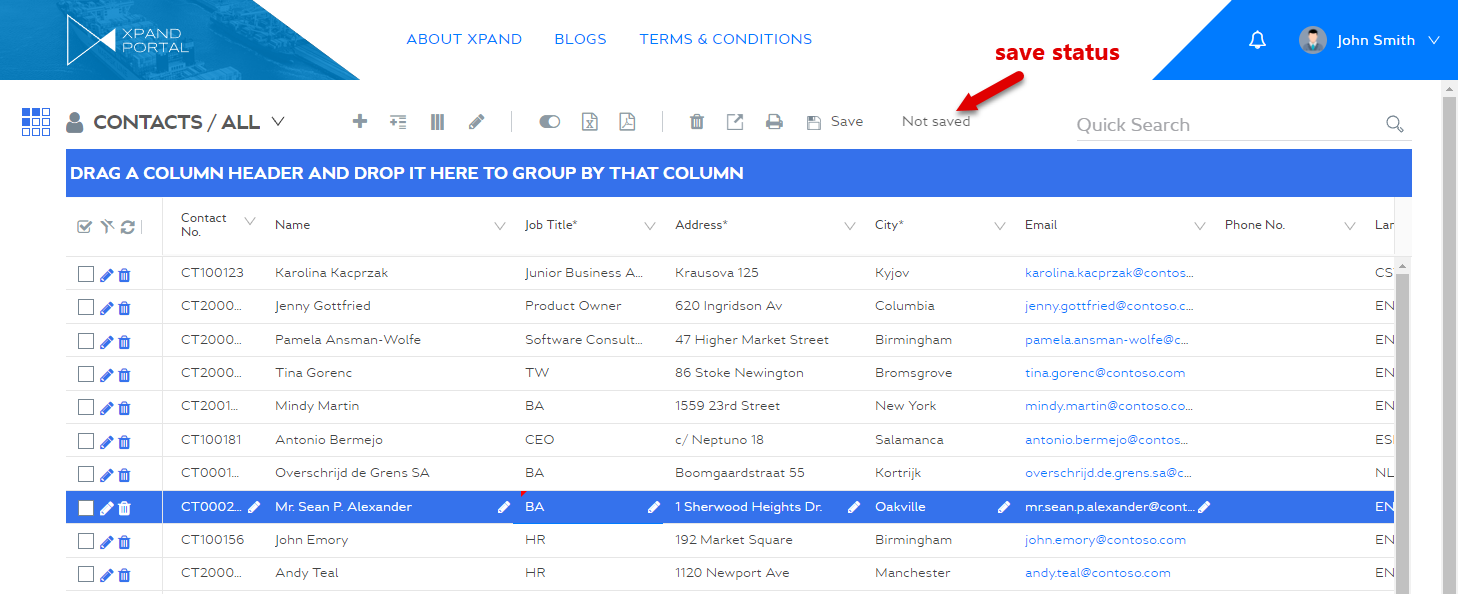
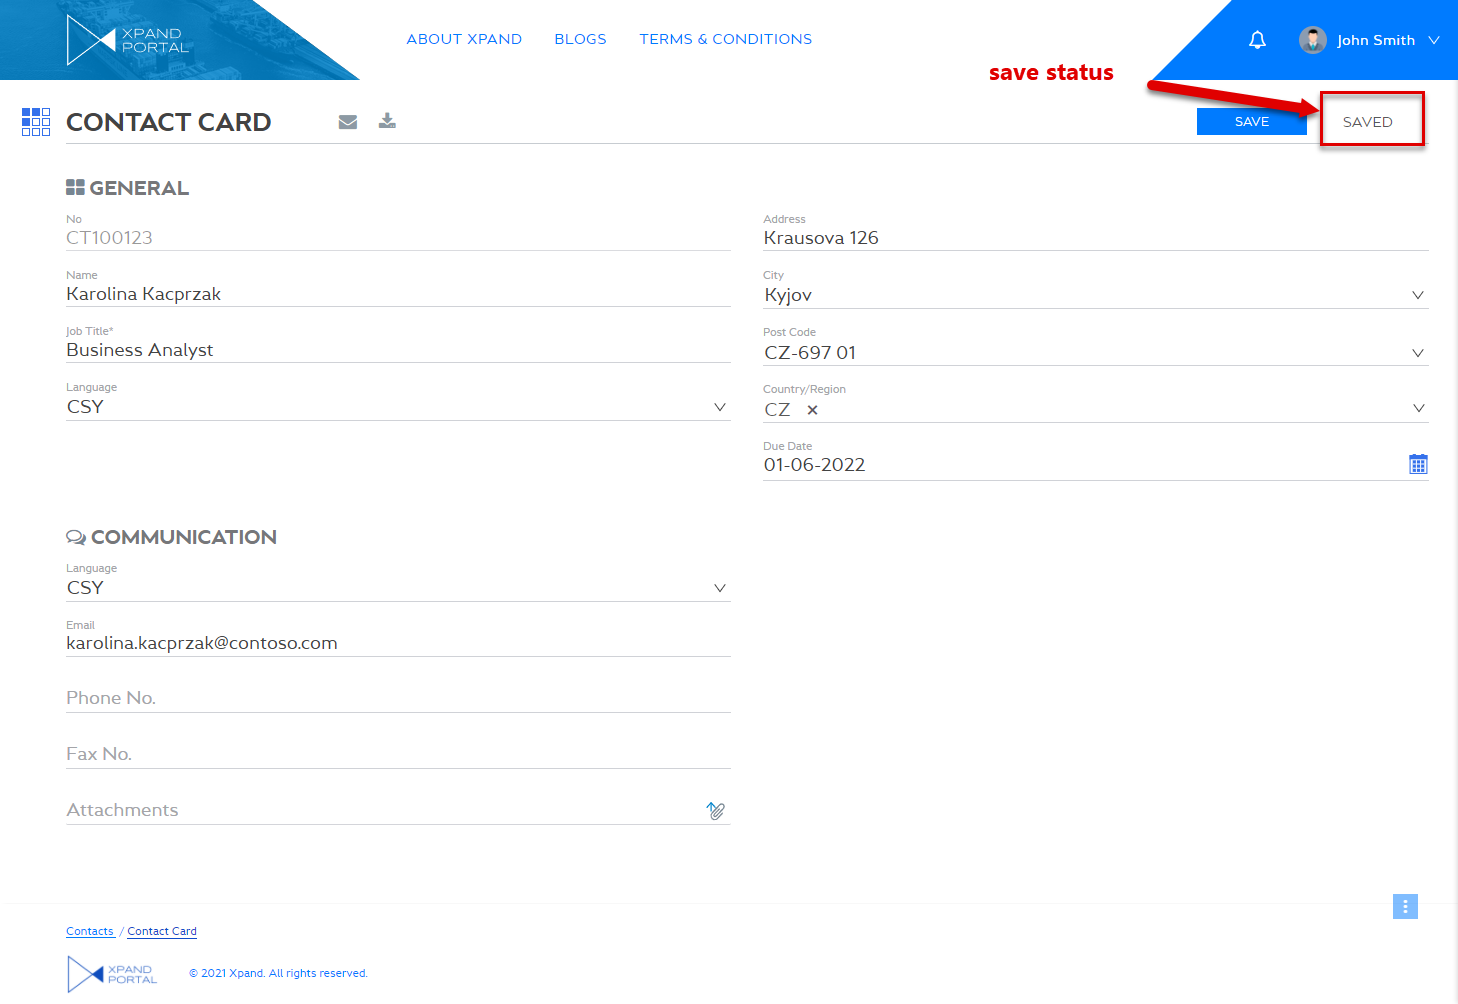
Depending on the Save action configuration, changes are automatically saved either after a certain period of time or after you leave the page. You can see the status of changes above the grid, near the Save button (if it is added and not hidden). The following save status can be displayed on a grid page:- Not saved – There is a change in one field pending save.
- Saving – Saving of changes is in progress.
Note
It is not recommended that you navigate to another page while the saving process is in progress (when the status is Saving). If you do try to leave the page while saving is in progress, a warning message will be displayed prompting you to complete the saving process.
-
Saved – Changes have been saved.
In addition to automatic saving, you can use the Save button (if it is configured on the page) to manually force the portal to save changes if necessary. This is useful if the action is configured to save changes automatically after a long period of time or upon leaving the page. The button can also be hidden to only use automatic saving.
-
Set the Enable editing
switch to OFF (the slider caption and icon are customizable and may be different in your case) to disable the ability to edit grid lines. This step is optional and is not required to save the changes.
|
Edited records are moved to the end of the grid. |
To edit a record on a detail page
- Open a grid page where you want to edit a record.
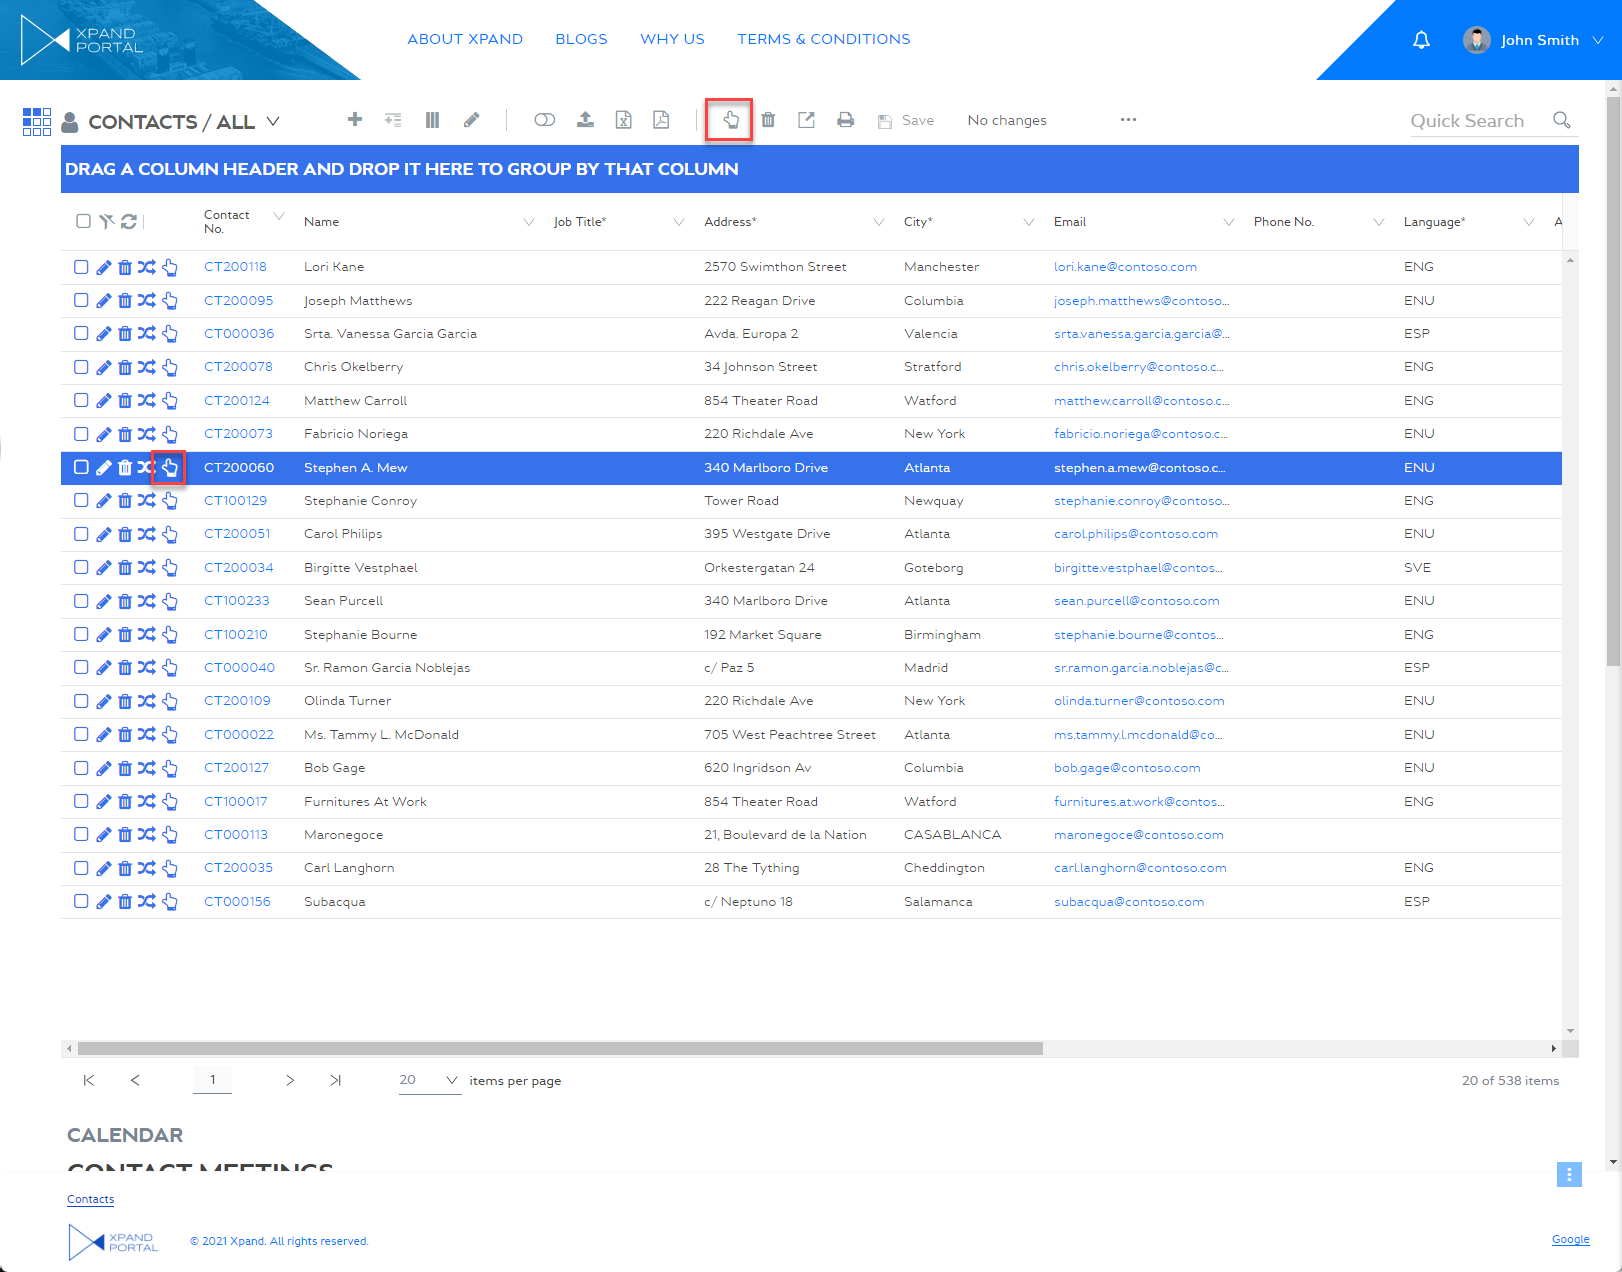
- On the record that you want to edit, select the icon to on the line or on the grid action bar to open the record's detail (card) page. Alternatively, select and hold (or right-click) the record, and then select Edit.
- On the detail (card) page that is open, change the value in an editable field. The field must be editable for this detail page for you to be able to change the field value. Non-editable fields for your member role are grayed out. Depending on the field type (e.g. text field, date field, lookup field, etc.), the corresponding control may be available to help you fill in the field, such as the AssistButton or the date selection pop-up window.
Depending on the Save action configuration, changes are automatically saved either after a certain period of time or after you leave the page. The saving status is shown as a popup in the center top area of the page. The following save status can be displayed on a detail page:
- Not saved – There is a change in one field pending save.
- Saving – Saving of changes is in progress.
NoteIt is not recommended that you navigate to another page while the saving process is in progress (when the status is Saving). If you do try to leave the page while saving is in progress, a warning message will be displayed prompting you to complete the saving process.
-
Saved – Changes have been saved.
In addition to automatic saving, you can add a Save button to manually force the portal to save the changes on the page. This is useful if the action is configured to save changes automatically after a long period of time or upon leaving the page. The button can also be hidden to only use automatic saving. Even if the Save button is hidden on the detail page, the save status is still displayed and automatic saving settings are applied.
If a detail page field is configured as required, such a field will have an asterisk next to its caption. If you leave a required field without value, "The field is required" error message will be displayed next to it.
Complex modify
A grid or detail page may have a Complex modify action (the caption is configurable) that allows you to make changes on a selected record on the current page as well as in other records on related pages according to the rules configured for this action. Using such an action allows you to make changes in records not only on the current page, but also in related pages at the same time. However, what kind of changes the action does (which fields are changed and to what values) as well as which related records and in which related pages are modified alongside the current page is configured in the action settings.
This may be useful when you have closely related records on different pages, and making changes on a record may need to be reflected in the related records automatically. For example, a change on a record requires the change of a status field on the related records on a different page. Thus, you could configure an action that would change the selected record as well as automatically update the status field in the related records on a different page.
|
For the Complex modify grid action or detail action to be available on the page, it must be added to the page, properly configured, and the role that you belong to must have permissions to use it on that page. See the description of the action settings for details on how to configure what the action will actually do and how related records and related pages will be identified to be applicable for changes when the action is used. |
|
Use this action with caution to avoid undesired changes on multiple records/pages. You must be aware how the action is configured and what changes will be made. |
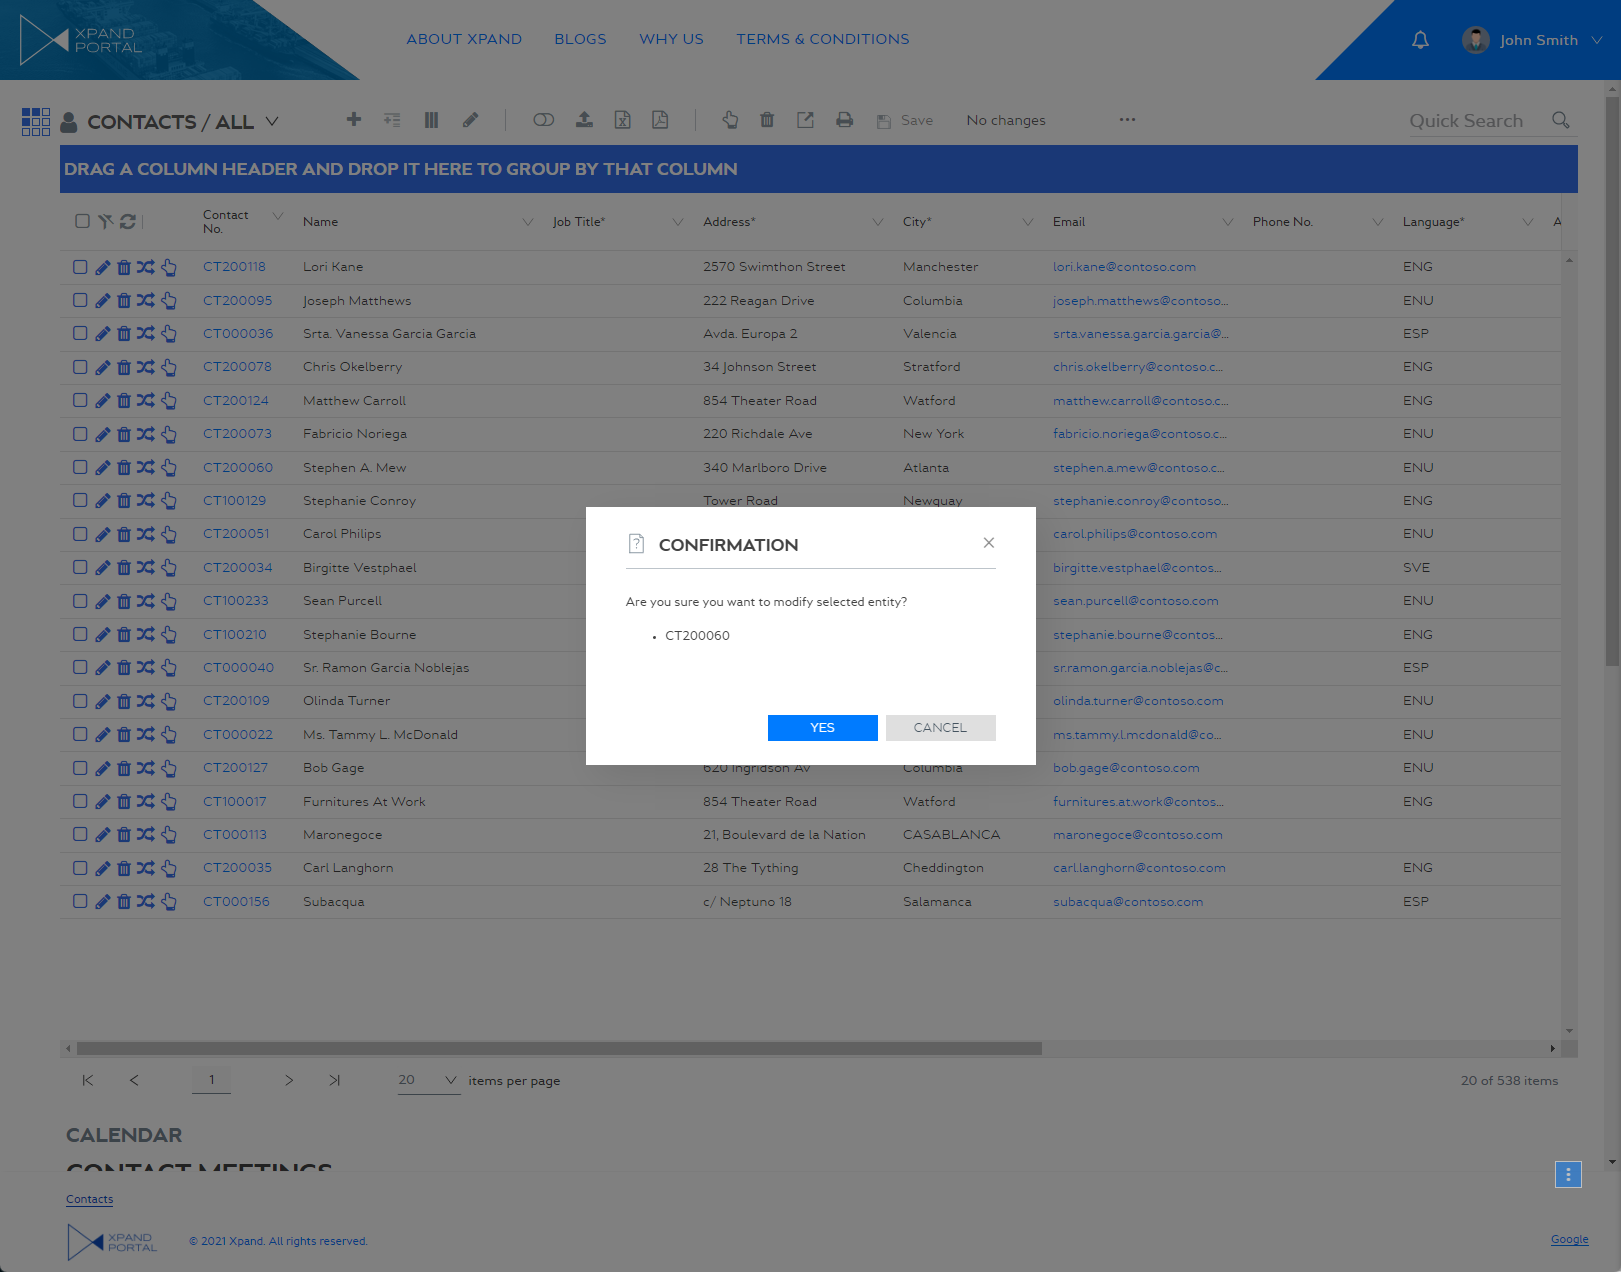
To edit a record along with related records on related pages at the same time
- Open a grid or detail page where a Complex modify action is available. The icon and caption are configurable and may be different in your case (for example, the action caption may be based on the actual changes that the action will be doing).
- Select a record(s) that you want to edit along with other related records on related pages, and then select the
 icon on the action toolbar directly on a record that you want to edit.
- Select Yes on the confirmation message that appears.
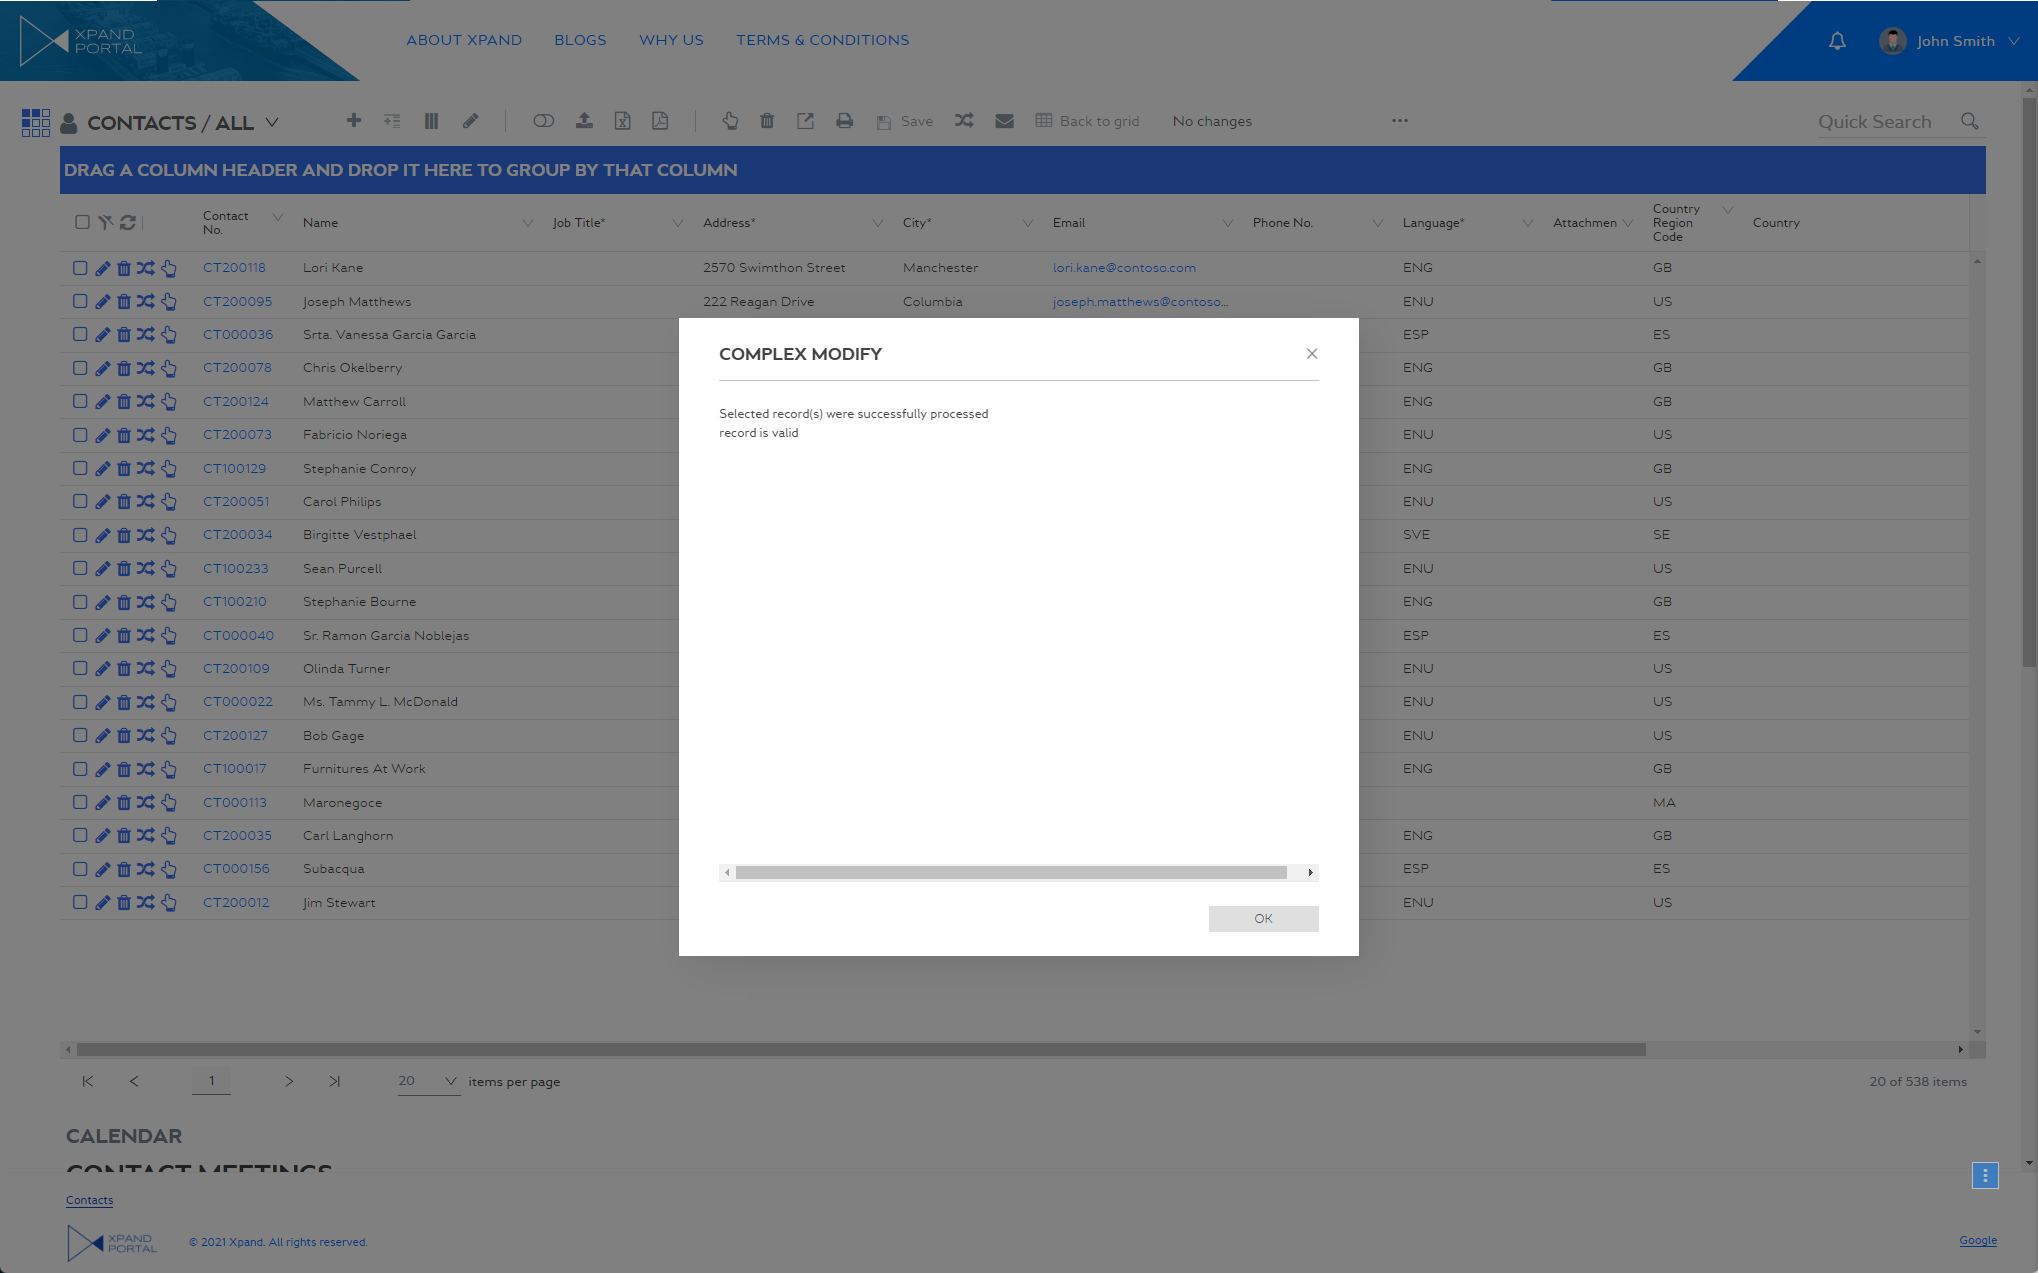
After processing, the results are shown in the dialog window. If a record cannot be processed (for example, because the record or related records do not meet the validation filters configured for the action), an error message will be shown. Also, if configured for the action, a different page can be opened once the processing is finished.
 Note
NoteThe dialog window that is shown when the action is used and its content (such as title, description, processing message, processing results, etc.) are configurable in the Complex Modify action settings and may look different in your case. It can also be configured differently for each Complex Modify action to make it tailored to what the action does. In addition to the text from dialog window settings, the message also shows the text from the base dictionary key (also configured in the action settings), including the validation messages (if a record is valid, it means it meets the validation filters, otherwise, the details why a record is invalid for completing the action are shown).
- Select OK in the dialog window to close it.
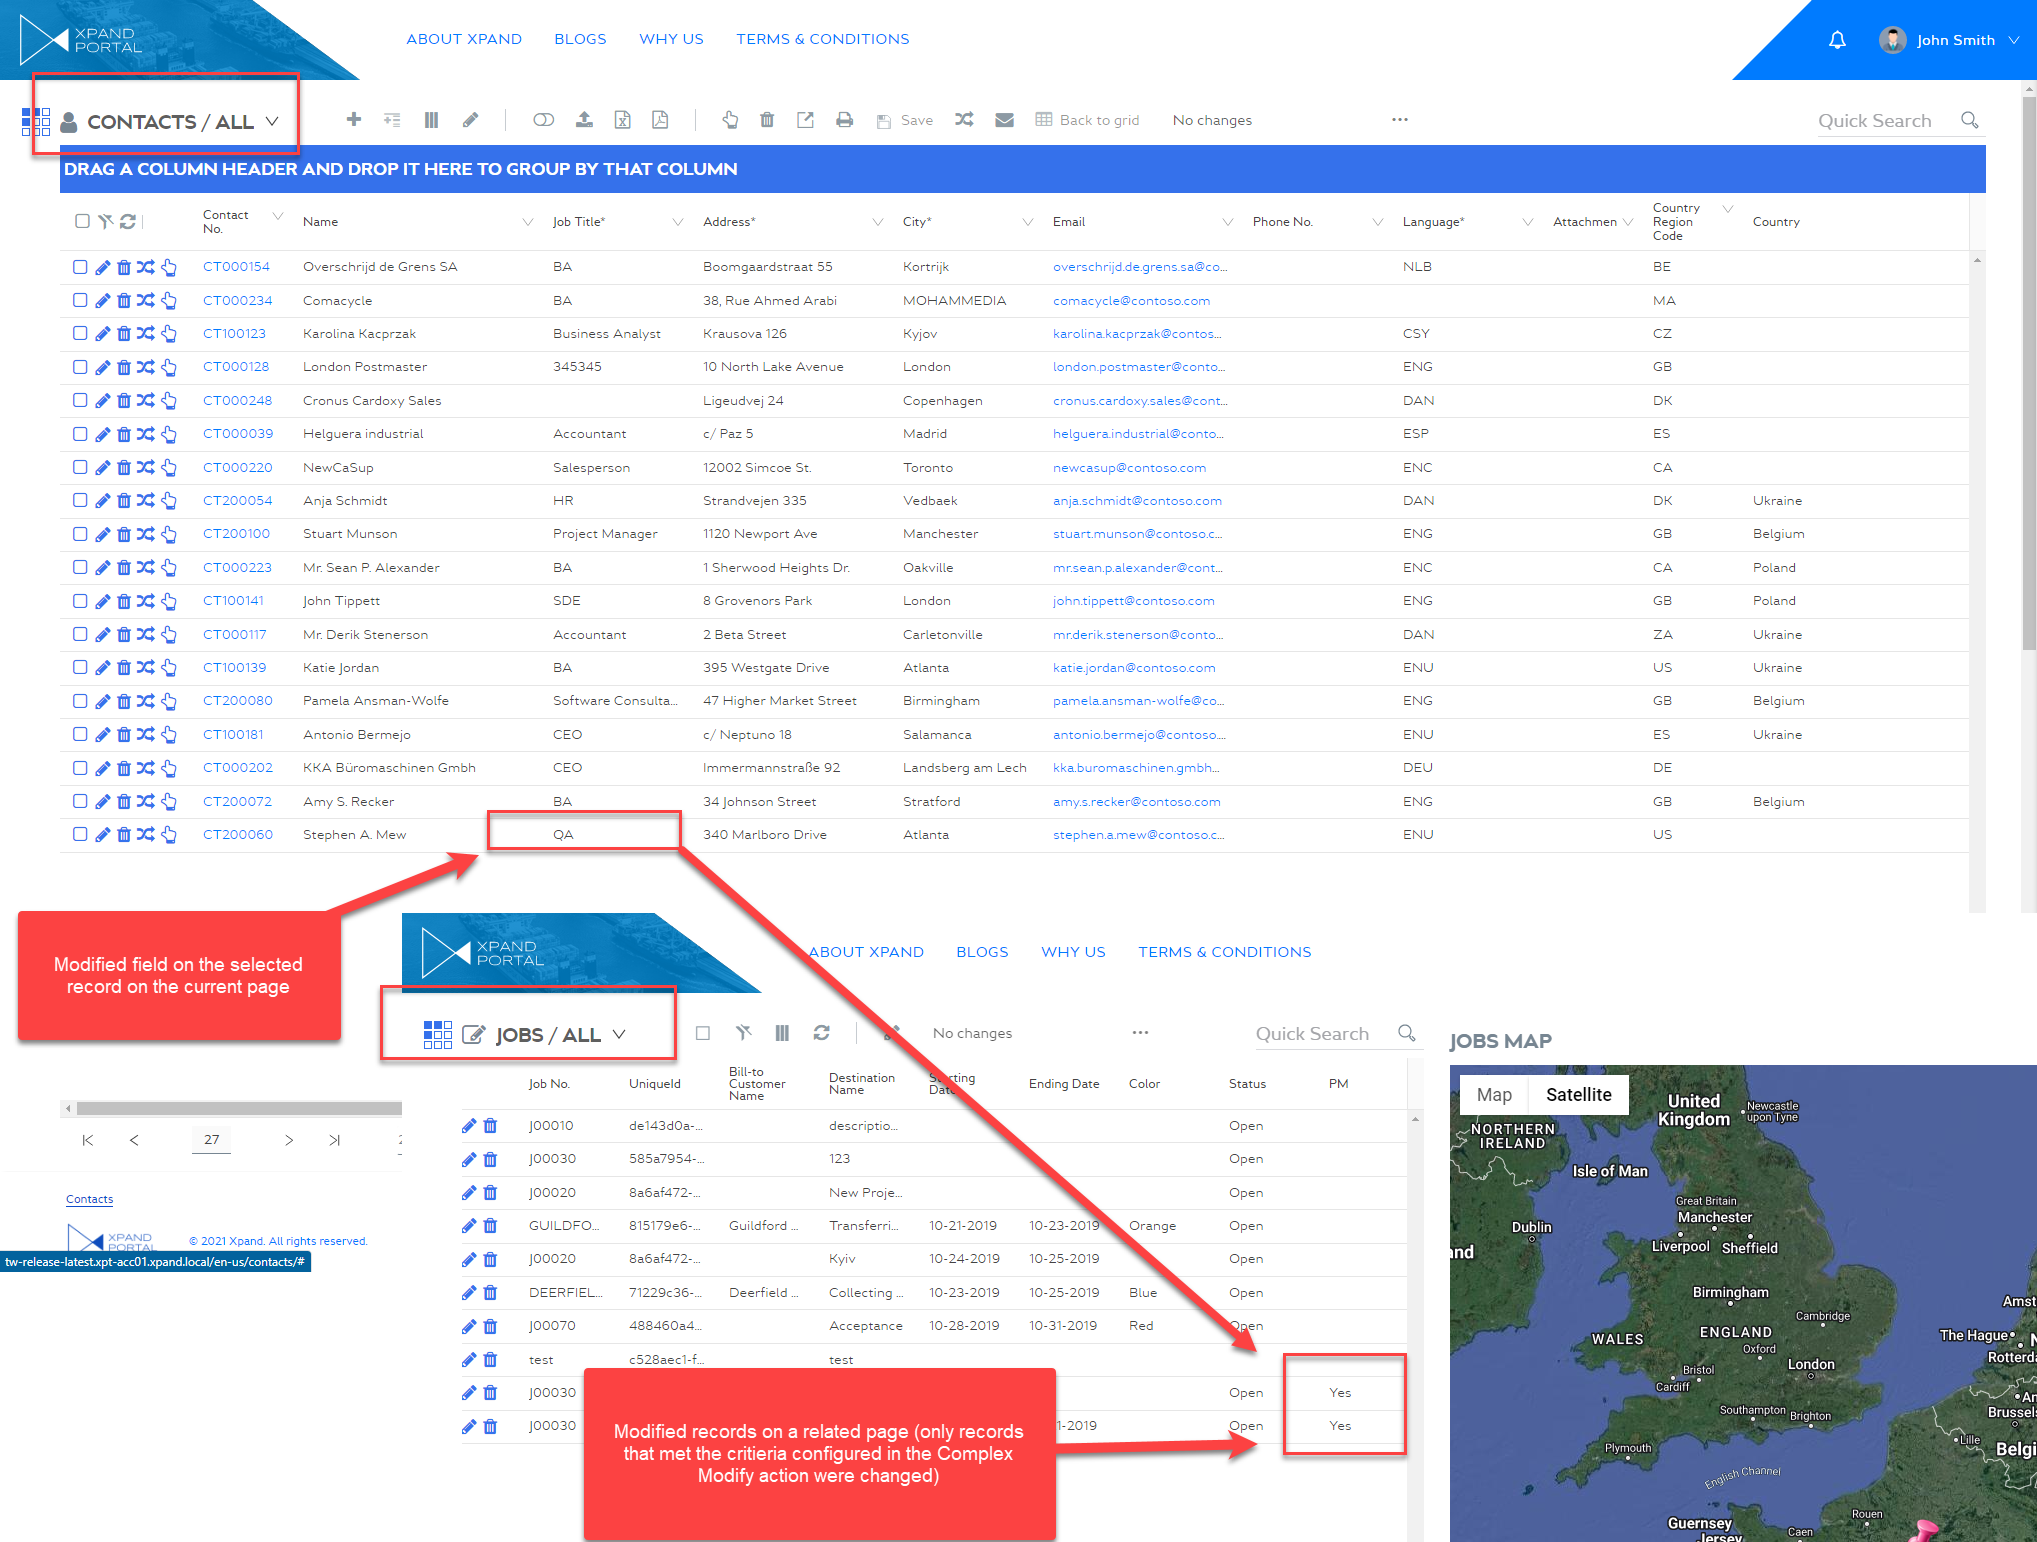
- Check the expected changes on the current page as well as related pages (in accordance with the action settings). Edited records are moved to the end of the grid.
|
The changes in the related records of related entity(ies) can be completely different from the changes on the parent record that was initially selected, like in the example above. A different field was filled in with a different value. What exactly is changed on the parent and in related entities/records is configured in the Complex modify action settings. For changes to be successful, various criteria configured in the action settings for both the parent entity and related entities/records/fields must pass the validation. Otherwise, no changes will be made, and an error message will be displayed after processing. |