Importing data
You can import data into a grid page from:
- Microsoft Excel Workbook
- CSV (Comma-separated values)
During data import, the portal uses the Unique fields field setting to identify whether a record is already available in the grid to which data is being imported (if the value of the unique fields coincides, the record is considered to be the same). If a record already exists in the grid, it will be updated with values from the Excel/CSV file, and a new record won't be created. If the Excel/CSV file has multiple lines that are to update the same record in the grid, an error will occur, and only the first found record line will be applied.
Additionally, duplicate validation in the Excel/CSV file (verification whether the Excel/CSV file has duplicate records using the Unique fields setting) can be enabled in the Import action settings.
|
For this feature to be available on a page, it must be added to the grid page, and the role that you belong to must have permissions to use this function on that page. Also, make sure that the file that you are going to import data from corresponds to the requirements in the configured action (has required unique fields). The fields that will be updated during import must be editable both for new records (the Editable (new record) check box must be selected in the grid field settings) and existing records (the Editable (existing record) check box must be selected). |
|
To see how the imported file is expected to look, you can export data and save it as an Excel Workbook or CSV file first. You can also use the combination of export and import when you need to edit a big number of records on a grid, and you'd like to do it in Excel: you export data, edit it in Excel, in then import it back into the portal. |
To import data from Excel/CSV
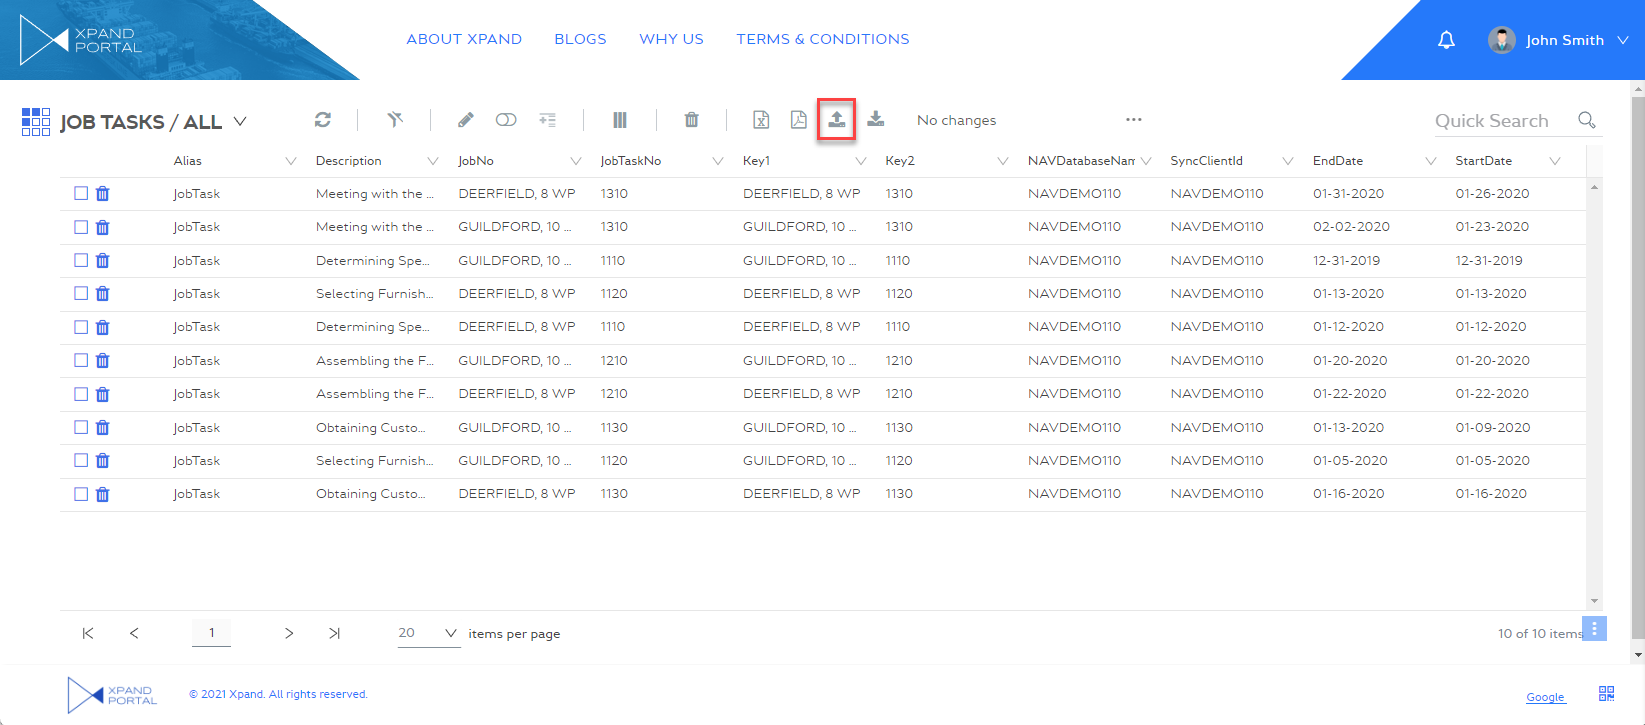
- Open a grid page where you want to import data from an Excel workbook or comma-separated values (CSV) file. Which type of format is used depends on the action configuration (only one of the two).
-
Select the Import
 action (the caption and icon are configurable, and may be different in you case).
- On the Choose a file to import step, use the Select files action to browse to an Excel Workbook or CSV file that you want to import data from or drag a file into this field.
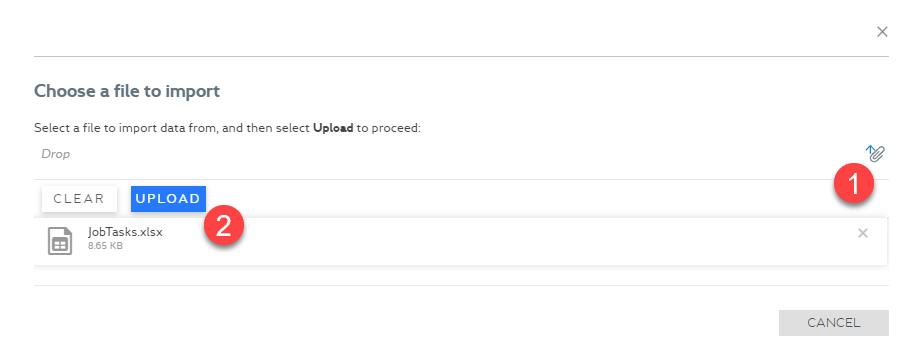
 Note
NoteThe format that you import data from depends on the configuration of the Import action. At this stage, the file is verified to satisfy conditions of the configured action (for example, it must contain columns (with field captions) that correspond to the unique fields configured for the action). If the file doesn't meet the requirements, an error message will be shown.
- On the Import options step, select data import options:
- Stop import on any error - If an error occurs, the import will be interrupted.
- Skip all errors and continue import - If errors occur, the import will continue. You will be able to see information about errors if any after the import is complete.
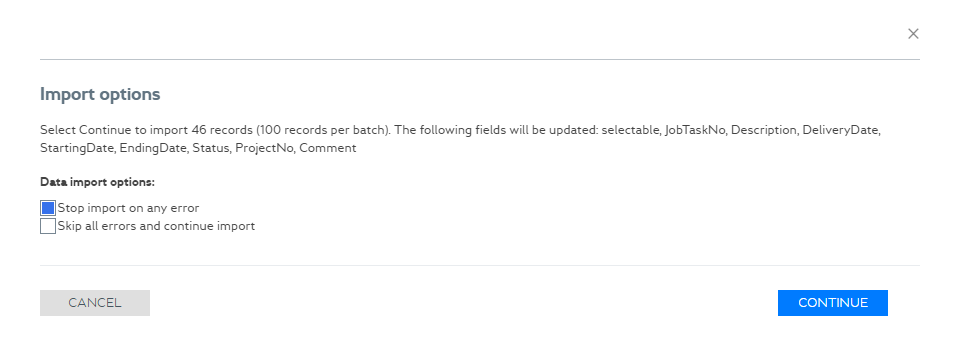
You can see the number of records that will be imported and which fields will be updated.
If file record duplicate validation is enabled in the Import action settings, and during data import duplicated records are detected in the Excel/CSV file, information about duplicates is displayed in the Import options dialog window where you select how to handle errors during import.
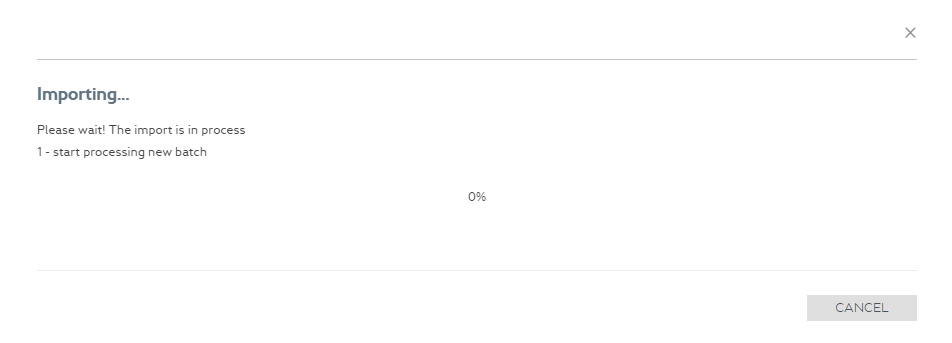
- Select Continue.
- Wait until the import is completed.
- Once the import is completed, import summary is shown. Optionally, you can select Details to view detailed information about imported data.
Note
For the Details action to be available, the page that it opens must be configured and specified in the Report page field of the Import action settings. Otherwise, this button won't be shown on the import summary. See action settings for details on how to set up the report page.

Select Hide to hide the details.

Which fields are available on the Import summary page depends on the page configuration (the PortalImportDataStatus source entity). This page is specified in the action settings.
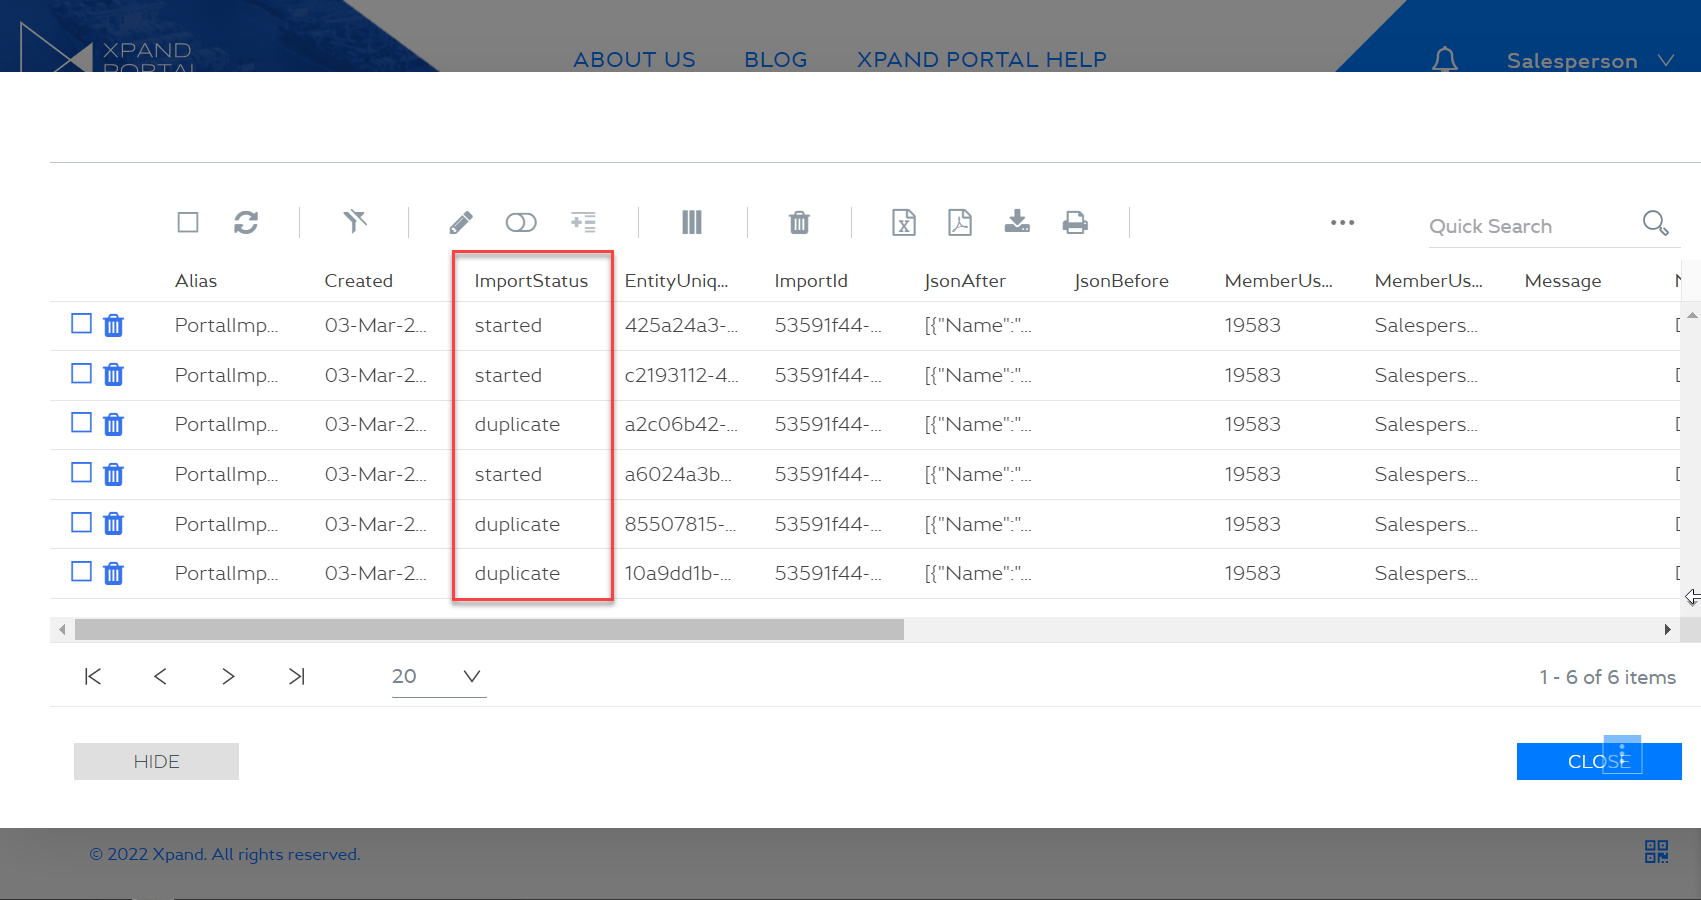
If there were duplicate records during import, and you selected the Stop import on any error option, the import will stop on any error that occurs, including duplicated records. On the portal import data status report page, which can be opened by using the Details button on the import summary page, duplicate records will be shown with the duplicate import status.
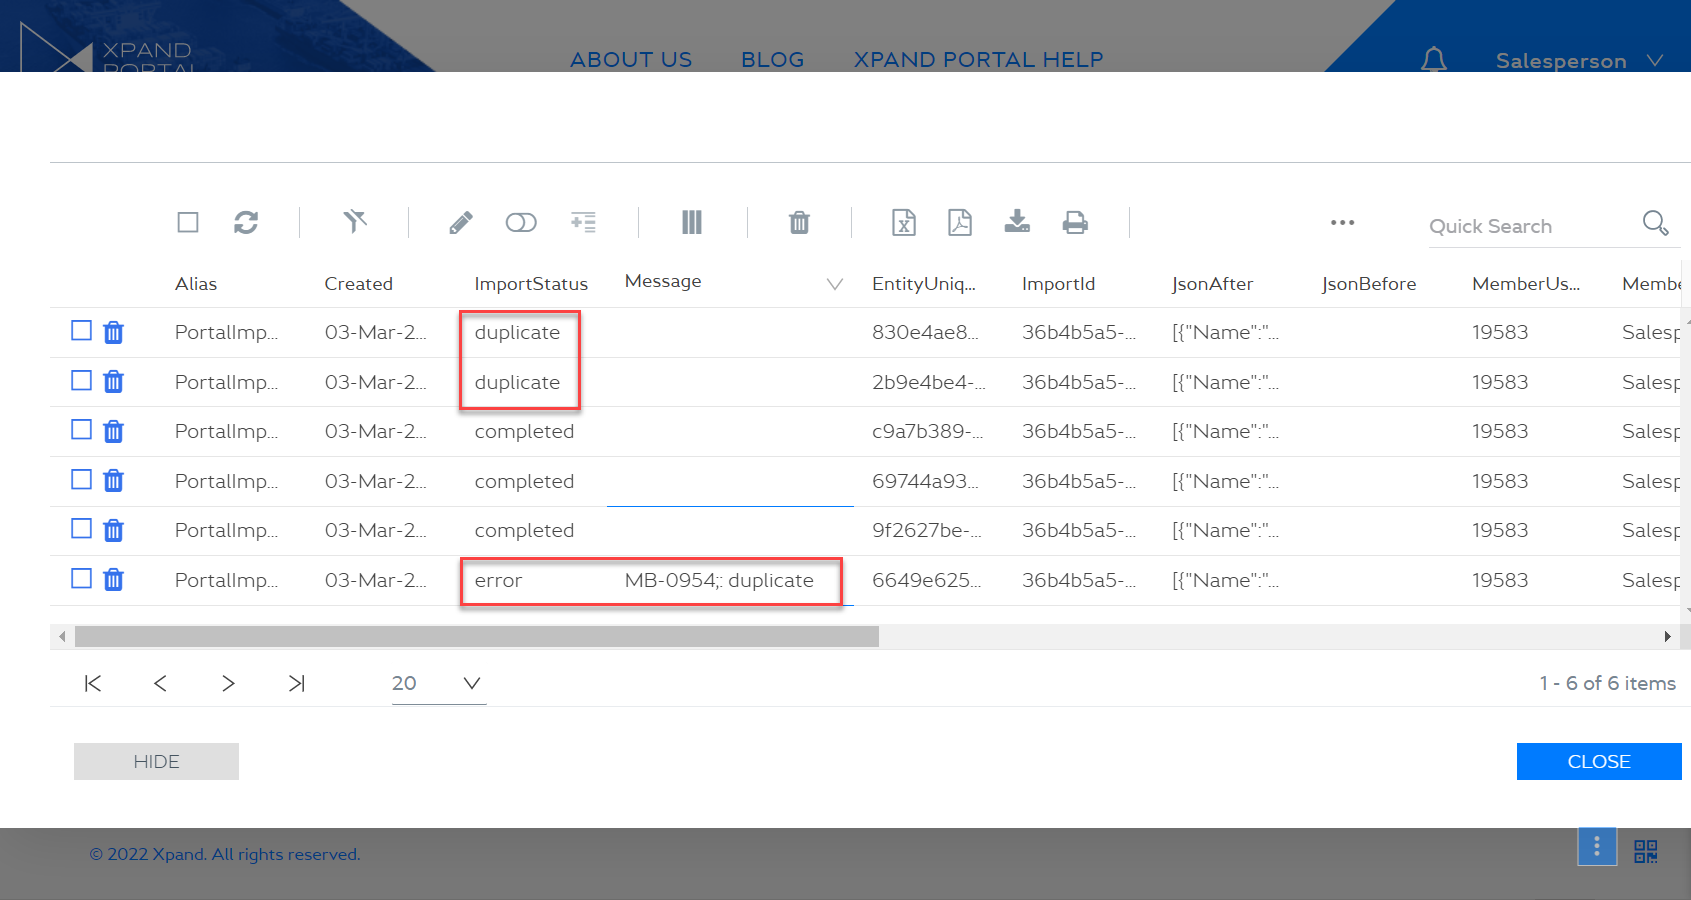
If you selected the Skip all errors and continue import option, all records are imported except the ones with errors (duplicated records are also considered as records with errors). In this case, on the portal import data status report page, which can be opened by using the Details button on the import summary page, duplicate records will be shown with the error import status.
- Select Close to close the import summary.
- Refresh the grid page to see imported records. If records are created during import, they are shown at the end of the grid.