List views
By default, records on a grid page are shown in the form of a list with columns that represent table fields. As an optional way of viewing records, a list view can be used. In a list view, records are shown in the form of data containers (tiles) without columns. Each record is shown on a separate tile. Each list view can consist of a different set of fields and have its own style.
|
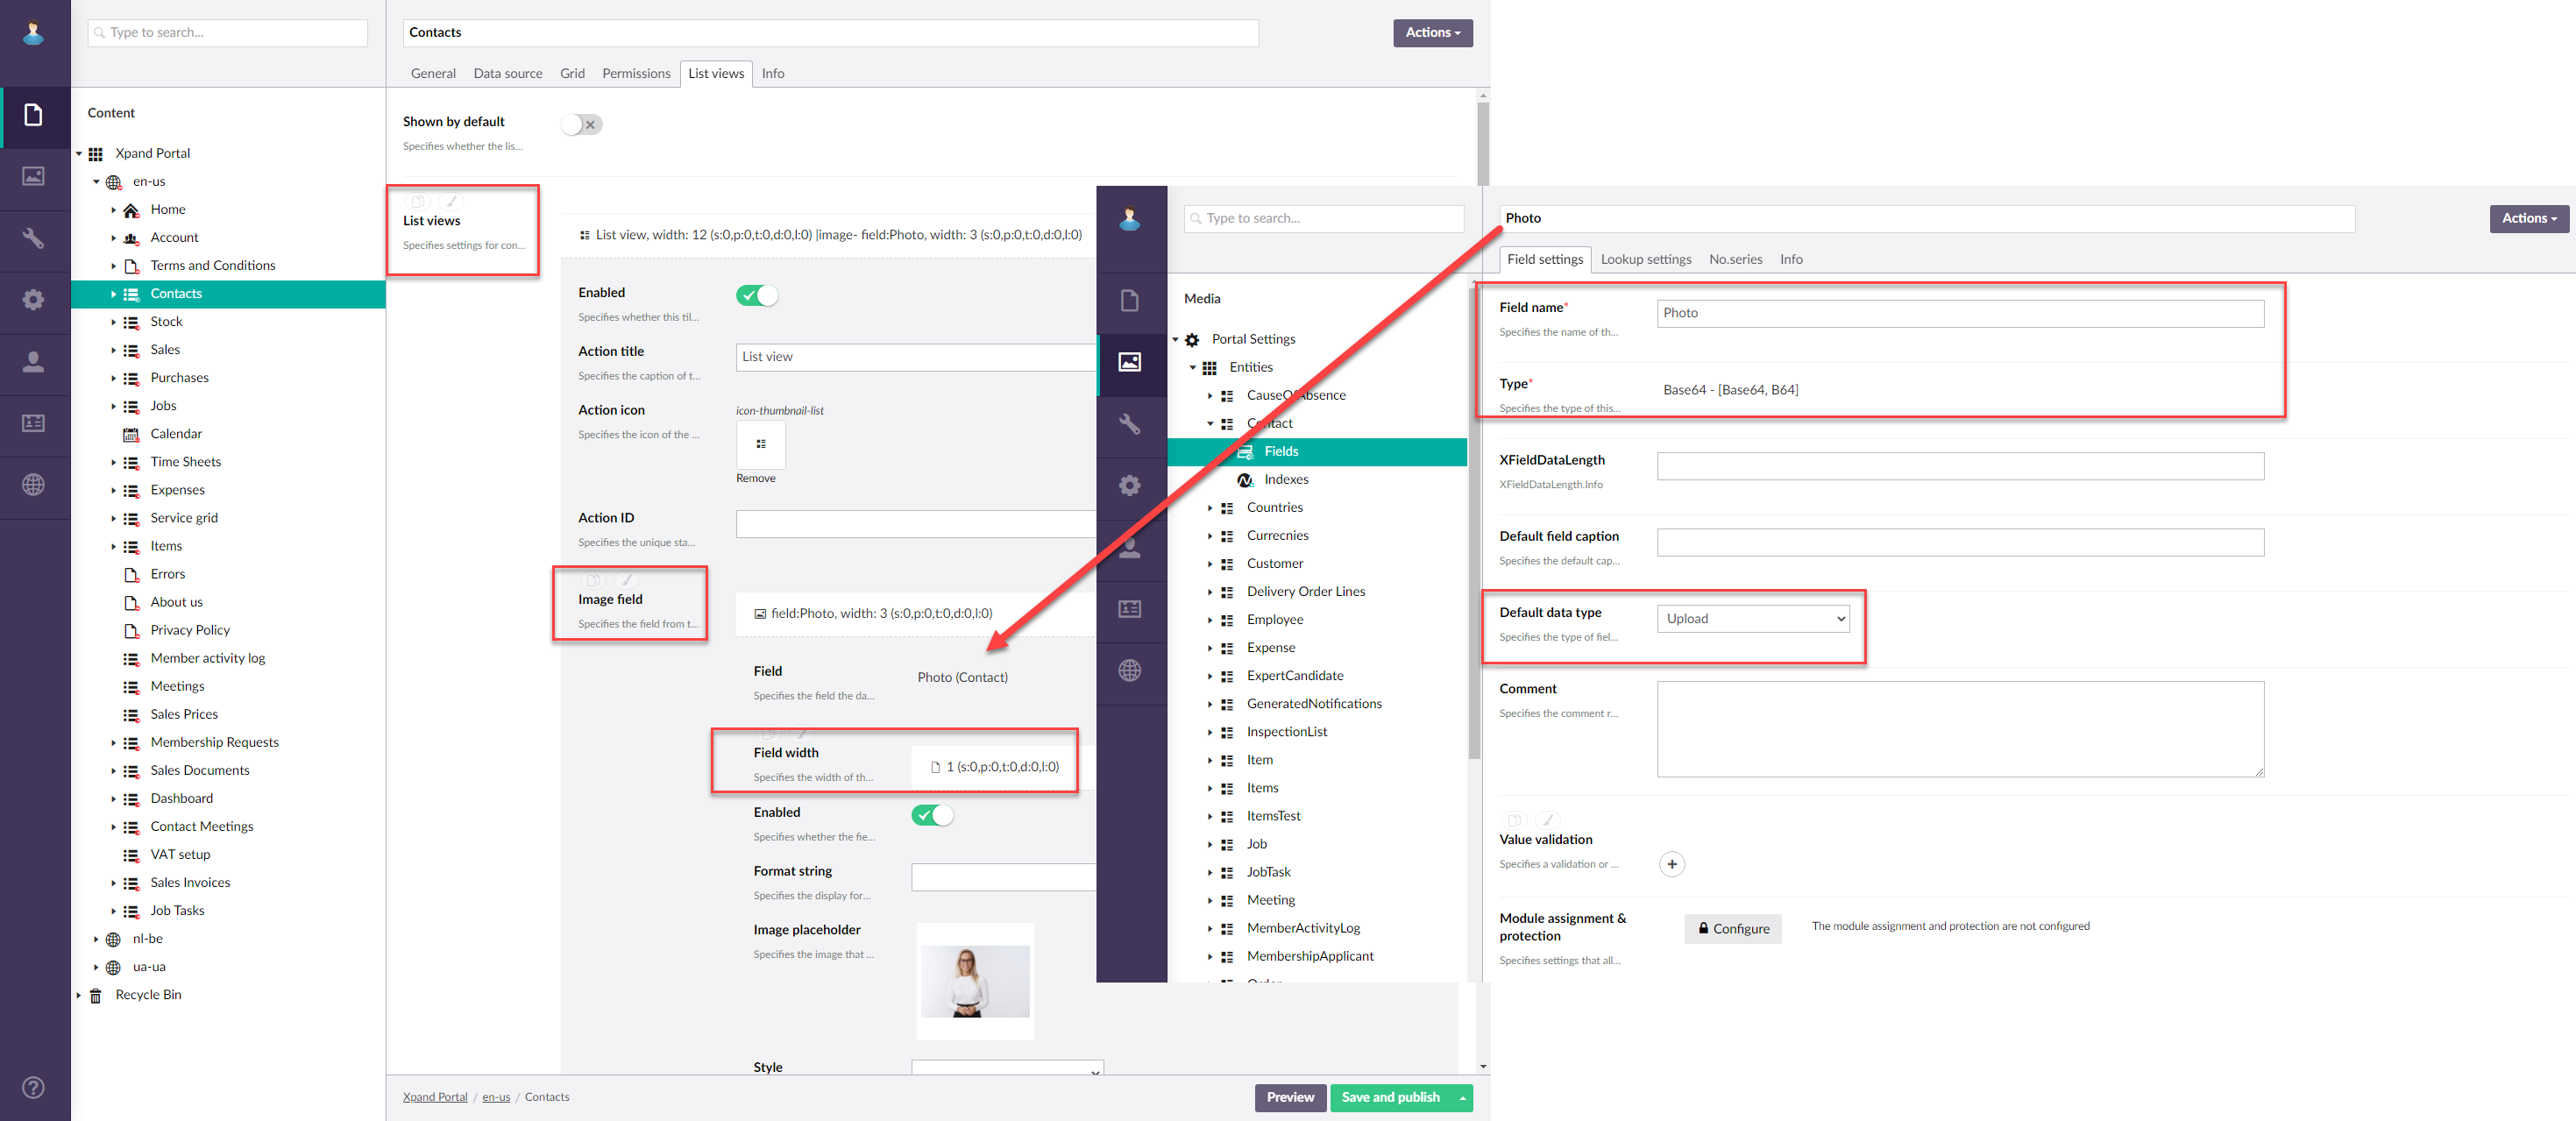
For this feature to be available on a page, it must be configured on the grid page (the List views tab in the grid page settings), the corresponding grid action (List view) must be added to the grid page, and the role that you belong to must have permissions to use these functions on that page. |
Depending on the page and action configuration, the action title as well as look of the list view may be different. Also, you can configure the grid page to open the list view by default (without the need to select the corresponding action). You can always return back to the grid view using the Back to grid action.
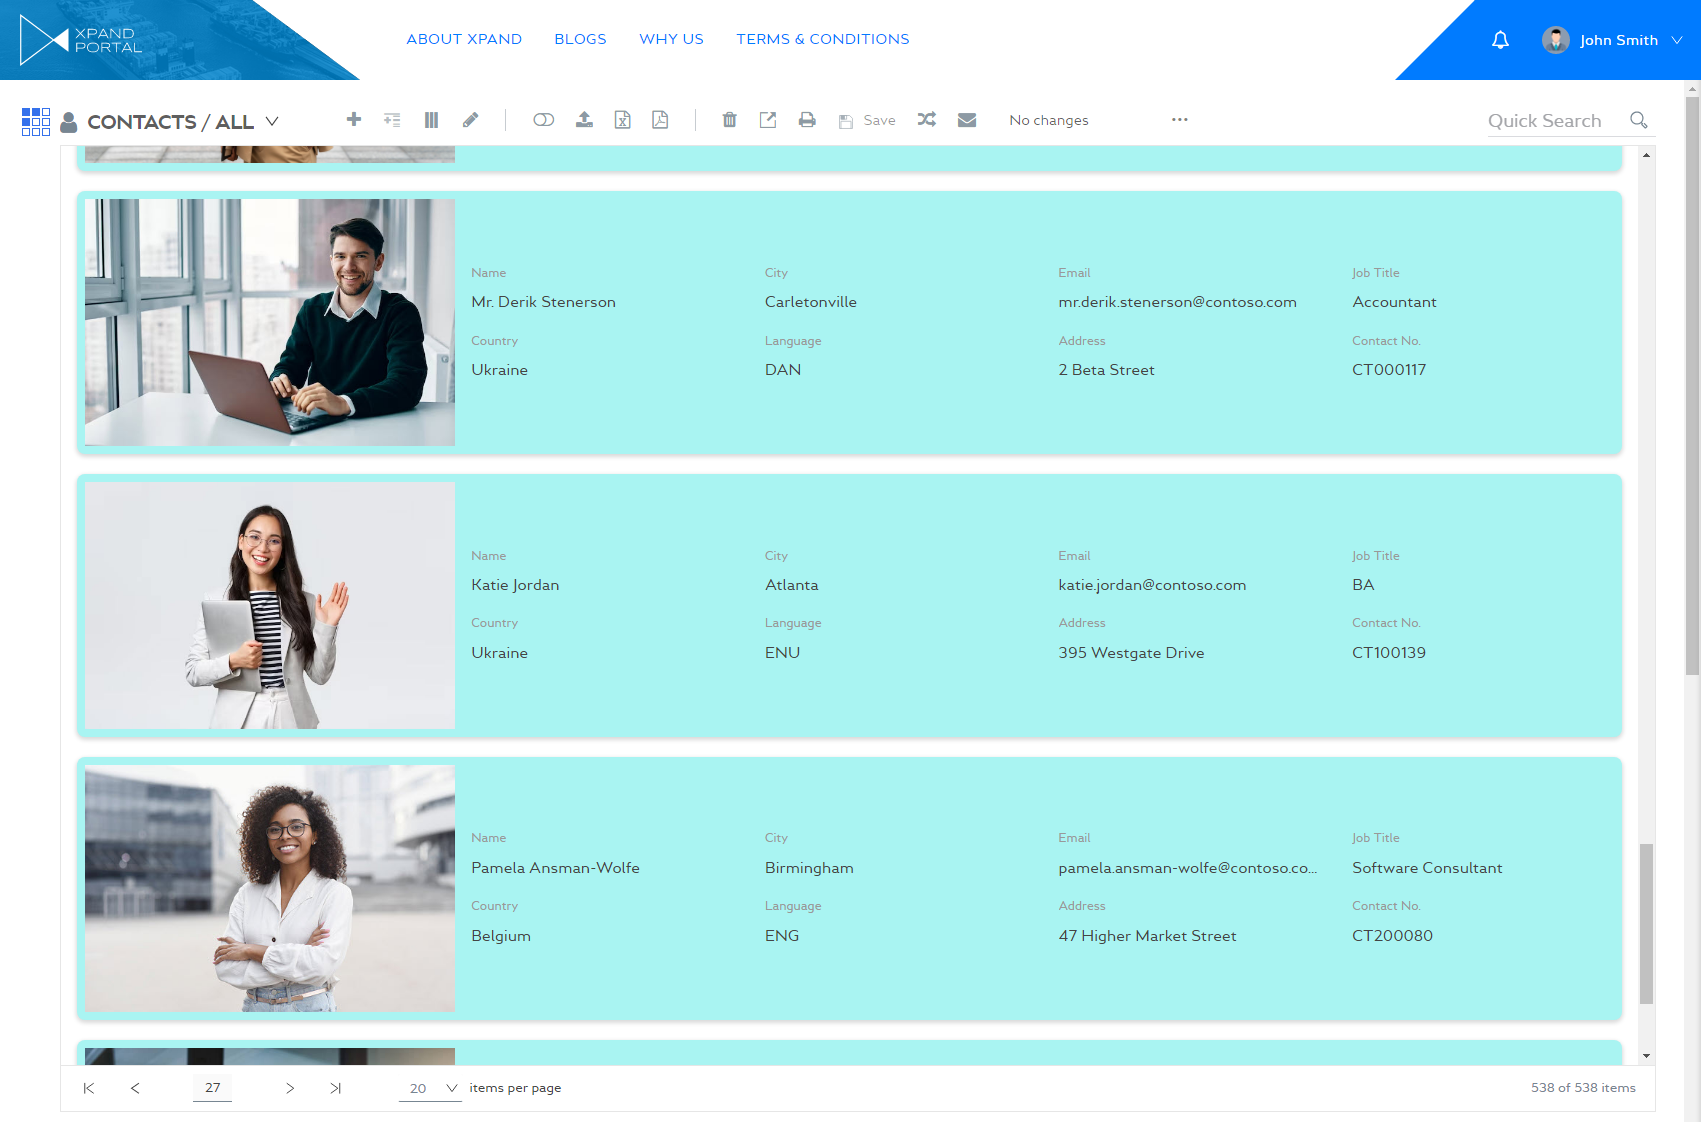
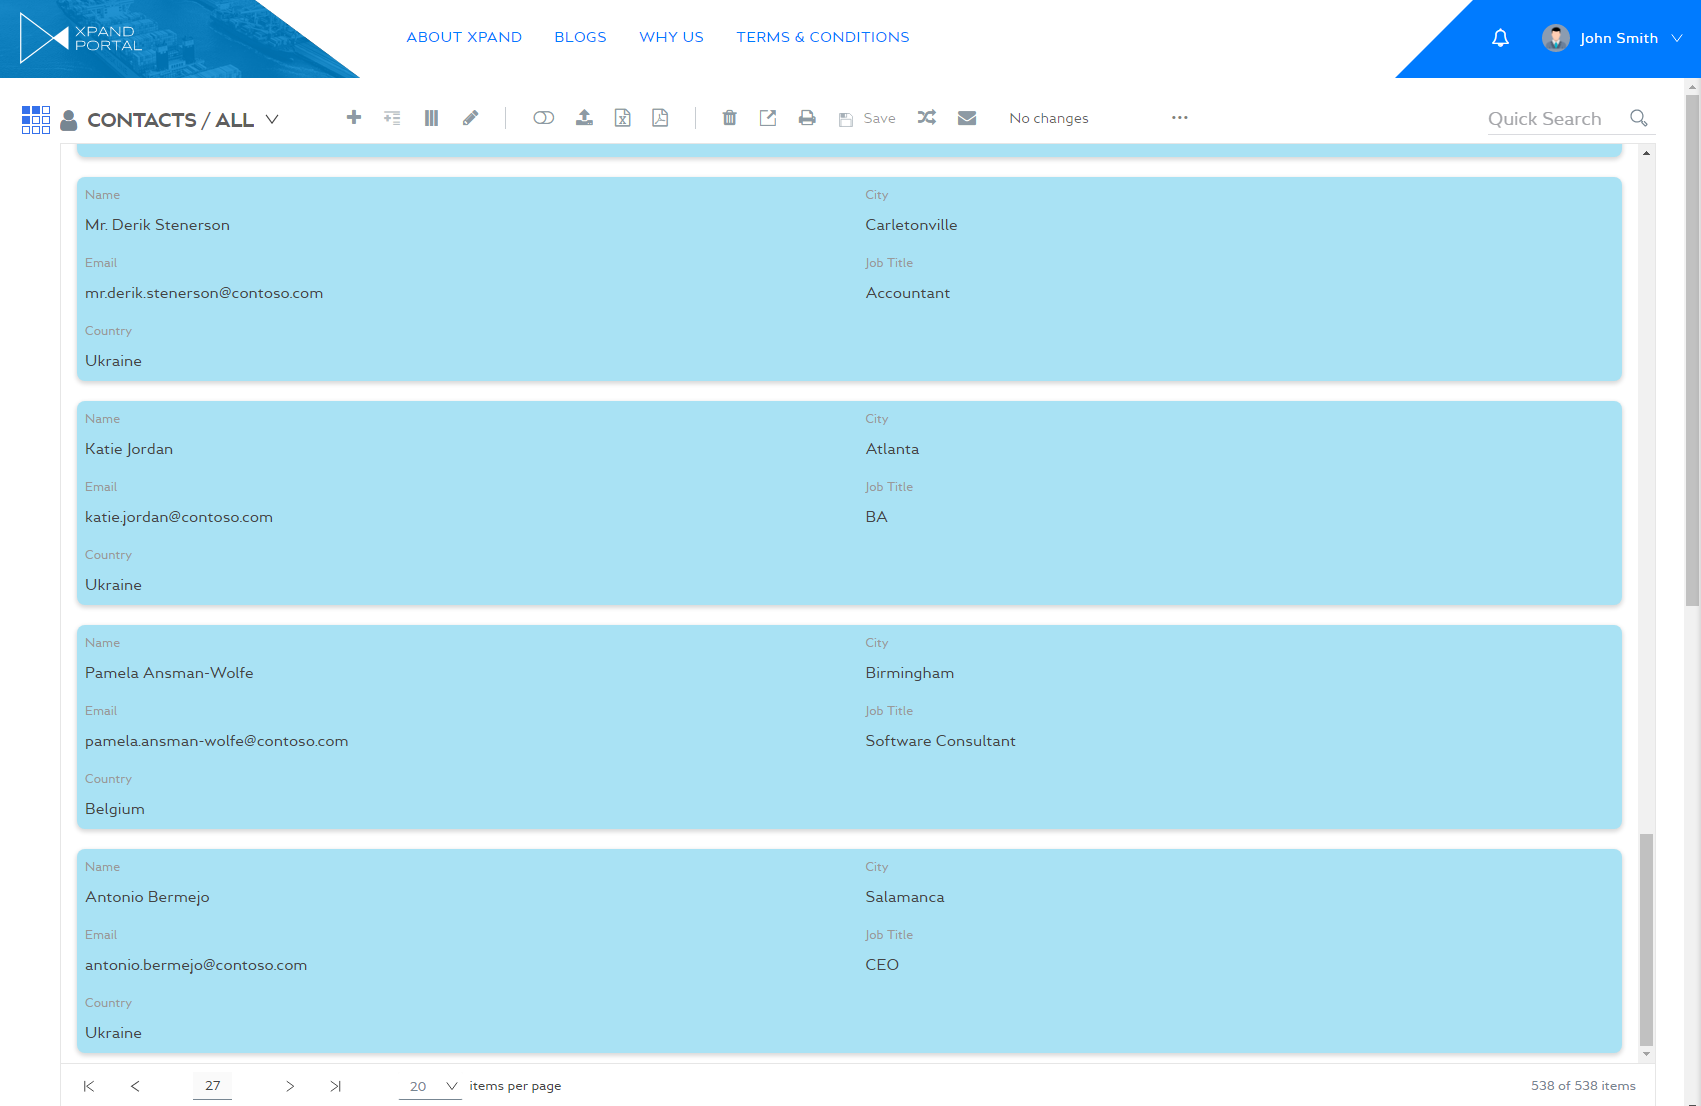
To open the list view, select the Show tiles action (the caption is configurable and may be different in your case) on a grid page where it is configured. Records are shown in the form of tiles. Only configured fields are shown in each tile. The field captions are optional. The List view action becomes inactive while you are in the list view.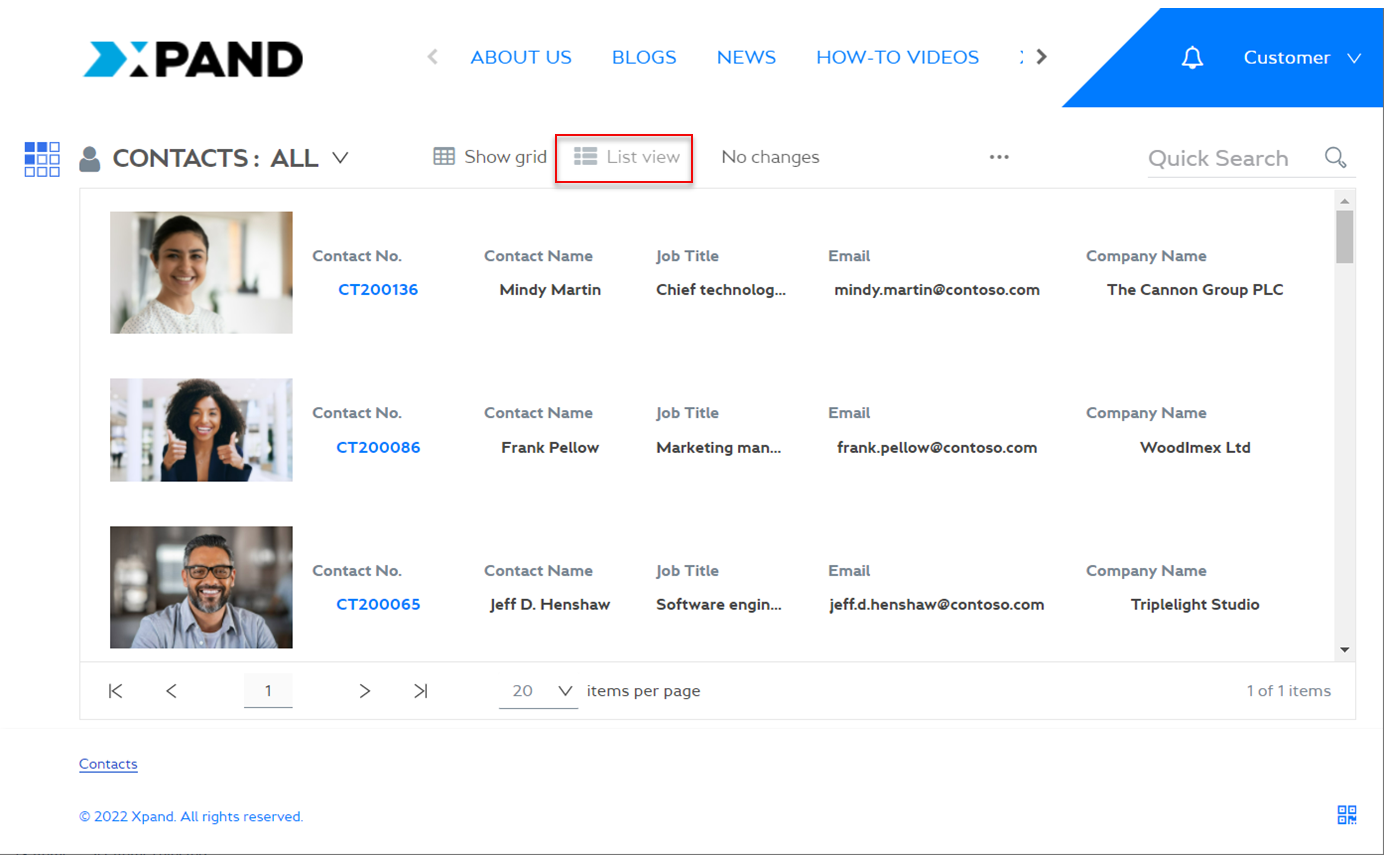
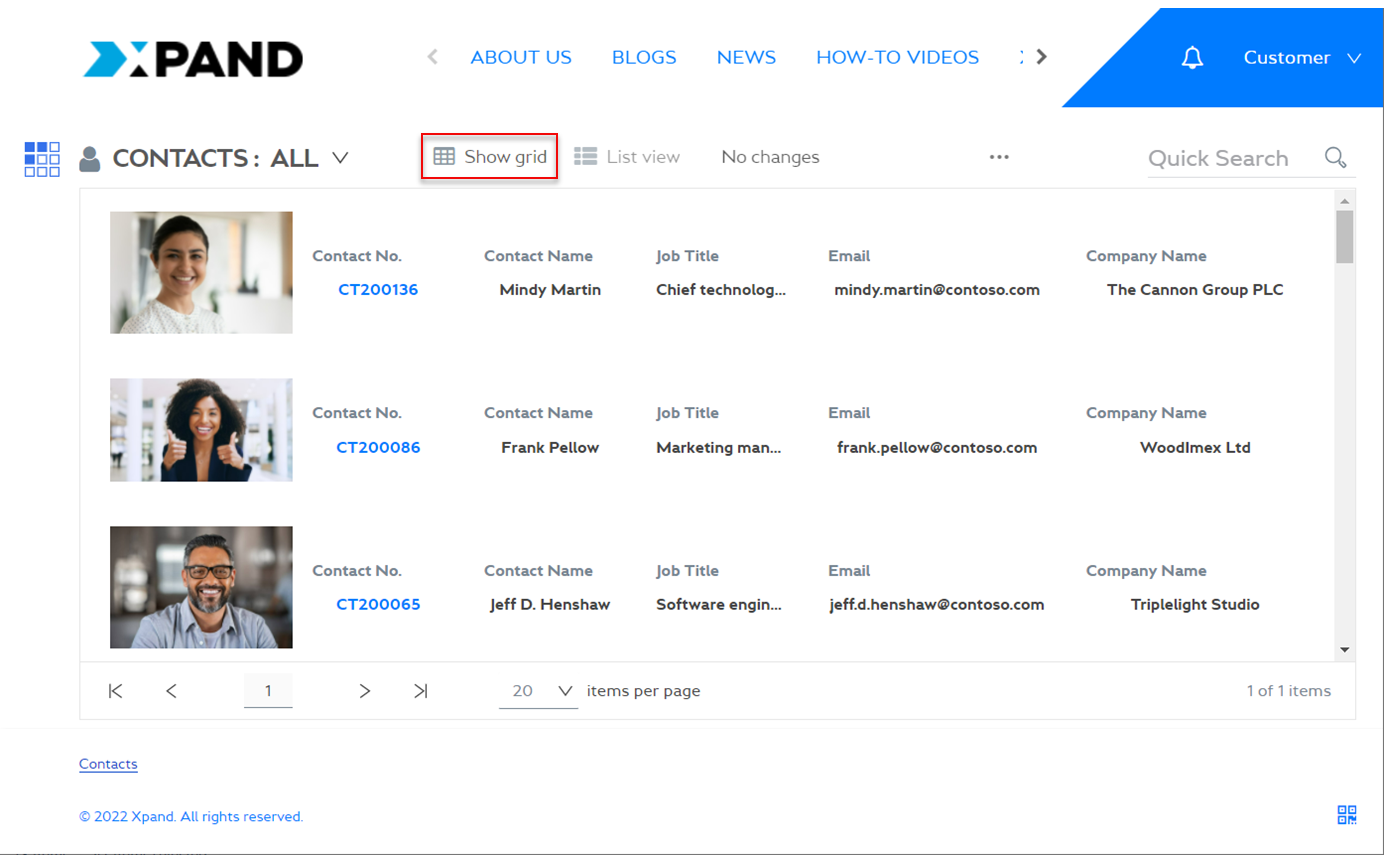
To go back to the grid view, select the Show grid action (the caption is configurable and may be different in your case).
Examples of list view configuration
|
These examples were configured on the version earlier than 4.3.0.0. The configuration and the design may be different in newer versions. For detailed description of the settings, see grid page settings (the List views tab) as well as the List view grid action settings. |
- Example 1: Colored tile background with a small image; a small number of fields

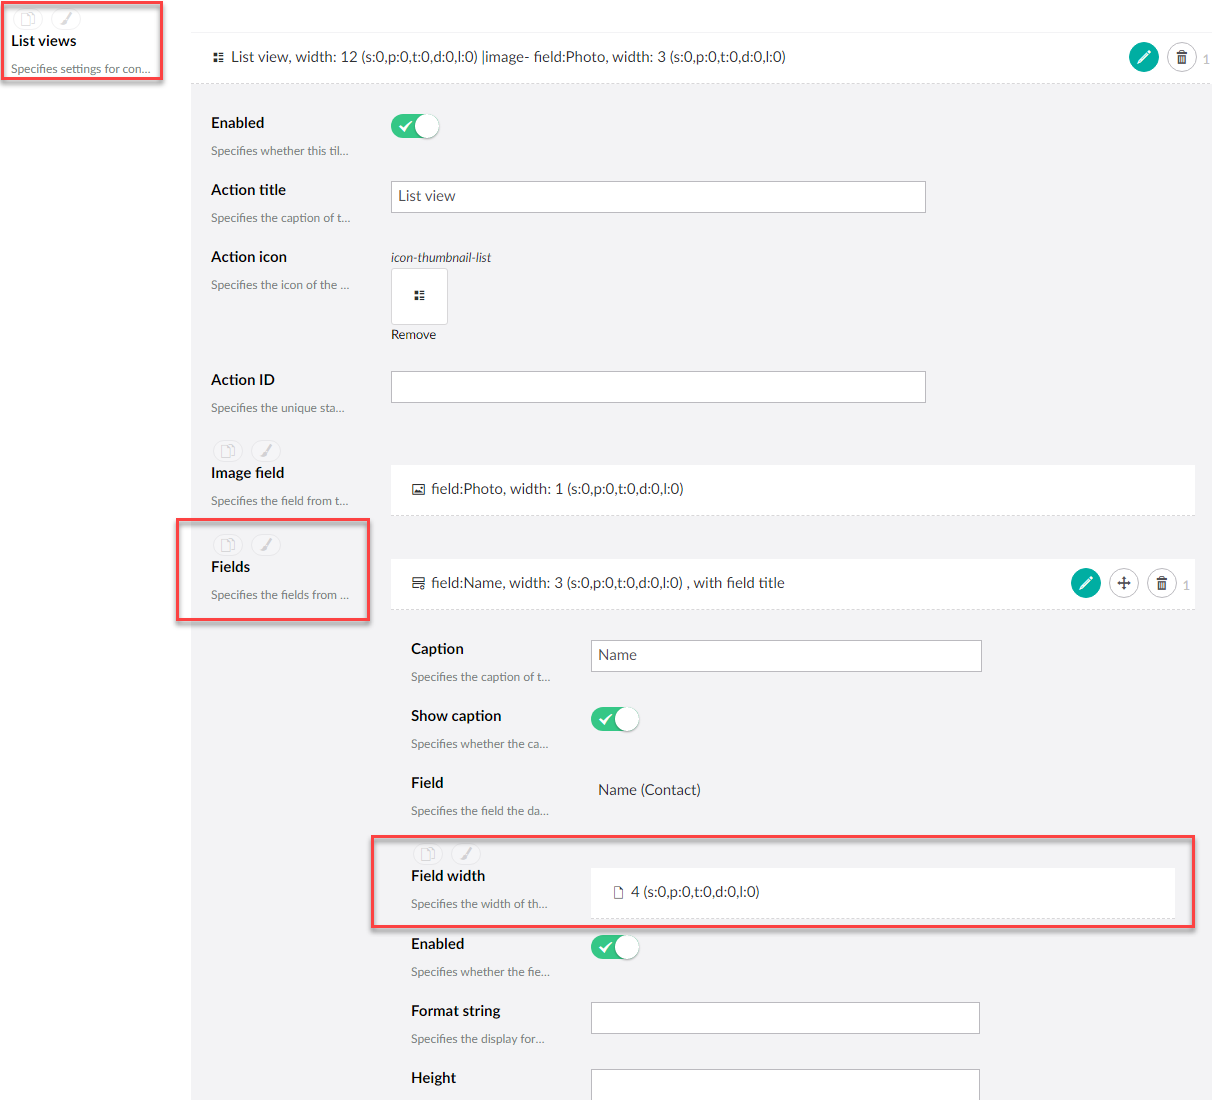
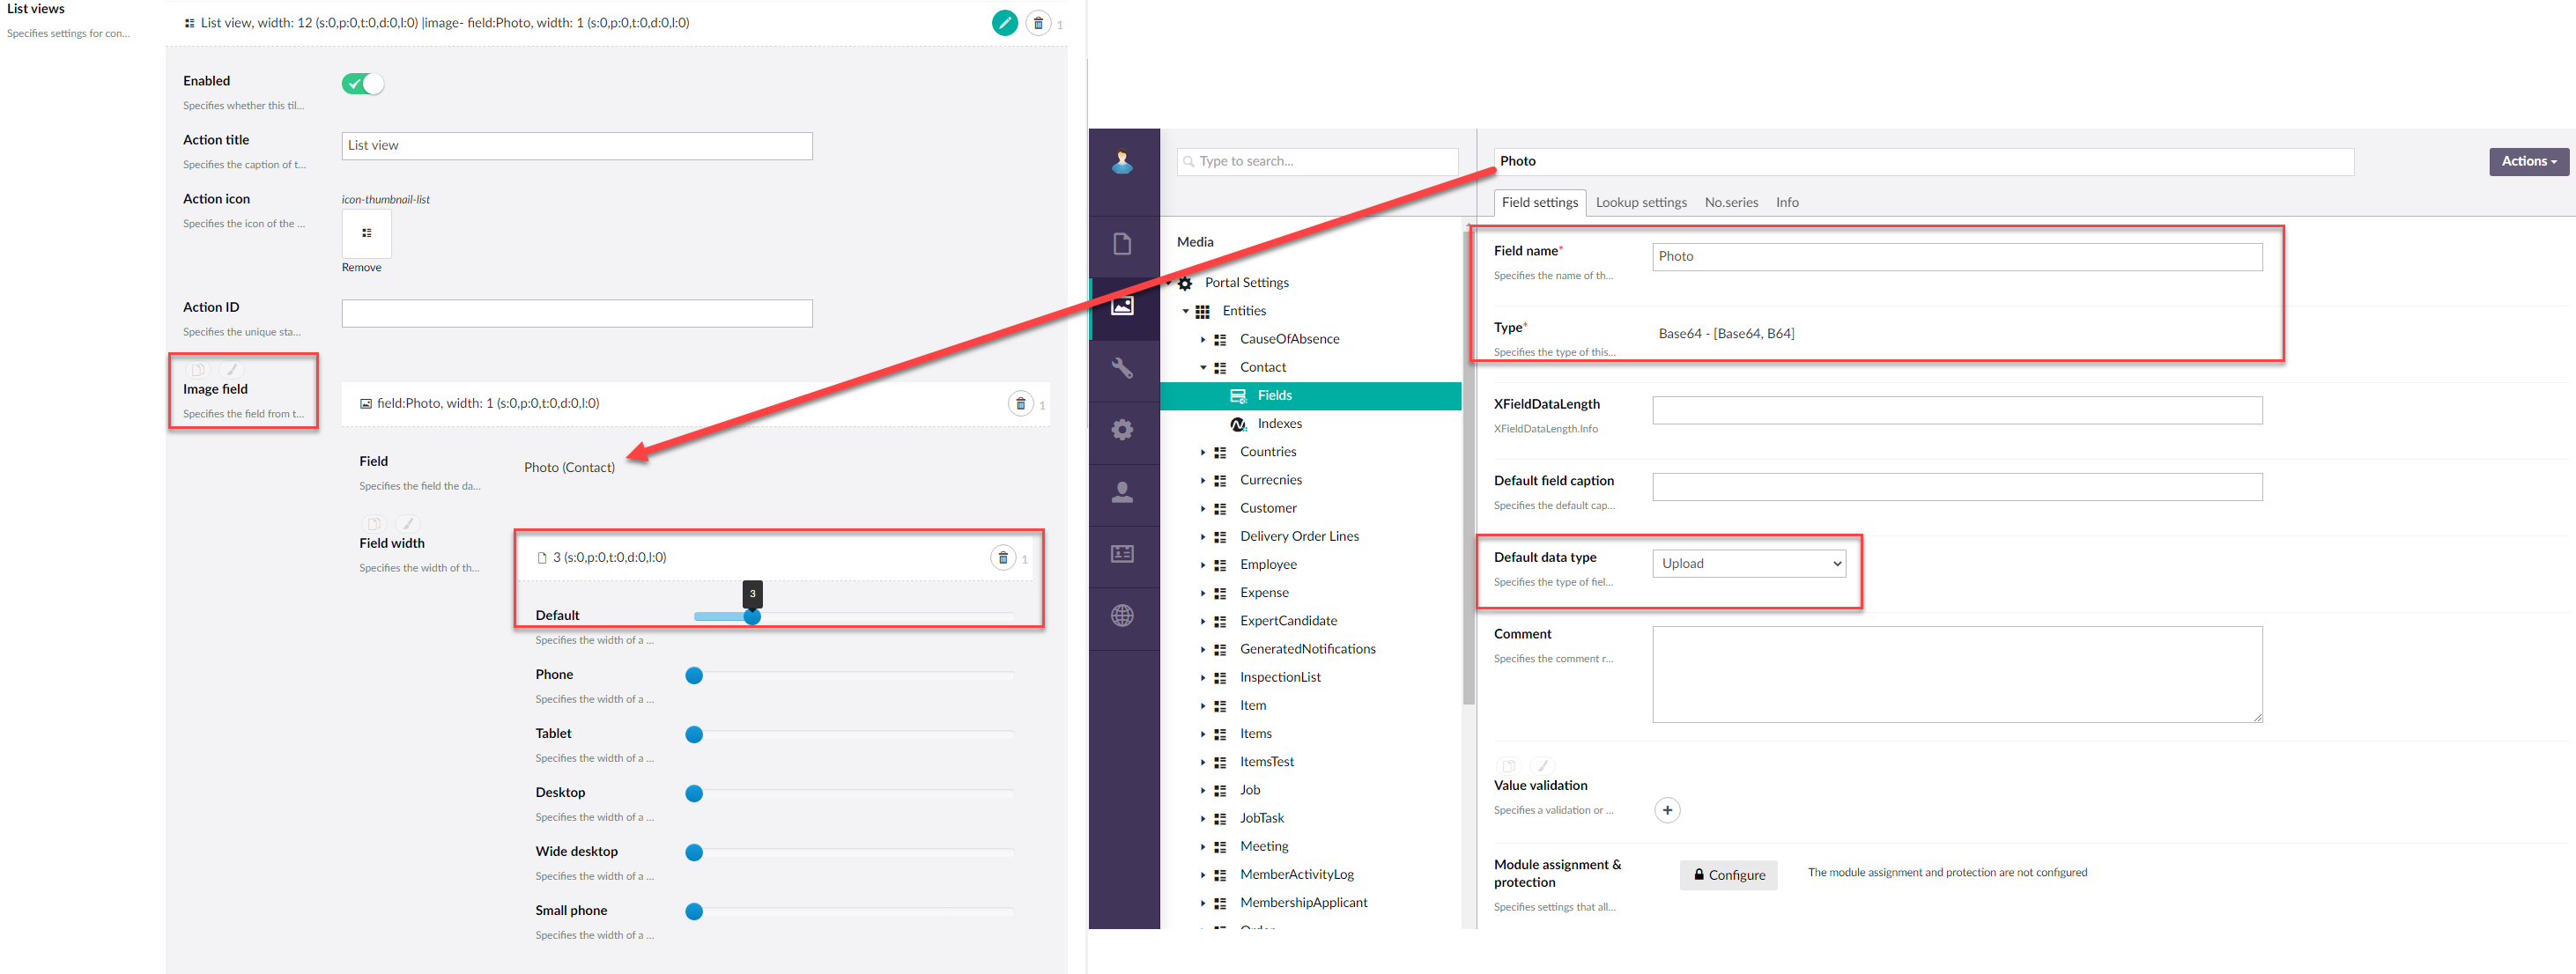
To achieve this configuration, the following list view settings were tweaked:- The field width of an image field was set to 1 out of 12 to make it small in the tile. To be able to display the image, a field with the with the Base64 type (in entity field settings) and Upload data type (in the entity or field settings) was chosen as an image field, and a separate image was uploaded for each record.
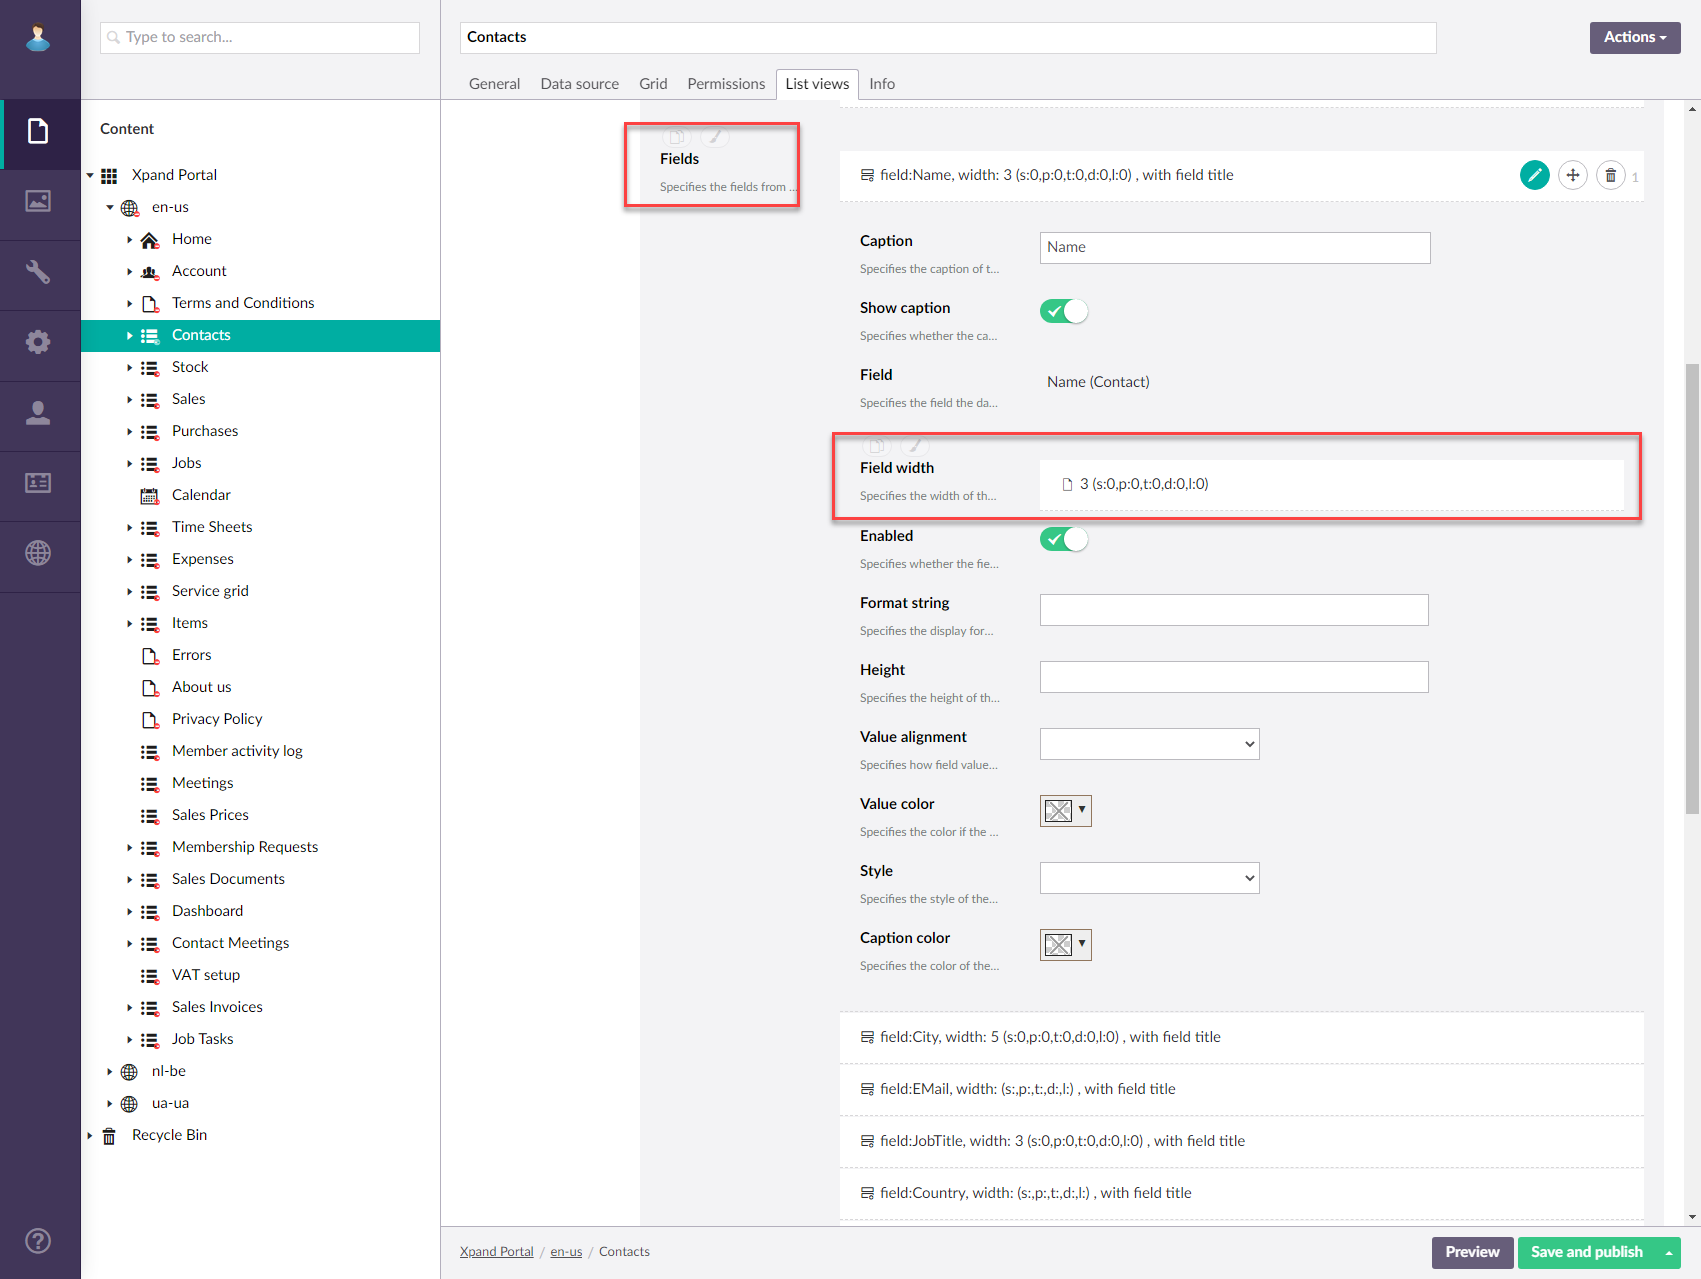
- There are only three non-image fields. To have them displayed in three columns, but with one row, their width was set to 4 out of 12.
- The color background was configured in the Background color setting.
- The field width of an image field was set to 1 out of 12 to make it small in the tile. To be able to display the image, a field with the with the Base64 type (in entity field settings) and Upload data type (in the entity or field settings) was chosen as an image field, and a separate image was uploaded for each record.
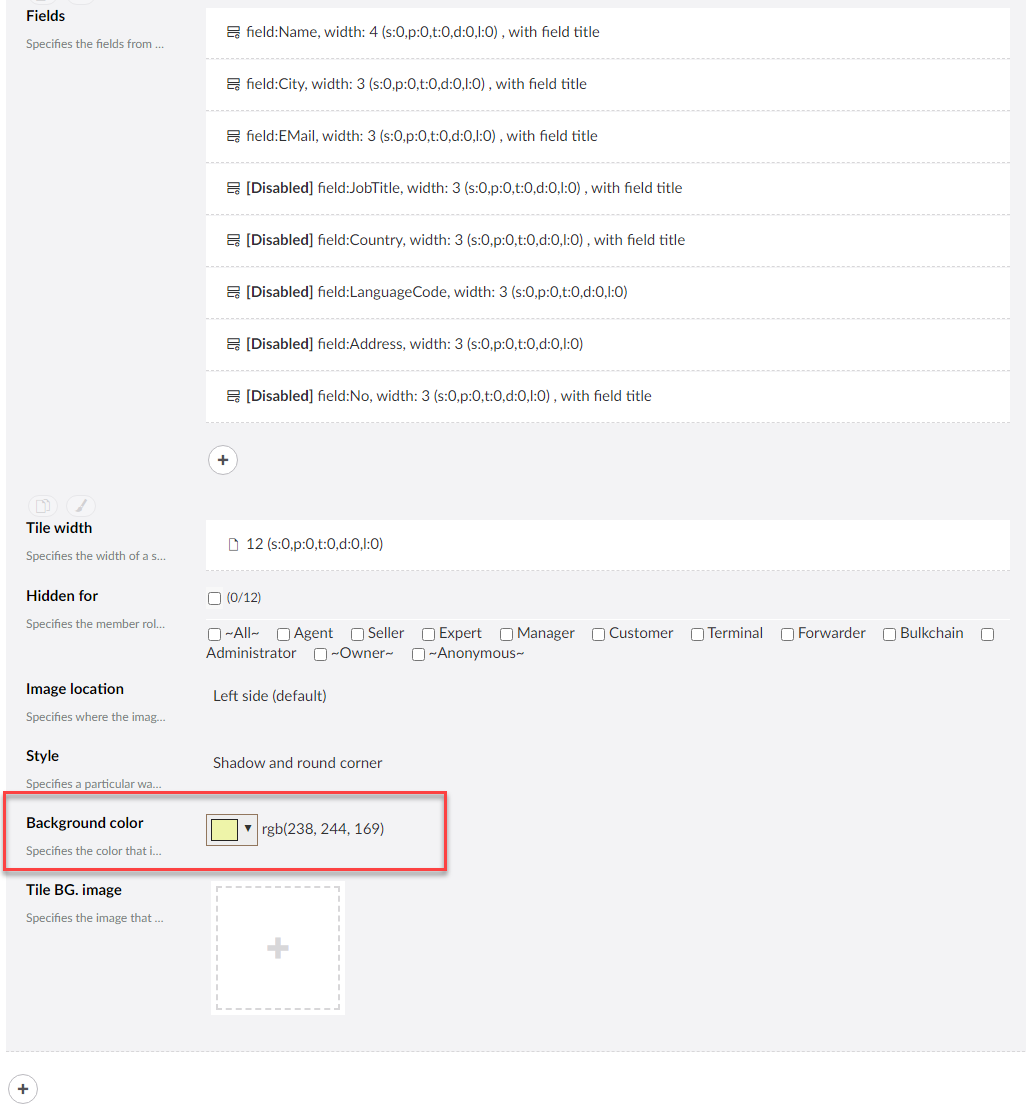
- Example2: Colored background without a bigger image; multiple fields on three rows.
To achieve this configuration, the following list view settings were tweaked:- The field width of an image field was enlarged (3 out of 12). To be able to display the image, a field with the with the Base64 type (in entity field settings) and Upload data type (in the entity or field settings) was chosen as an image field, and a separate image was uploaded for each record.
- To have the fields displayed on 4 rows, the field width of non-image fields was set to 3 out of 12.
- The color background was configured in the Background color setting.
- The field width of an image field was enlarged (3 out of 12). To be able to display the image, a field with the with the Base64 type (in entity field settings) and Upload data type (in the entity or field settings) was chosen as an image field, and a separate image was uploaded for each record.
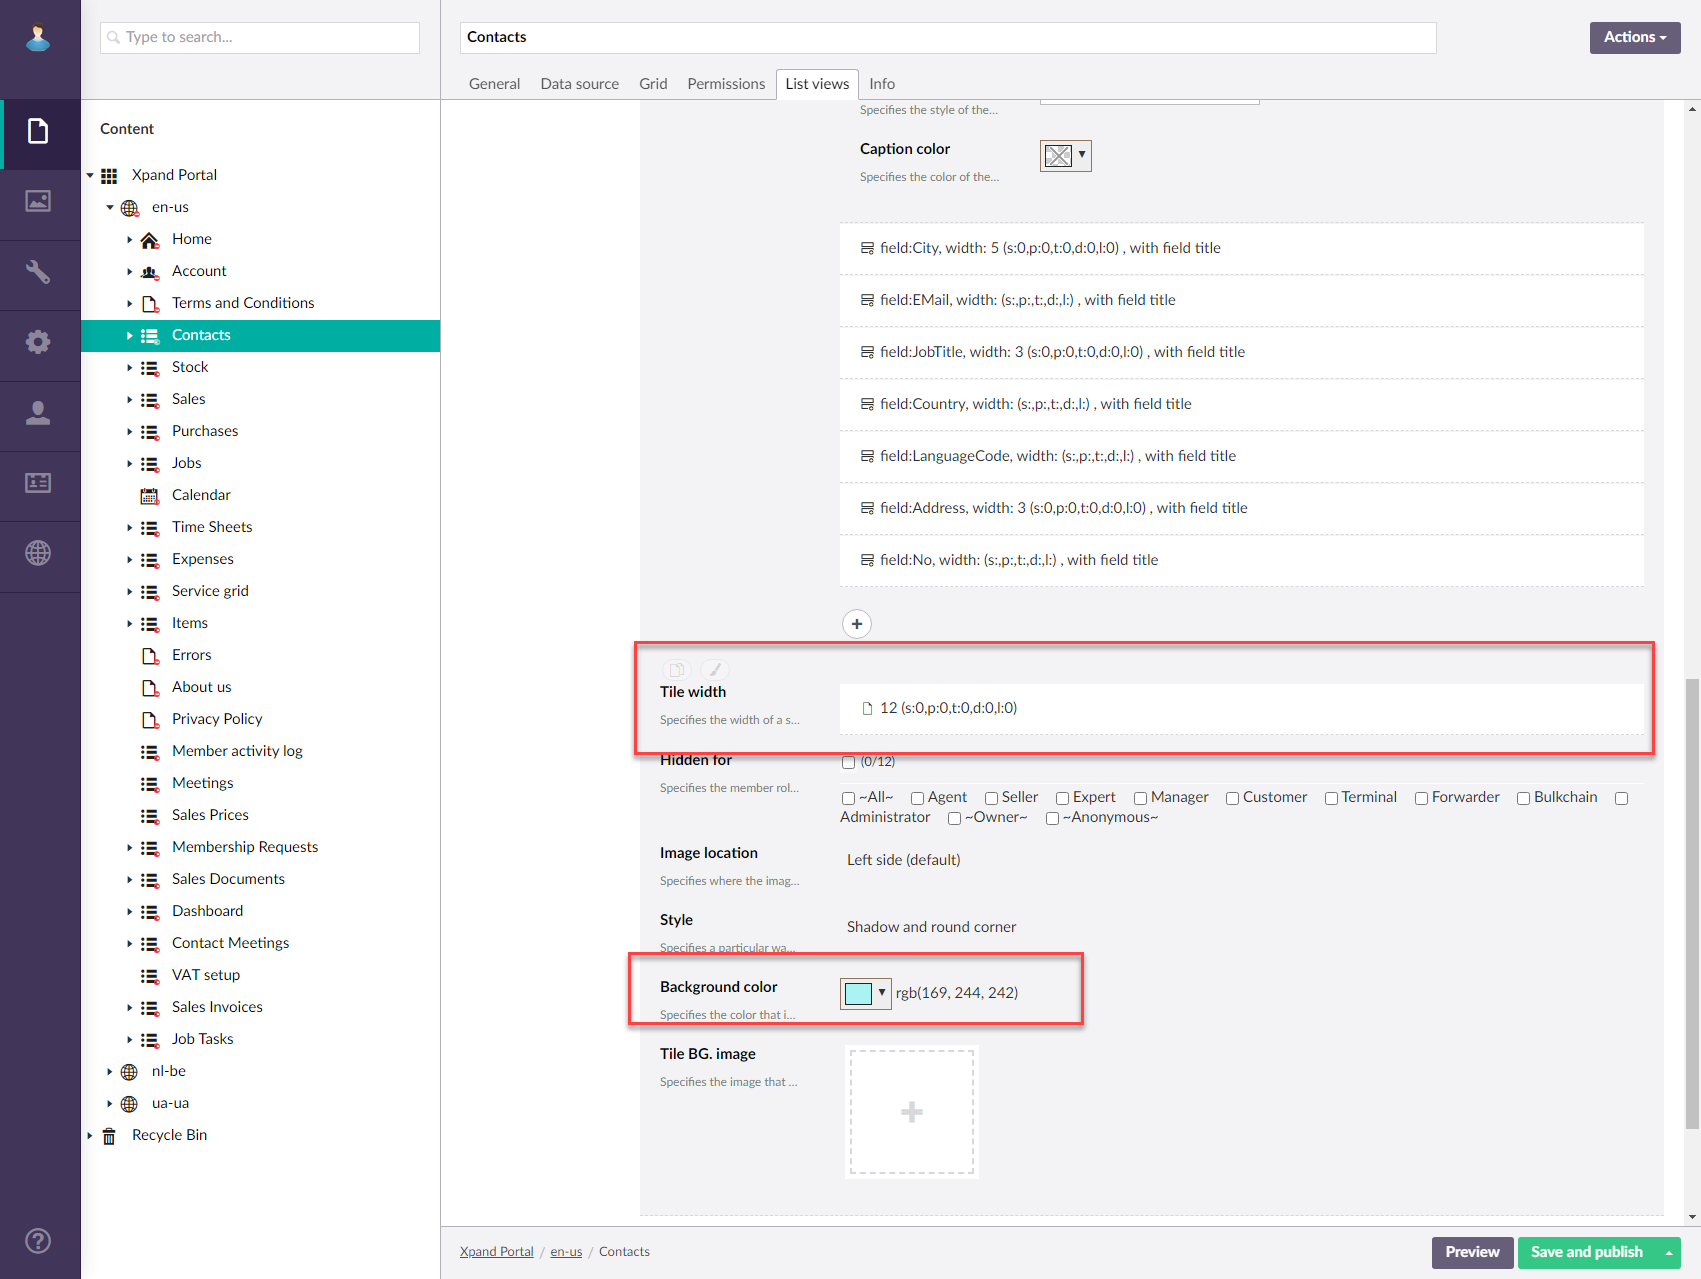
- Colored background without an image; a big number of fields on two rows.
To achieve this configuration, the following list view settings were tweaked:- An image field was not specified/disabled so that an image is not displayed.
- To have the fields displayed in two columns, the field width was set to 6 out of 12 for non-image fields.
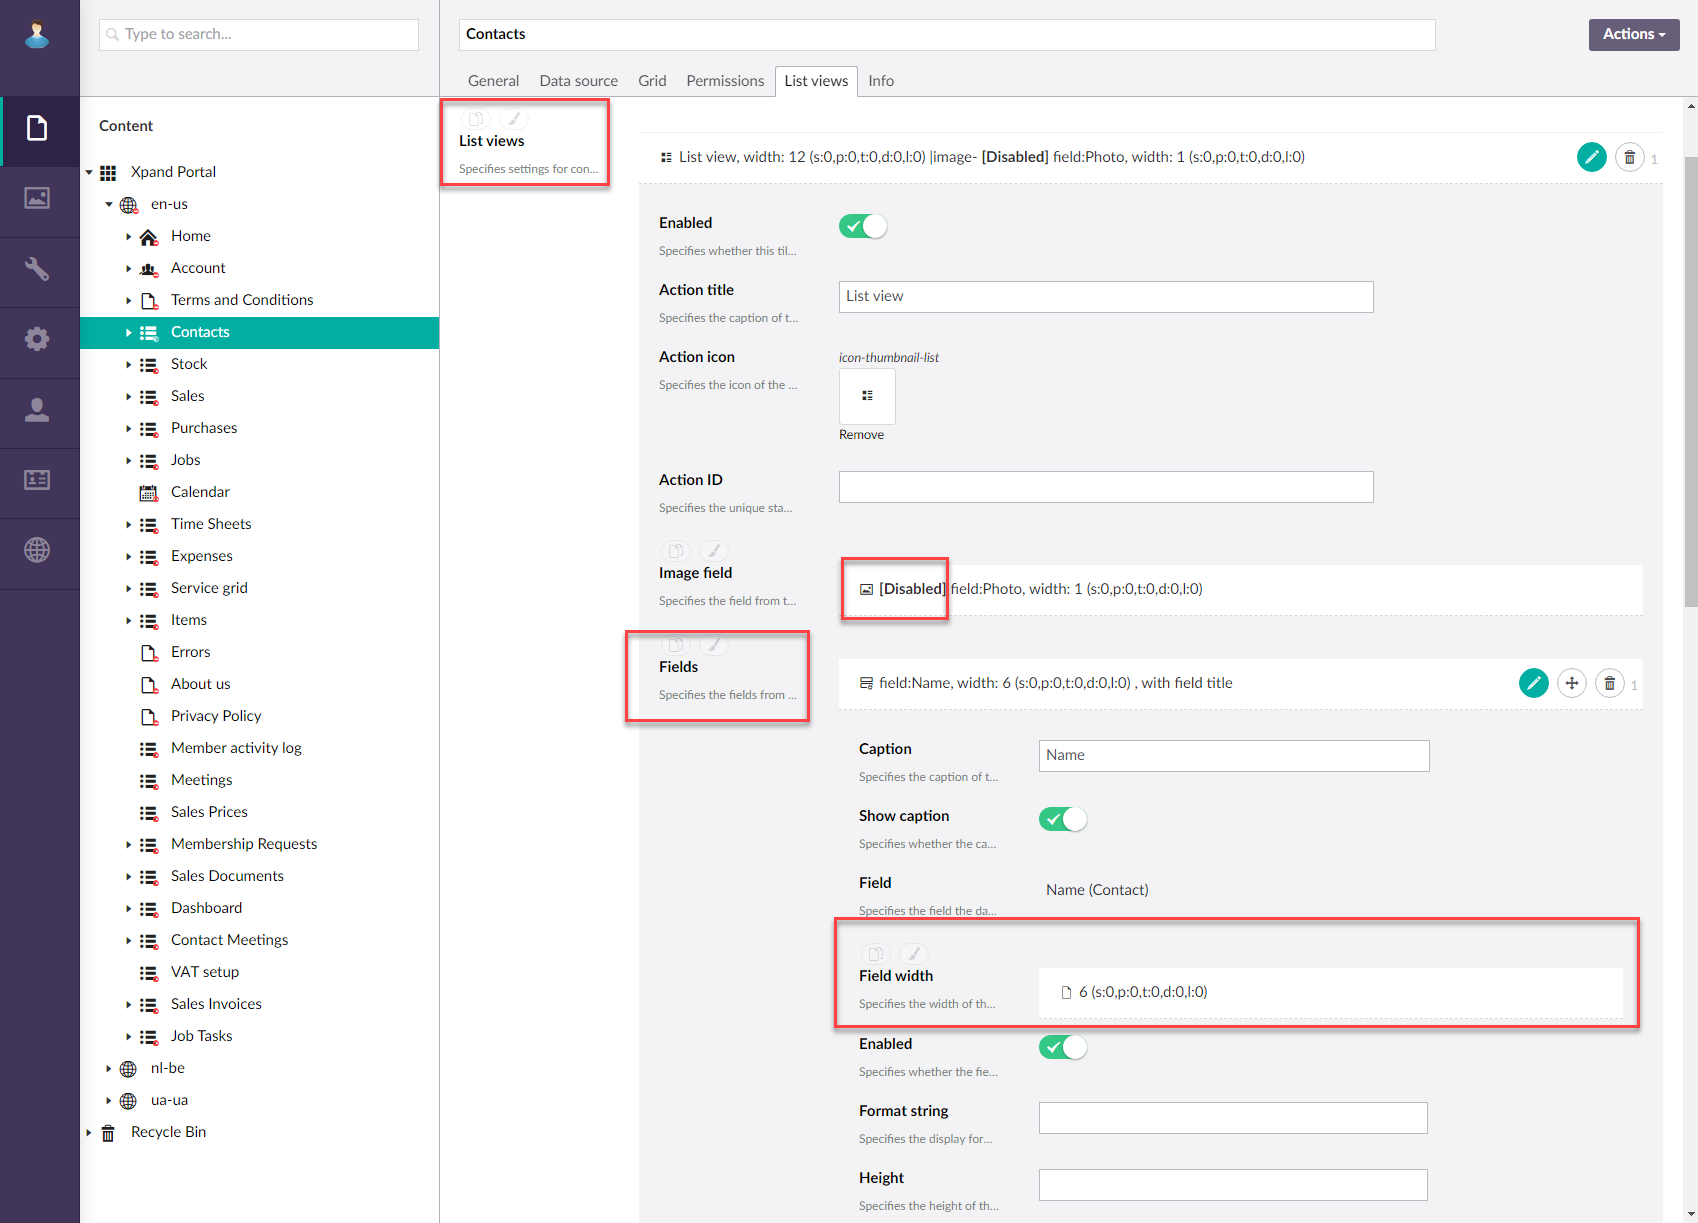
- The color background was configured in the Background color setting.
- Multiline field with an image
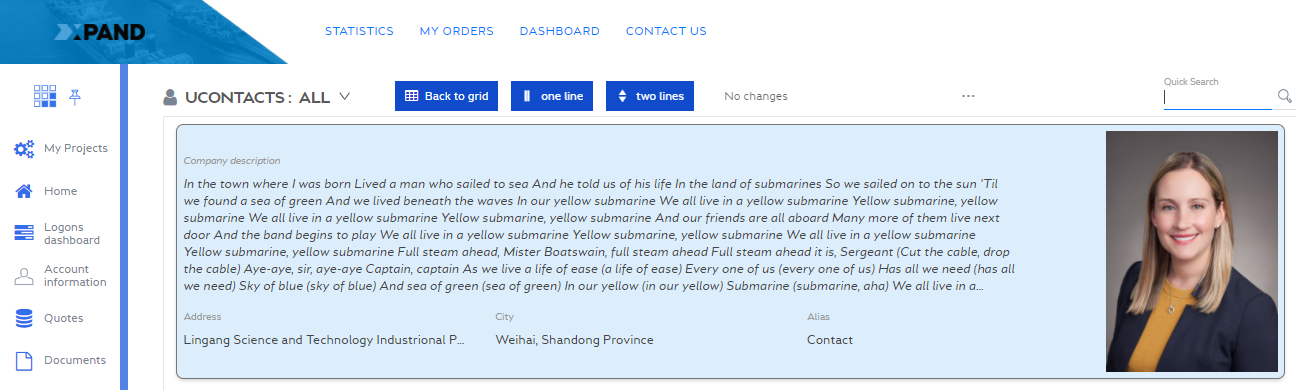
To achieve this configuration, one of the used non-image fields has the Multiline data type. Other settings are similar to the ones on the examples above.