Schedule automatic synchronization of data
Xpand Portal Connector uses the standard Business Central job queue entries for various automatic operations during data synchronization.
Automatic import and export of portal entities
Portal entities and their data can be synchronized between Microsoft Dynamics 365 Business Central and Xpand Portal in two ways:
- Manually – Use manual synchronization when you want to force portal entity or data synchronization immediately after making some changes in the configuration without having to wait until scheduled synchronization takes place. Manual data synchronization is recommended for the first synchronization of the entity with the portal. During import into BC, only data for an existing portal entity can be imported.
- Automatically using a job queue – This synchronization is used in most scenarios. You must set up two separate job queues, one for importing data into Microsoft Dynamics 365 Business Central from the portal, and the other – for exporting data from Microsoft Dynamics 365 Business Central to the portal. Additionally, you need to set up job queue entries that handle related processes, such as automatic notification, reimport of faulty entries, and clearing of the portal integration log.
|
Alternatively, the job queue entries that handle data synchronization can be configured automatically when you enable integration in the portal integration setup. |
|
Data is synchronized only for portal entities that were set up. |
When a portal entity is synchronized/exported for the first time, it becomes available for selection as data source when creating or editing portal pages. All subsequent synchronization attempts will export or import data for that entity depending on the setup in the Portal Entities window.
To schedule automatic export of data
- In Microsoft Dynamics 365 Business Central, choose the
 icon, enter Job Queue Entries, and then select the related link.
 - Select New.
- In the Job Queue Entry Card window, set the Object Type to Run field to Codeunit.
- In the Object ID to Run field, enter 52137927. This is the ID of the Exp. Portal Data via JQ XPND codeunit. This codeunit exports data for portal entities.
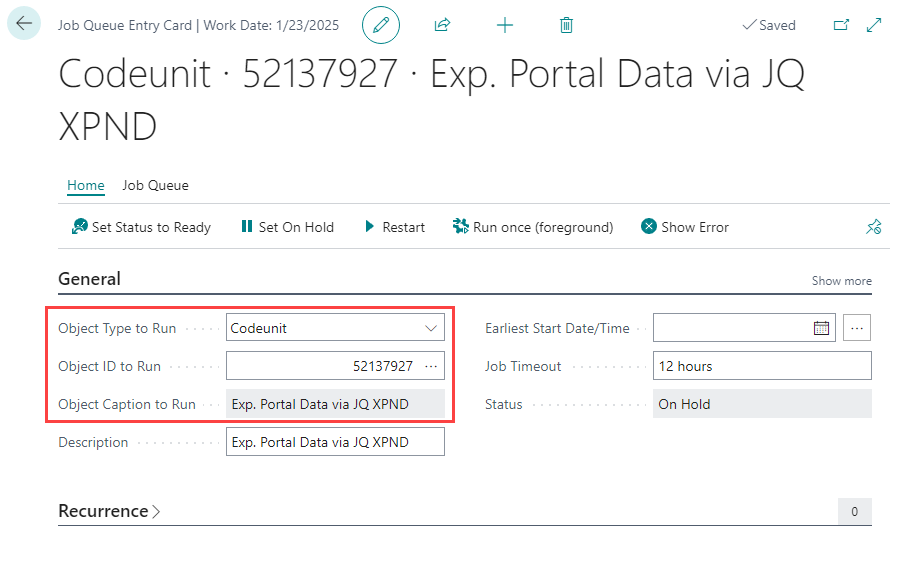
 Note
NoteThe ID and name of the codeunit that exports data may be different depending on the version of Xpand Portal Connector.
- In the Description field, enter a description of the job queue entry for export. By default, it shows the name of the object to run.
- In the Earliest Start Date/Time field, enter the earliest date and time when the job queue entry should be run.
- In the Job Timeout field, enter the maximum time period that the job queue entry is allowed to run.
- On the Recurrence FastTab, configure when the synchronization with Xpand Portal take place.
- Fill in other fields if necessary, and then choose Process > Set Status to Ready.
To schedule the automatic import of data
- In Microsoft Dynamics 365 Business Central, choose the icon, enter Job Queue Entries, and then select the related link.
- Select New.
- In the Job Queue Entry Card window, set the Object Type to Run field to Codeunit.
- In the Object ID to Run field, enter 52137928. This is the ID of the Imp. Portal Data via JQ XPND codeunit. This codeunit imports data for portal entities.
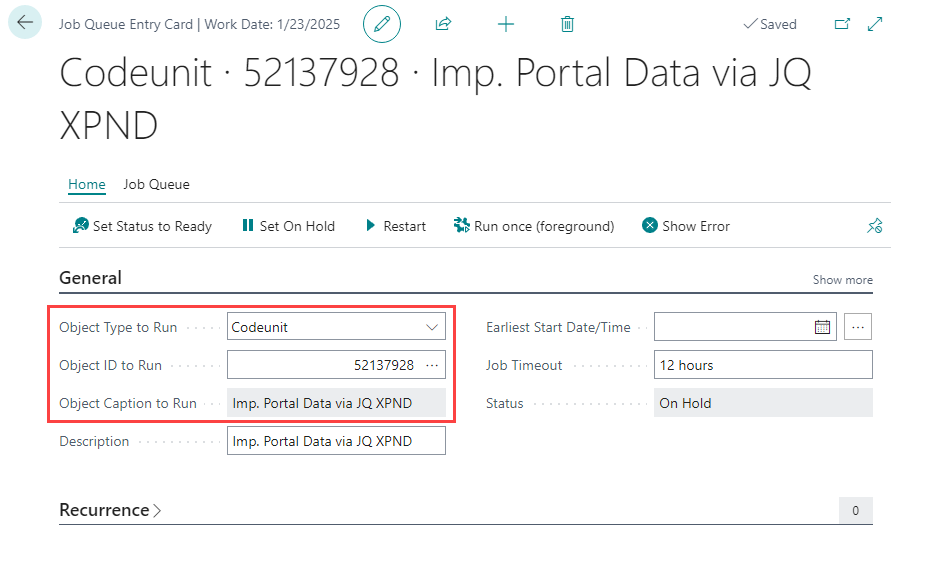 Note
NoteThe ID and name of the codeunit that exports data may be different depending on the version of Xpand Portal Connector.
- In the Description field, enter a description of the job queue entry for import. By default, it shows the name of the object to run.
- In the Earliest Start Date/Time field, enter the earliest date and time when the job queue entry should be run.
- In the Job Timeout field, enter the maximum time period that the job queue entry is allowed to run.
- On the Recurrence FastTab, configure when the synchronization with Xpand Portal should take place.
- Fill in other fields if necessary, and then select Set Status to Ready.
Automatic notifications about issues during import and export
In the portal integration setup, you can enable notifications about issues during the export and import of portal entities that will be sent to the specified email(s).
Notifications will include the following information:
- Job queue entry(ies) (including the object type to run, ID to run, and object caption) that stopped running due to an error. Only job queue entries that handle import (codeunit 52137928) and export (codeunit 52137927) are verified.
- The reason why the job queue entry(ies) stopped running.
- Error text.
For this feature to work, you need to set up a job queue entry that will handle these notifications.
To schedule automatic notifications about export and import errors
- In Microsoft Dynamics 365 Business Central, choose the icon, enter Job Queue Entries, and then select the related link.
- Select New.
- In the Job Queue Entry Card window, set the Object Type to Run field to Codeunit.
- In the Object ID to Run field, enter 52137934. This is the ID of the Check Portal Job Queues XPND codeunit. This codeunit checks whether job queue entries that handle import (codeunit 52137928) and export (codeunit 52137927) stopped due to an error (have the Error status), and, if detected, sends a notification (with job queue entry details, the stoppage reason, and error text) to the emails specified on the Notification FastTab of the Portal Integration Setup window.
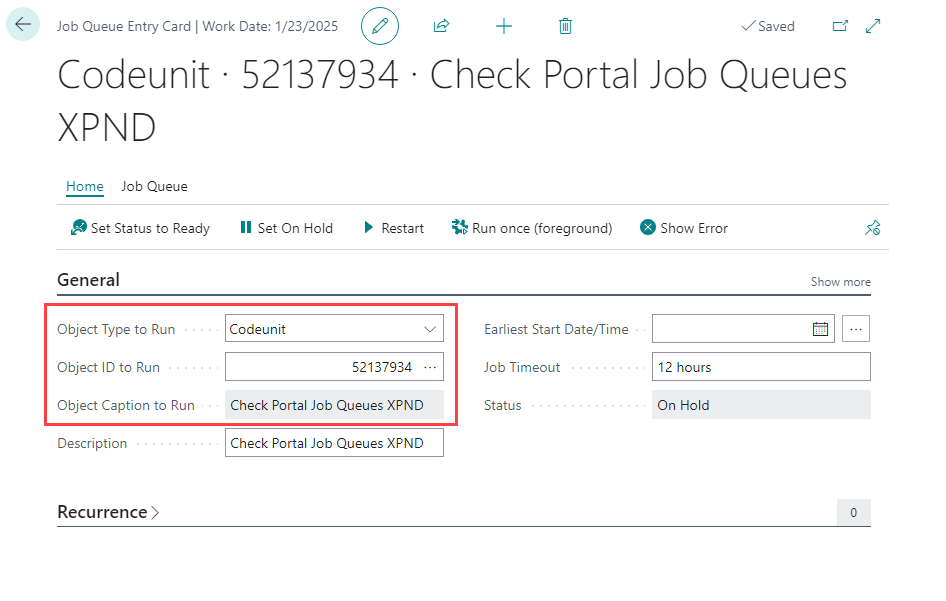 Note
NoteThe ID and name of the codeunit that exports data may be different depending on the version of Xpand Portal Connector.
- In the Description field, enter a description of the job queue entry for import. By default, it shows the name of the object to run.
- In the Earliest Start Date/Time field, enter the earliest date and time when the job queue entry should be run.
- In the Job Timeout field, enter the maximum time period that the job queue entry is allowed to run.
- On the Recurrence FastTab, configure when the synchronization with Xpand Portal should take place.
- Fill in other fields if necessary, and then select Set Status to Ready.
Automatic re-import of faulty portal entities
If a portal entity couldn't be imported at the first attempt due to some error(s), it is considered a "faulty" entity and requires re-import after the issue(s) are resolved. If you set up automatic synchronization import with a short period between runs (e.g. 1 minute between runs), the error log would grow very fast, which is undesired. Therefore, a separate codeunit is used to re-import faulty entities. We recommend setting up the period between runs for the job queue entry that attempts to re-import faulty portal entries to be higher than the period of normal import of portal entries to ensure that the administrator has time to fix the issue and to avoid fast growth of the error log.
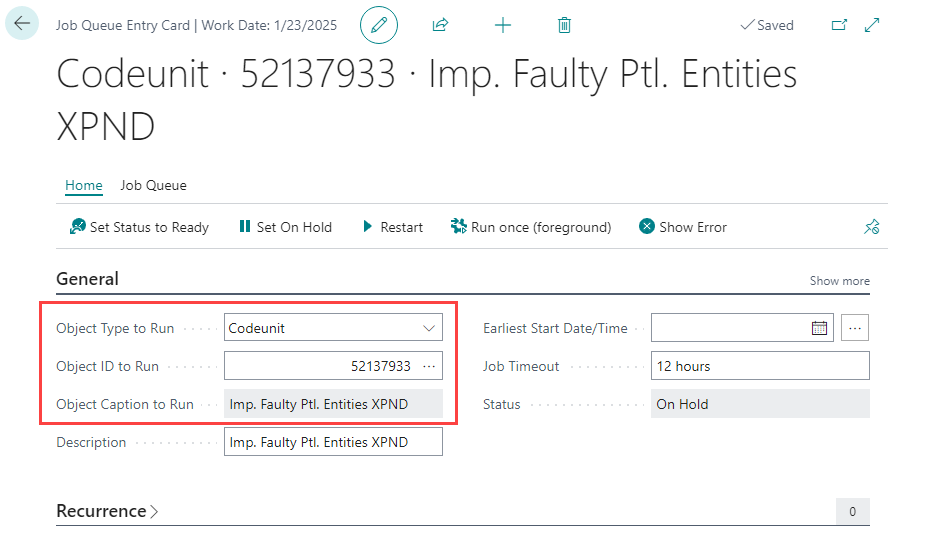
To schedule automatic re-import of faulty portal entries
- In Microsoft Dynamics 365 Business Central, choose the icon, enter Job Queue Entries, and then select the related link.
- Select New.
- In the Job Queue Entry Card window, set the Object Type to Run field to Codeunit.
- In the Object ID to Run field, enter 52137933. This is the ID of the Imp. Faulty Ptl. Entities XPND codeunit. This codeunit attempts to re-import portal entries that couldn't be imported during the first attempt.
 Note
NoteThe ID and name of the codeunit that exports data may be different depending on the version of Xpand Portal Connector.
- In the Description field, enter a description of the job queue entry for import. By default, it shows the name of the object to run.
- In the Earliest Start Date/Time field, enter the earliest date and time when the job queue entry should be run.
- In the Job Timeout field, enter the maximum time period that the job queue entry is allowed to run.
- On the Recurrence FastTab, configure when the synchronization with Xpand Portal should take place.
- Fill in other fields if necessary, and then select Set Status to Ready.
Automatic clearing of the portal integration log
The portal integration log, which stores log entries for all export and import operations, including processing and import errors, will grow over time. This will increase the database size and may have a negative impact on performance. Therefore, we recommend also setting up a job queue entry that automatically clears the log. Alternatively, you can use the Delete Entries Older Than 7 Days or Delete All Entries actions on the portal integration log when it is opened for a portal entity to delete entries manually.
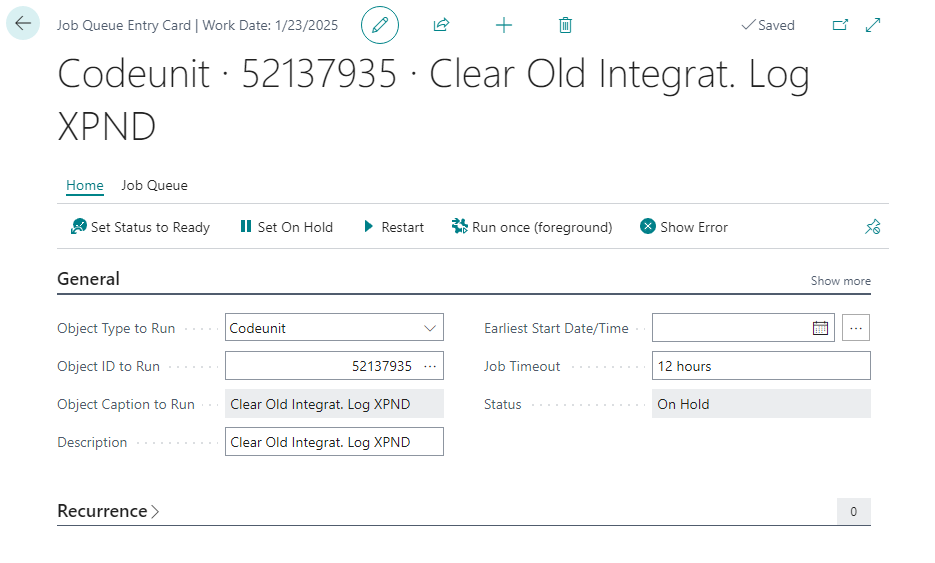
To schedule automatic clearing of the portal integration log (optional)
- In Microsoft Dynamics 365 Business Central, choose the icon, enter Job Queue Entries, and then select the related link.
- Select New.
- In the Job Queue Entry Card window, set the Object Type to Run field to Codeunit.
- In the Object ID to Run field, enter 52137935. This is the ID of the Clear Old Integr. Log XPND codeunit. This codeunit automatically deletes the portal integration log entries that are older than the period specified in the Log Preservation Period setting in the portal integration setup, which is calculated as follows: if the date in the Start Date-Time field is older than the date calculated as (Work Date - Log Preservation Period), then the entry is applicable for deletion.
 Note
NoteThe ID and name of the codeunit that exports data may be different depending on the version of Xpand Portal Connector.
- In the Description field, enter a description of the job queue entry for import. By default, it shows the name of the object to run.
- In the Earliest Start Date/Time field, enter the earliest date and time when the job queue entry should be run.
- In the Job Timeout field, enter the maximum time period that the job queue entry is allowed to run.
- On the Recurrence FastTab, configure when the synchronization with Xpand Portal should take place.
- Fill in other fields if necessary, and then select Set Status to Ready.
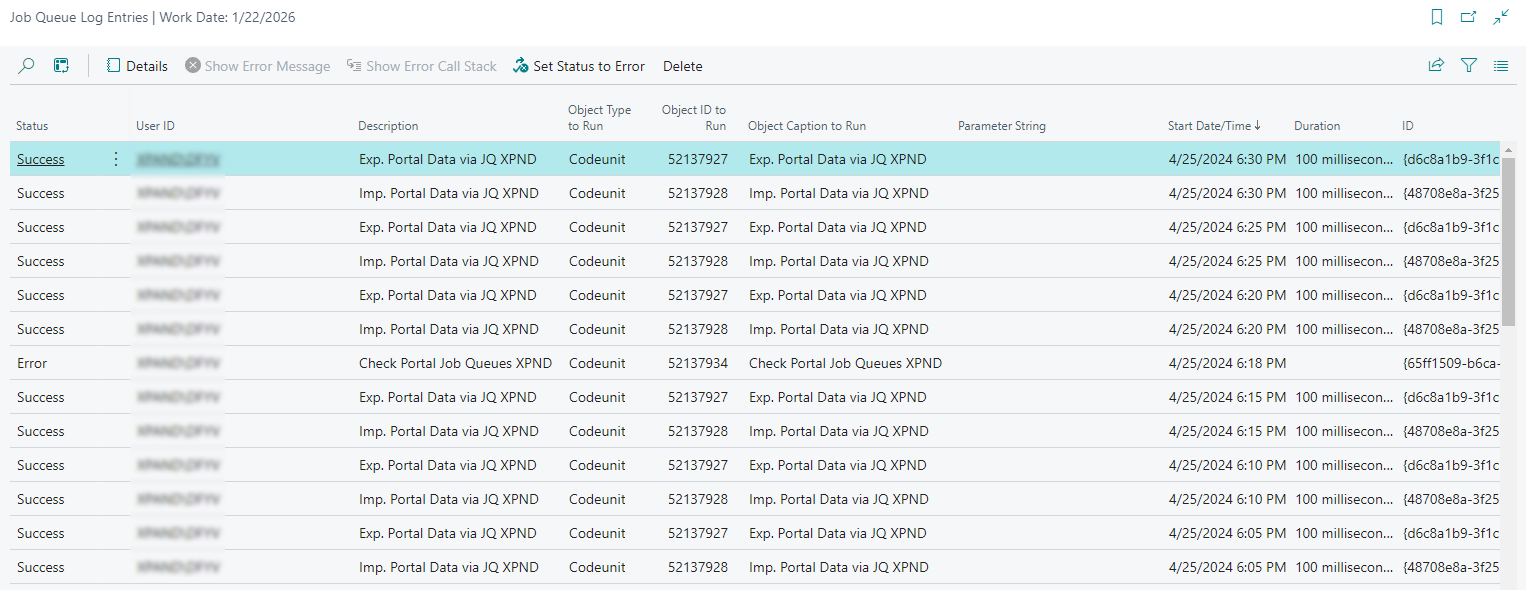
Job Queue Entries Log
To view the log information for job queue entries that have run or have not run due to errors, you can use the Job Queue Log Entries window. Choose the ![]() icon, enter Job Queue Log Entries, and then select the related link.
icon, enter Job Queue Log Entries, and then select the related link.