Portal integration setup
Portal Integration Setup is the place where you can enable or disable integration of Microsoft Dynamics 365 Business Central with Xpand Portal as well as configure other general settings.
To perform the general portal integration setup
- In Microsoft Dynamics 365 Business Central, choose the
 icon, enter Portal Integration Setup, and then select the related link.
 - If the page is opened in the read-only mode, choose the
 icon to make changes on the page.
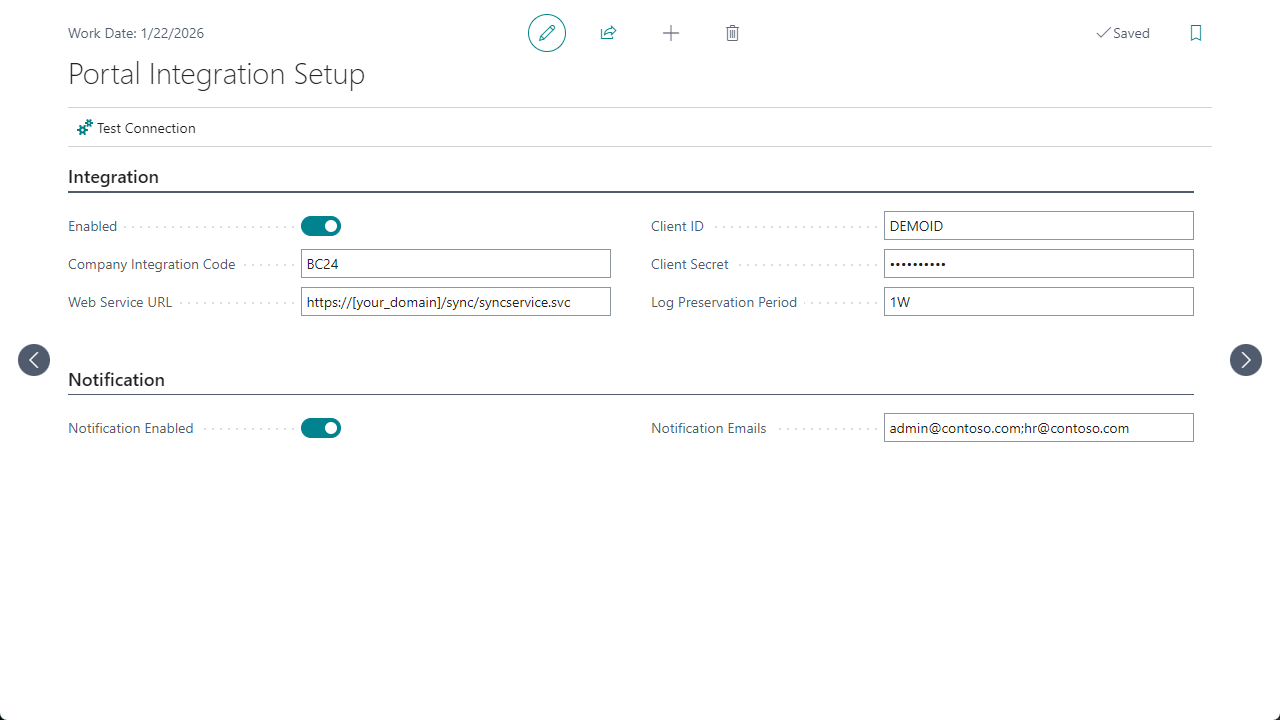
- On the Integration FastTab, configure the general integration settings as described below:
- Enabled - Use this switch to enable or disable the integration of Microsoft Dynamics 365 Business Central with Xpand Portal:
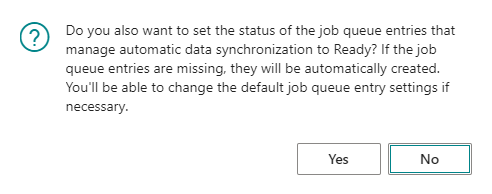
- When you enable integration, choose Yes on the confirmation message that appears if you also want to have job queue entries that handle data synchronization automatically configured, unless they are present already, and set their status to Ready. If the required job queue entries are already present, only their status will be updated if necessary. If you choose No, you will need to configure the required job queue entries manually.
- When you disable integration, choose Yes on the confirmation message that appears if you also want to suspend the job queue entries that manage automatic data synchronization.

- When you enable integration, choose Yes on the confirmation message that appears if you also want to have job queue entries that handle data synchronization automatically configured, unless they are present already, and set their status to Ready. If the required job queue entries are already present, only their status will be updated if necessary. If you choose No, you will need to configure the required job queue entries manually.
- Company Integration Code - Specifies the integration code that is used to link this Business Central company with Xpand Portal for data synchronization. This code must be the same as the code in the corresponding member field to synchronize data for that member with this BC company.
- Web Service URL - Specifies the URL of the web service through which communication with Xpand Portal will be handled: https://{domain}/sync/SyncService.svc where {domain} is the name of your portal domain.
- Authentication Type - Specifies the type of authentication that is used to grant access to Xpand Portal for this connector and this Business Central company.
- Legacy - Access is granted using the client secret and client ID. The credentials (client ID and client secret) are sent with each request. If you use this type, you need to:
1) Configure the client ID in the Client ID field.
2) Configure the client secret in the Client Secret field.
3) Choose Test Connection to verify that the connection is valid. - Authorization Code (with PKCE) - OAuth 2.0 access is granted using the authorization code that you get after signing in; this code provides a token that is used during API requests. If you use this type, you need to:
1) Configure the client ID in the Client ID field.
2) Configure the client secret in the Client Secret field.
3) Copy the generated URL from the Redirect URL field to the corresponding setting on the portal side: Media > Site settings > API clients tab > Clients > (within client settings) Other settings > Redirect URI.
4) Choose Authorize (to get a token, which is used to send requests), and enter the login and password to sign in to the portal with a member who has permissions to use API (the Allow using API switch is enabled). If you sign in successfully, a message will be displayed about successful authorization. The obtained token is stored securely in BC. The Authorize action is available only when the Authorization Code authentication type is chosen.
5) Choose Test Connection to verify that the connection is valid. - Password Credentials - OAuth 2.0 access is granted using the specified username and password, which provides a token for web requests. If you use this type, you need to:
1) Configure the client ID in the Client ID field.
2) Configure the client secret in the Client Secret field.
3) In the Username setting, enter the username of a portal member who has permissions to use API (the Allow using API switch is enabled).
4) In the Password setting, enter the password of a portal member who has permissions to use API (the Allow using API switch is enabled).
5) Сhoose Test Connection to verify that the connection is valid.
- Legacy - Access is granted using the client secret and client ID. The credentials (client ID and client secret) are sent with each request. If you use this type, you need to:
- Client ID - Specifies the ID of the Business Central client. This ID will be used to authorize communication between Xpand Portal and Business Central. The client ID is configured on the Xpand Portal side, in CMS, in Media > Site settings > OAuth & SSO settings. For a new installation of Xpand Portal and Xpand Portal Portal Connector, this client ID is pre-configured and should be DEMOID. If you install the connector for an existing portal, this ID may be different in your case.
- Client Secret - Specifies the secret (password) of the Business Central client. This secret is used to authorize communication between Xpand Portal and Business Central. The client secret is encoded. Therefore, enter the password—not the generated secret key currently displayed on the portal—that was used when configuring the secret key on the Xpand Portal side in Media > Site settings > OAuth & SSO settings. Unless instructed otherwise, use the following client secret: abcABC123!
 Note
NoteThe client ID and client secret are used as additional authentication for portal connection. In Xpand Portal CMS, in Media > Site settings > OAuth & SSO settings, the client is created, and its ID and secret (password) are filled in here in the connector. Then the portal checks this access and allows sending/receiving data to/from the portal through the connector. This was done to add even more security to connection between the ERP and the portal, so that only authorized clients have access to data transferring and receiving.
- Log Preservation Period - Specifies the date formula that defines how much time should pass until the old portal integration log entries are cleared. For this setting to work, ensure that you also set up a job queue entry that clears the portal integration log.
- Username - Specifies the username that is used to authenticate communication with Xpand Portal when API is used. This username can be taken from the API settings on the portal side. Configure this setting with the Password Credentials authentication type.
- Password - Specifies the password that is used to authenticate communication with Xpand Portal when API is used. This password can be taken from the API settings on the portal side. Configure this setting with the Password Credentials authentication type.
- Redirect URL - Specifies the URL that is used with the Authorization Code authentication type to get the authorization code. This URL is generated automatically and must be coped from this setting and pasted on the portal side before authorizing the connector.
- Enabled - Use this switch to enable or disable the integration of Microsoft Dynamics 365 Business Central with Xpand Portal:
- On the Notification FastTab, configure notification for this integration:
- Notification Enabled - Use this switch to enable or disable notifications about issues, related to job queue entries that are used for automatic import and export of data during synchronization. Notifications include such information as the job queue entry(ies) that stopped running due to an error (have the status Error), the reason why they stopped running, and error text. Only job queue entries that handle import (codeunit 52137928) and export (codeunit 52137927) are verified. If notifications are enabled, specify the email(s) in the Notification Emails field to which the notifications will be sent. For this setting to work, set up a job queue entry for notifications.
- Notification Emails - Specifies one or multiple emails where notifications about issues, related to job queue entries that are used for automatic data synchronization, will be sent to. If you want to specify several emails, use the comma to separate them.
- On the Data FastTab, configure data-related settings:
- Include Field Length - Specifies that exported data will include the DataLength field property value where possible. You may need to disable this for older versions of Xpand Portal where this property is not supported yet.
- Max. No. of Records per XML - Specifies the maximum number of records that can be exported in a single XML file. If the number of exported records exceeds this number, another XML file is created. By default, 1000 is used. You may need to lower this number in case you encounter errors related to data import on the portal side.
NoteThe Max. No. of Records per XML setting is also available on the entity card where it has higher priority allowing you to set up this separately for each entity.
- Use Modify Trigger on Manual Export - Specifies that the Modify trigger is used instead of Insert when manually exporting portal entities. This means that if during export a record already exists, only the changed fields will be updated rather than re-inserting the entire record, which could otherwise cause unintended changes or trigger unwanted events.
- Choose Test Connection to test the connection to the portal and ensure your settings are valid.

- Close the page when ready.