Uploading documents
Xpand Portal gives portal members the ability to upload documents in various formats. This helps portal members share information with each other or add required information in the form of an external file.
|
For this feature to be available on a grid page or detail page, the field data type must be Attachment for the field where files are to be uploaded . On the detail page, if the field where attachments are uploaded was added as part of the extended field set, the image attachments can be viewed directly in the field value. |
Uploaded documents can be seen both by the member that uploaded the file and by other portal members.
You can upload documents on a detail (card) page or grid page. You can upload multiple documents at once if necessary.
To upload a document to the portal from a detail page
-
Open a grid page that has a record to which you want to attach a document.
-
On the record for which you want to upload a file, select the
 icon to open its detail page.
 -
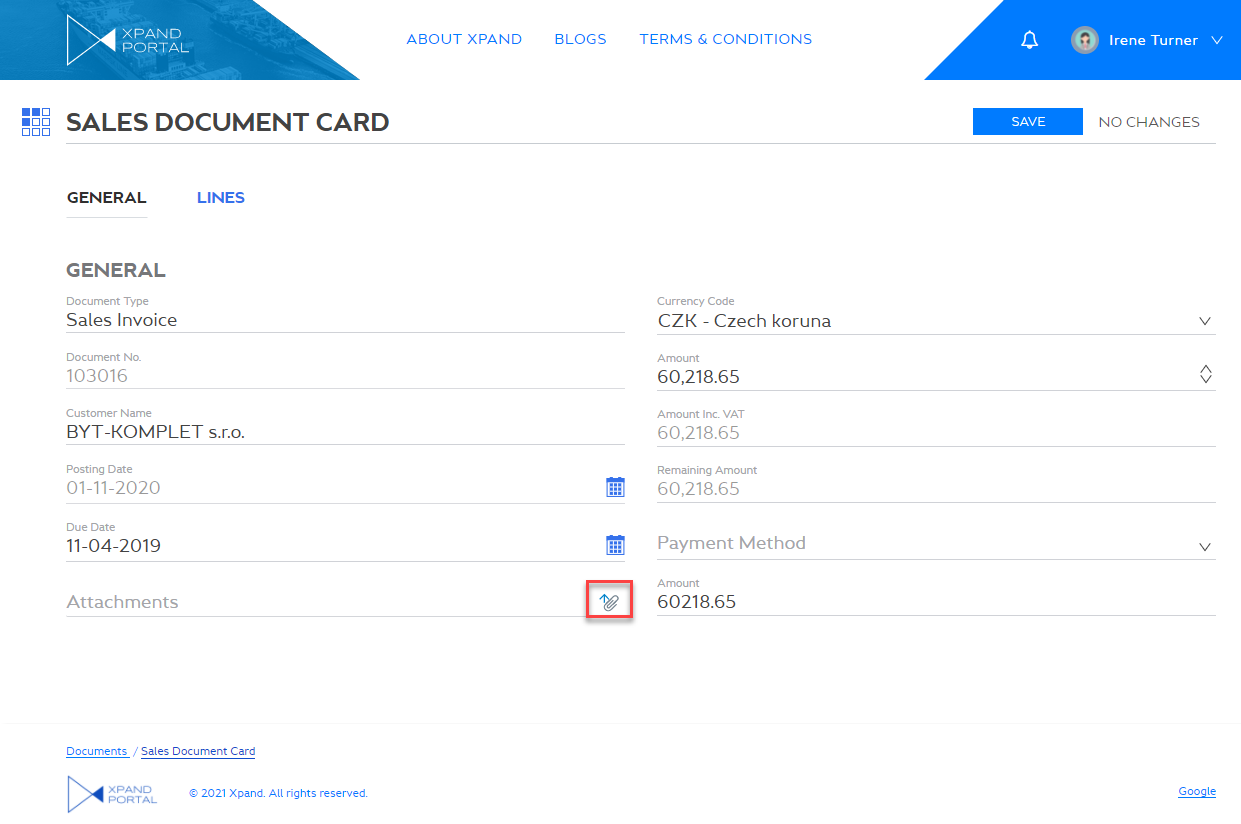
On the detail page, in the field that was set up to upload attachments, select the
 icon.
icon.
-
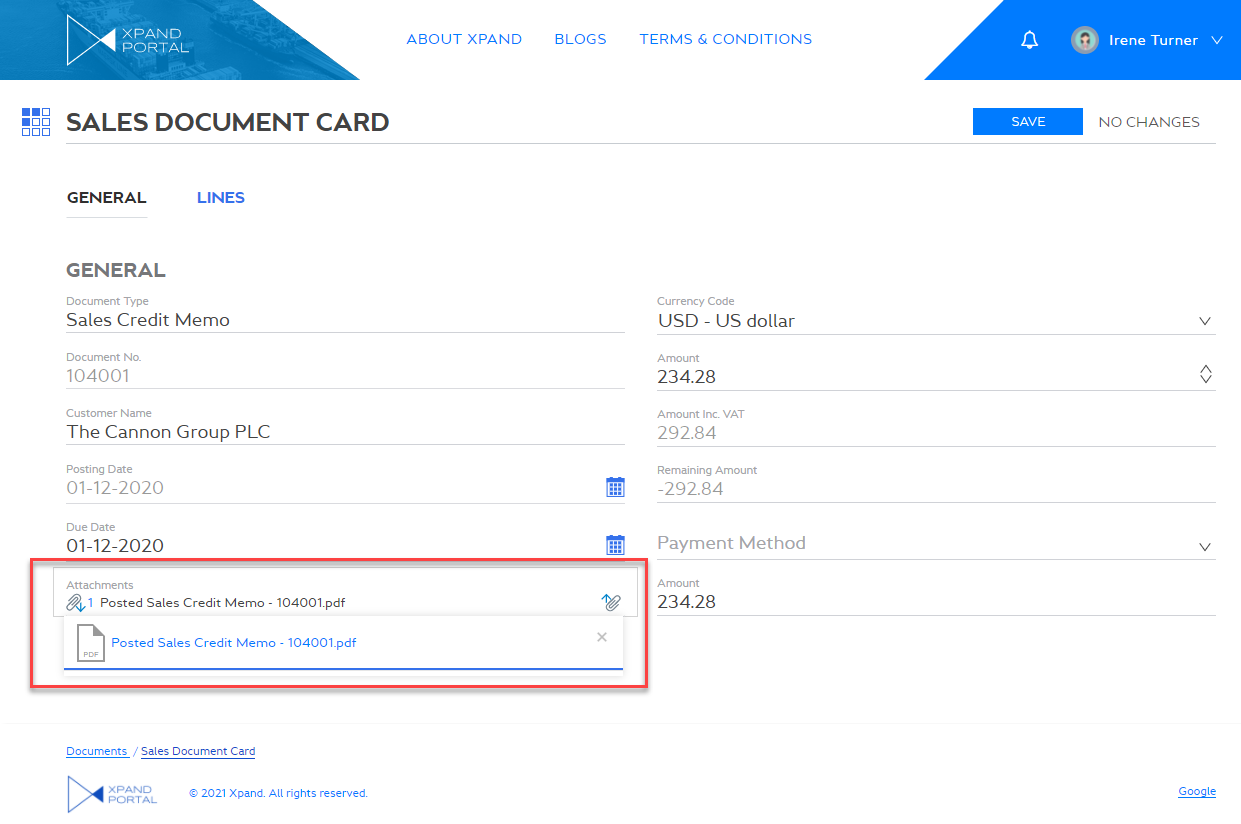
In the Open dialog window, browse to the file you want to upload, and then select Open. You can select multiple files if necessary.
-
Select Save to finish the uploading process and make the document available. The uploaded files are displayed in the field value and can be downloaded from there. The number of attachments is displayed next to the field. You can hover over the field to see the list of files.
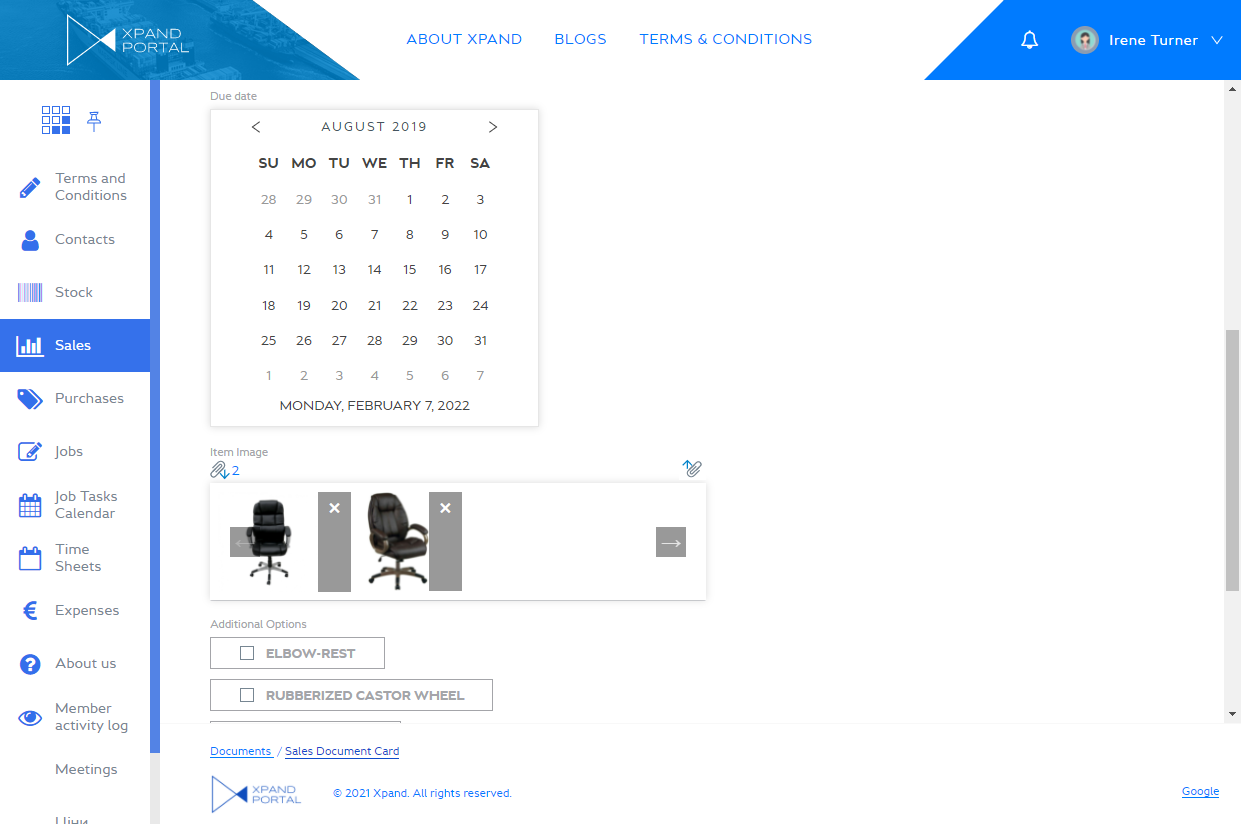
If the field, used to upload attachments, was created as part of the extended field set, such a field may display attachments with the image format directly in the field. Multiple images can be viewed as image gallery if it was configured so – use arrows to browse through images.
 Note
NoteIf you have several fields with the Attachment data type on the detail page, all attachments will be synchronized between them.
-
Repeat steps 3 through 5 to upload more documents for this record if necessary.
-
Repeat steps 1 through 6 to upload documents for other records on the portal.
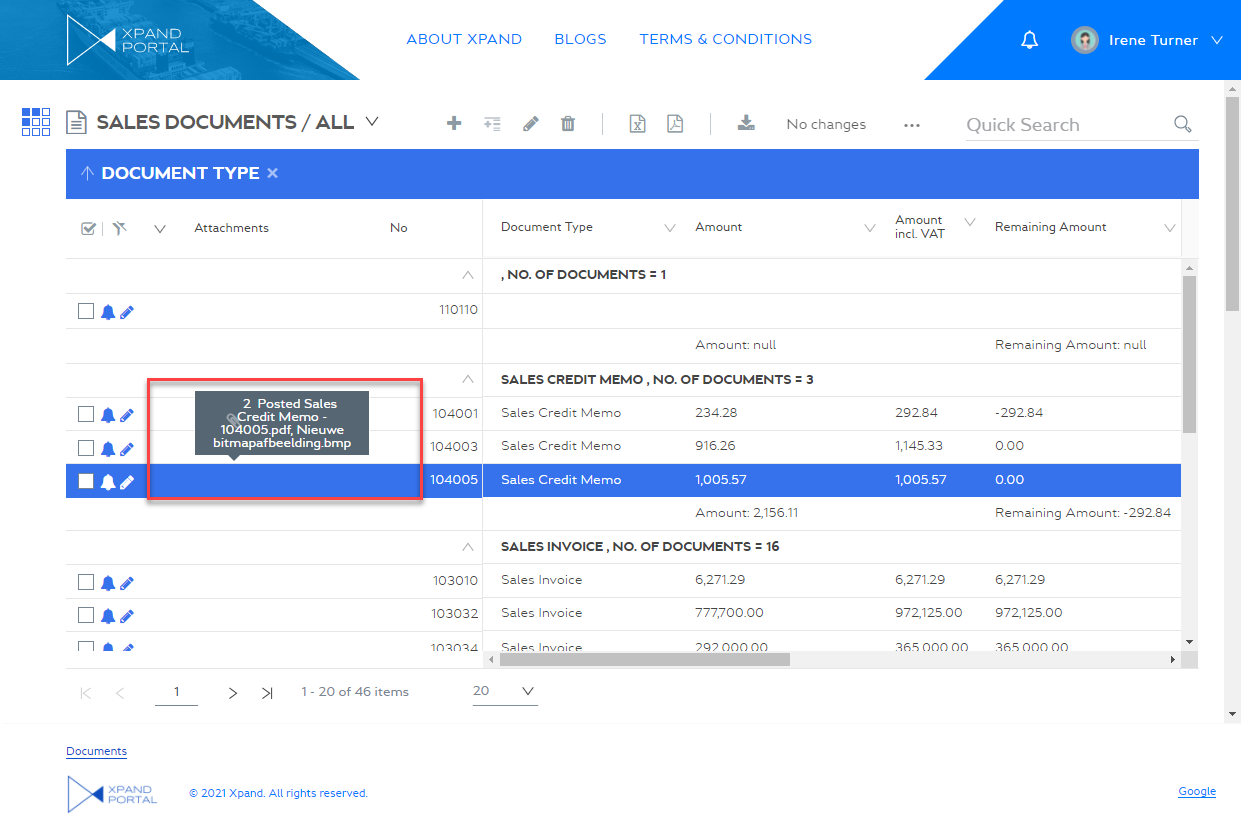
On the grid, the attachment icon ![]() is shown if a record has one or several attachments.
is shown if a record has one or several attachments.
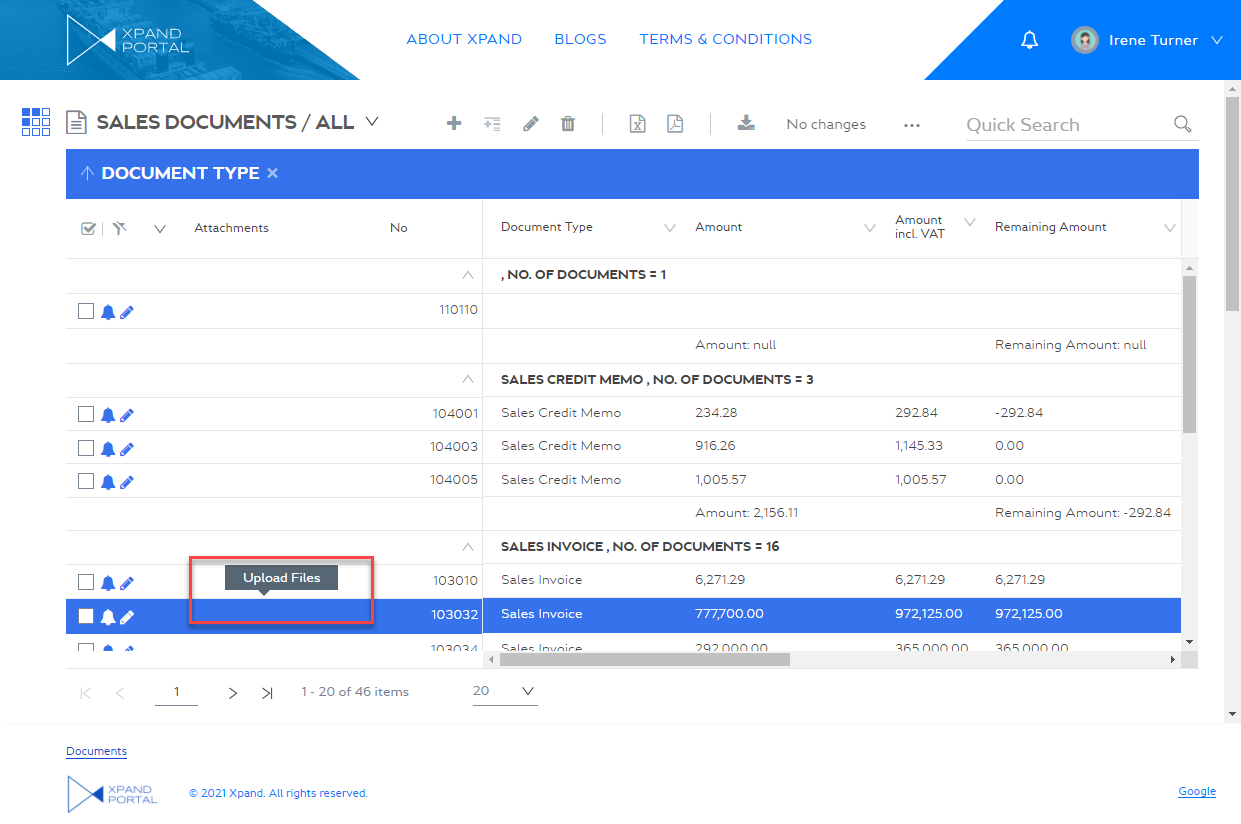
To upload a document to the portal from a grid page
-
Open a grid page that has a record to which you want to attach a document.
-
On the record for which you want to upload a file, click the field to start editing it. If the data format string was set up correctly, and the field does not have attachments yet, the Upload Files prompt will be shown when you hover over a field with the Attachment data type. The prompt text is customizable and may be different in your case.
-
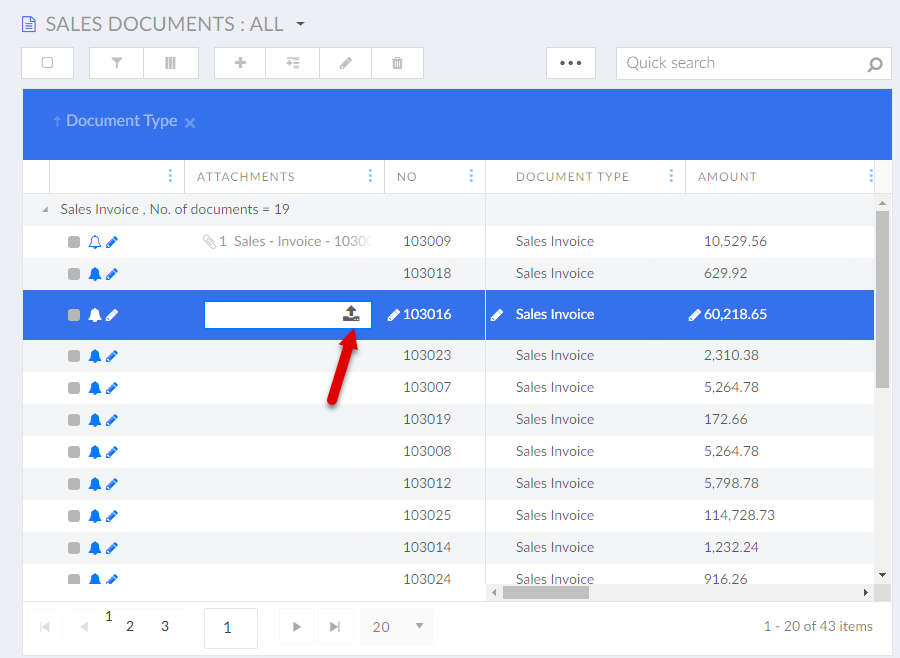
Select the
 icon.
icon.
-
In the Open dialog window, browse to a location, select one or several files, and then select Open. On grid pages, changes are saved automatically.
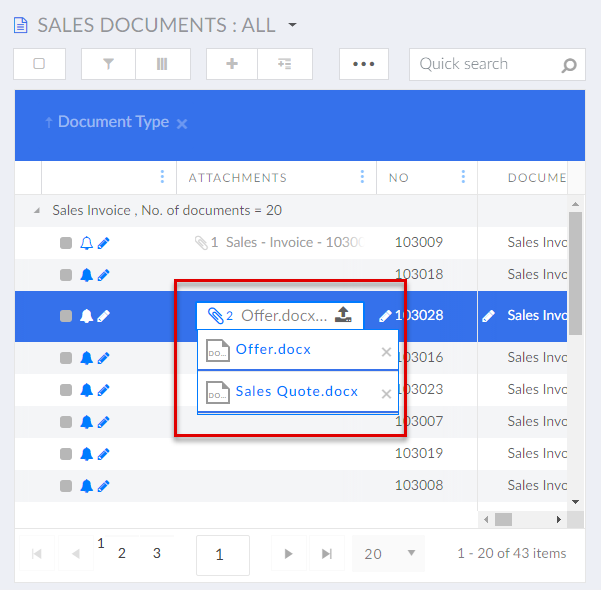
You can hover over the column again to see the list of uploaded documents. The uploaded documents also become available on the detail page. If the data format string is configured correctly for the field on this grid page, the number of attachments is displayed, and attachment names are the file names.
Uploaded documents become instantly available for downloading by all members of the portal, depending on their role permissions. Uploaded files can be deleted from the portal if necessary.