Account Authentication (2-factor verification) page
The Account Authentication page (or 2-factor verification page) is a portal page that will be opened to authenticate the portal member's sign-in if the 3-factor verification feature is turned on for this page.
To create an Account Authentication page and enable 2-factor verification
- In the backoffice, go to Content.
- Select the
 icon next to the node with the
  icon (or select and hold (or right-click) the node, and then select Create).
 Note
NoteThe
icon identifies the My Account page. The name of the page, which is also displayed as the node name, is customizable and can be different in your case. - In the Create pane, select
 2-factor verification page.
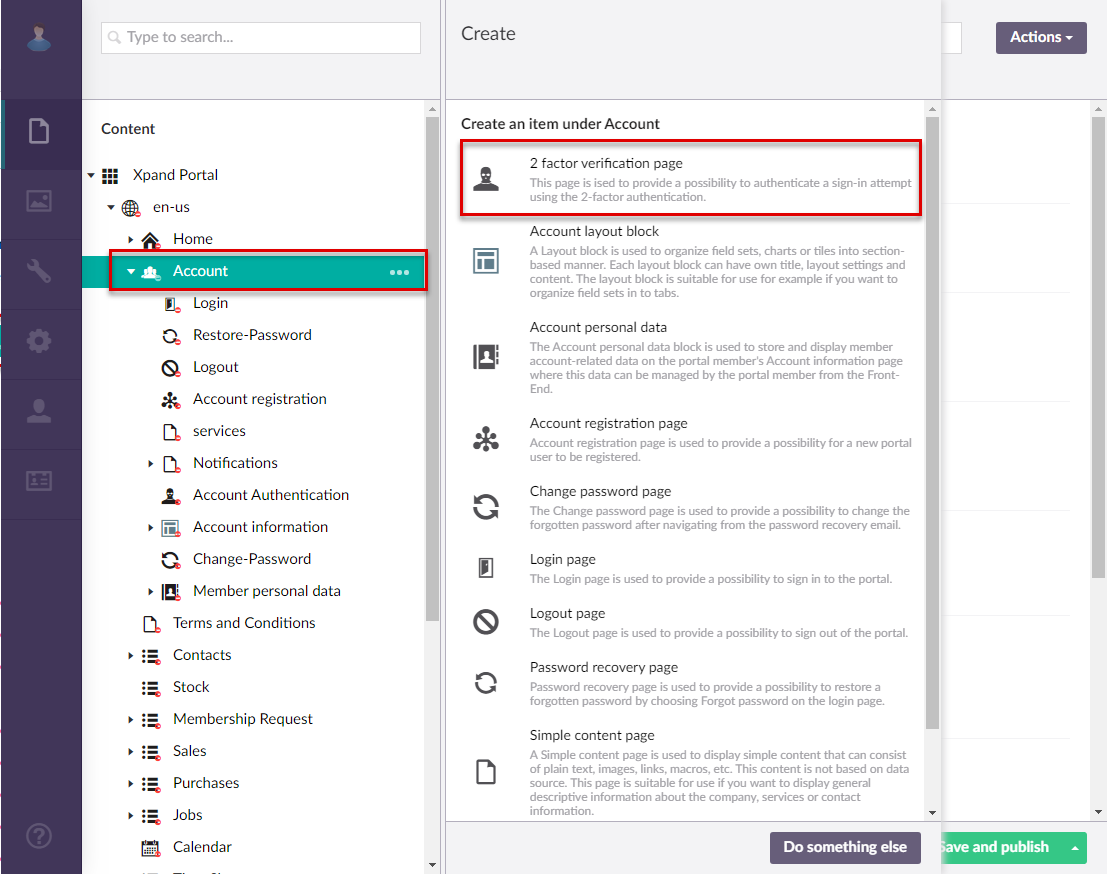
- On the header, type the name of the page, which will also be displayed as the node name in the site localization tree.
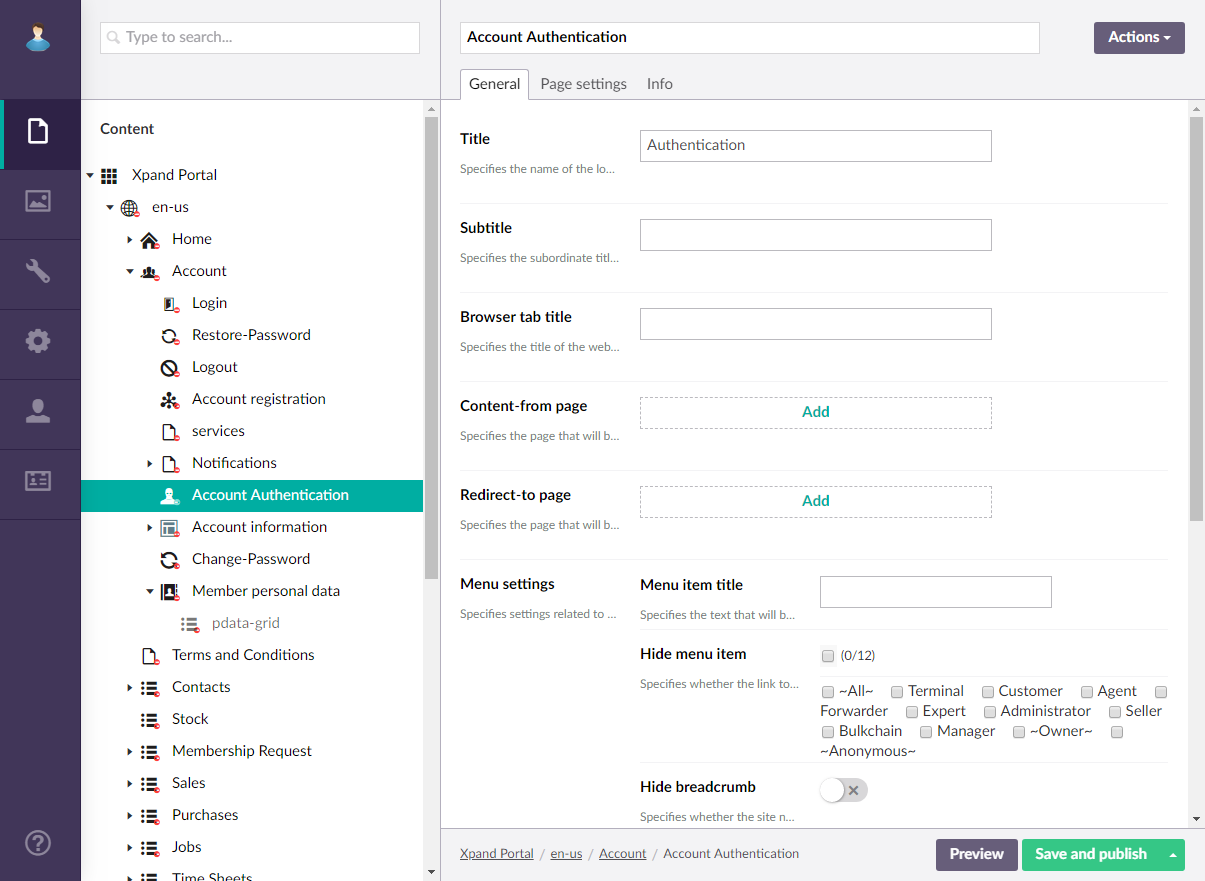
General tab
- On the General tab, configure the settings as described below.
Basic
- Titles - Specifies the settings where you can configure the title of various elements on this page:
- Title - Specifies the title of a page or UI element on a page.
- Subtitle - Specifies the subordinate title of a page or a UI element on a page.
- Browser tab title - Specifies the title of the web browser tab.
Menu
- Menu item title -Specifies the title of the menu item, which will be displayed in the navigation pane for this page.
- Menu item icon - Specifies the icon of the menu item for this page. You can leave this setting empty (in this case, the default icon, chosen by the development team, will be used) or choose an icon from one of the available icon libraries.
- Menu item title color - Specifies the color of the menu item for this page.
- Divider after menu item - Specifies whether a split line will be displayed after the menu item of this page. A divider can be added only on the first menu level.
- Hide menu item for - Specifies whether the link to the page will be displayed in the main menu.
Advanced
- Content-from page - Specifies the page the content of which will be displayed instead of the content of this page when this page is opened via a direct link. The URL in the address bar will remain that of the original page.
- Redirect-to page - Specifies the page that will be displayed instead of this page when this page is opened via a direct link. The URL in the address bar will be that of the target page.
- Module assignment & protection - Specifies settings that allow you to assign this content element (localization, page, etc.) to an internal module as well as to protect this element from certain operations (copying, changing, deletion). Select the Configure button to configure module assignment & protection or the Change button to edit existing configuration if it has already been configured.
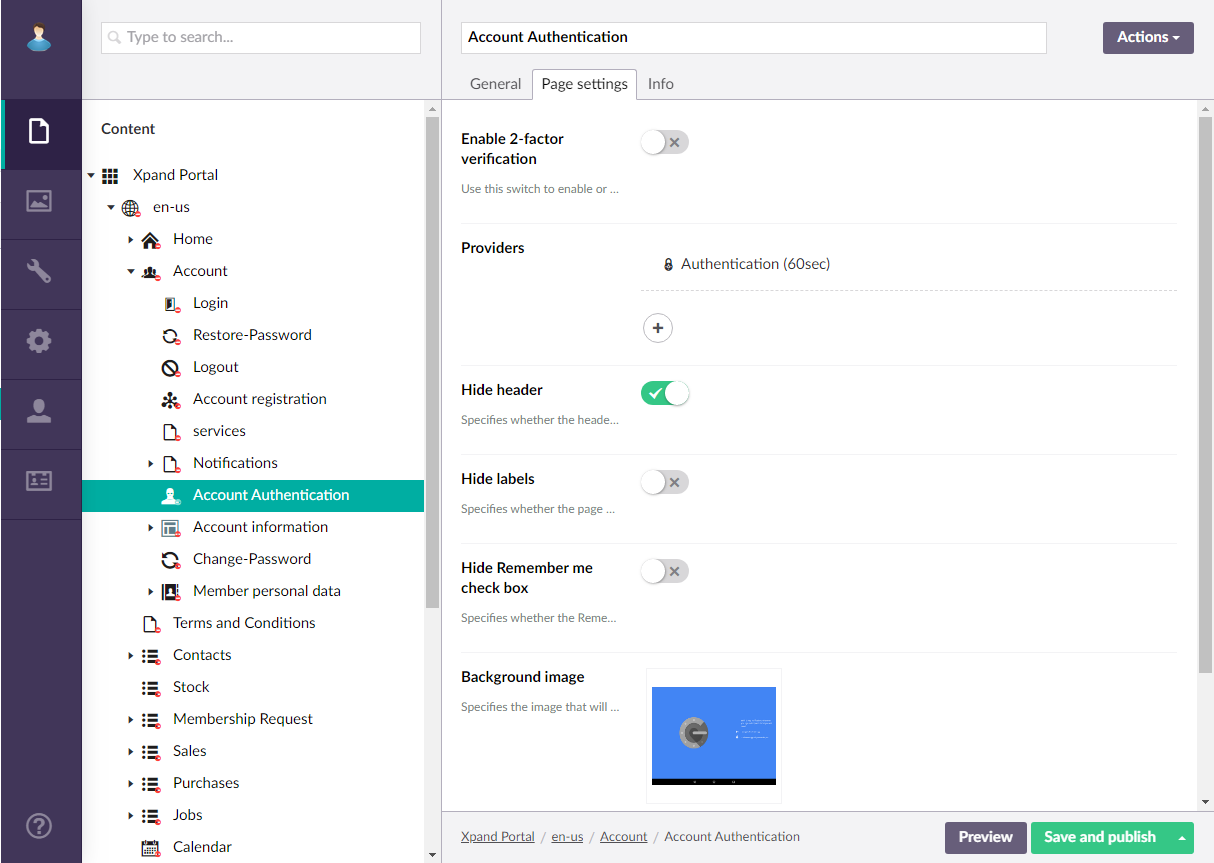
Authentication tab
- On the Authentication tab, configure the settings as described below.
- Enable 2-factor verification - Use this switch to turn on or off the 2-factor authentication feature.
- Authentication settings - Specifies the authentication settings for the 2-factor verification. These authentication settings are common for all authentication providers.
Note
During sign-in with 2-factor verification enabled, members can use any authenticator app, however, we recommend and support the following authenticators:
- Title - Specifies the internal title of this setting set that can be used to identify it in the backoffice.
- QR code refresh interval (seconds) - Specifies the interval in seconds between each time the QR-code, which the user can scan on the Account Authentication page using the authentication app on the mobile device to authenticate the login, is refreshed.
- Portal name - Specifies the internal name of the 2-factor authentication on the portal side.
- Portal ID - Specifies the name of the account that will be displayed in the authentication app for this authentication.
- QR code width - Specifies the width in pixels of the QR-code, which the user can scan on the Account Authentication page using the authentication app on the mobile device to authenticate the login. Recommended setting: 300.
- QR code height - Specifies the height in pixels of the QR-code, which the user can scan on the Account Authentication page using the authentication app on the mobile device to authenticate the login. Recommended setting: 300.
- Hide header - Use this switch to hide the header on the Account Authentication page.
- Hide labels - Use this switch to hide labels on the Account Authentication page.
- Hide Remember me check box - Use this switch hide the Remember me checkbox on the Account Authentication page, which disables for portal members the ability to have their authentication remembered. if you disable this feature, portal members will have to authenticate their every login attempt.
- Background image - Specifies the image that will be displayed in the background of the Account Authentication page.
- Select Save and publish to save the changes and publish them on the front end. Optionally, if you were editing the page, you can select Save and preview to preview how the page will look like on the front end.
- Specify the created Account Authentication page on the My account page in the Verification field.