Adding/editing portal members
End users of Xpand Portal who work with the front end are called portal members and set up separately from backoffice users. Each portal member belongs to a portal member group(s) that defines the member's permissions on the portal.
When you are creating a new member, there's a limited number of settings that you need to configure. After a member has been created, additional member settings become available.
|
Portal members can also be managed from the front end. |
To create or edit a portal member
- In the backoffice, go to Members> Members.
- Do one of the following:
- To create a new member:
Select the icon next to Members (or select and hold (or right-click) the node, and then, under Create a new member, select Portal member), and then select the member type from the list to create a new member. The availability of member types for selection depends on the member types configured for your portal. Member types are configured by the portal development team and define the availability of member settings.
 - To edit an existing member:
Expand Members > All Members, and then select the name of the member you want to edit.
- To create a new member:
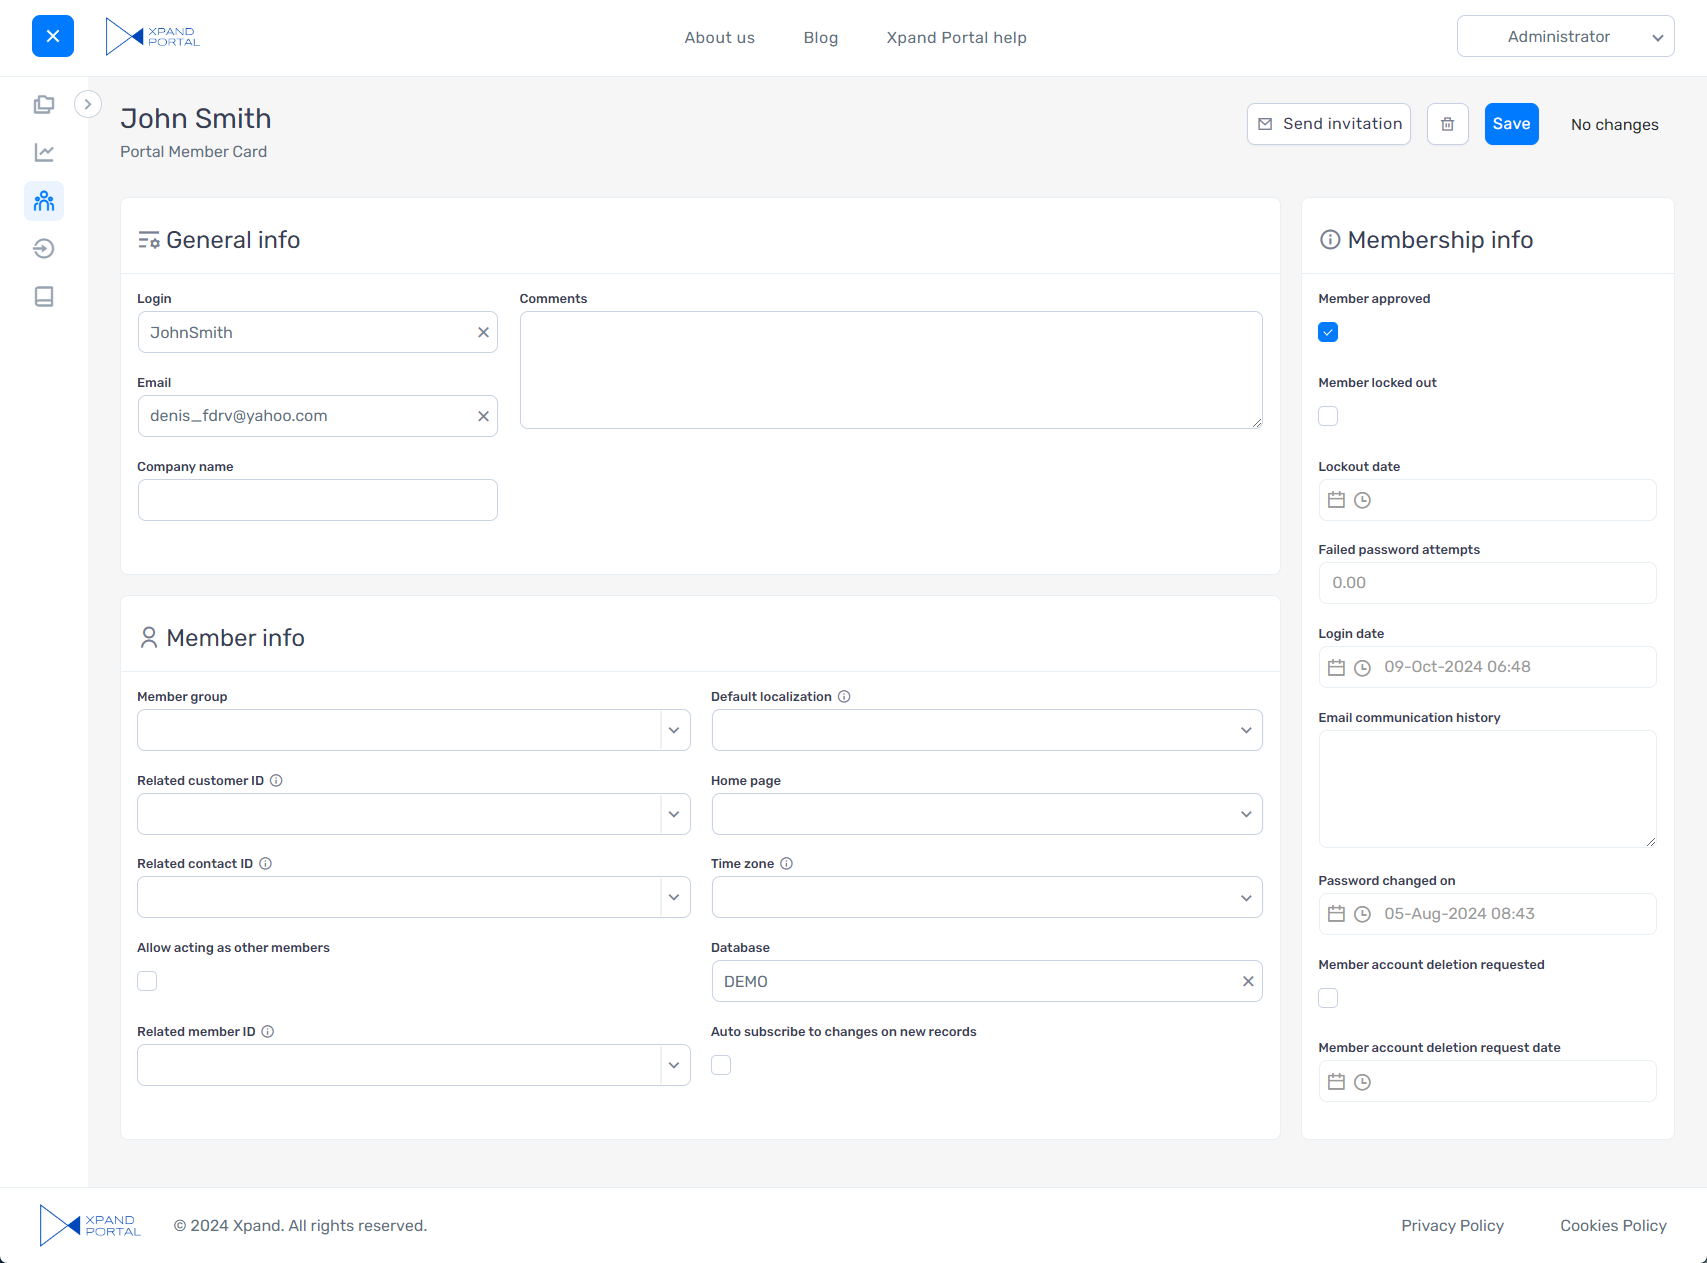
- At the top of the page, enter the name of the member. This name will be displayed in the front end when this member is signed in. The portal member will be able to change their name through the Account Information page. If you're editing an existing member, skip this step.
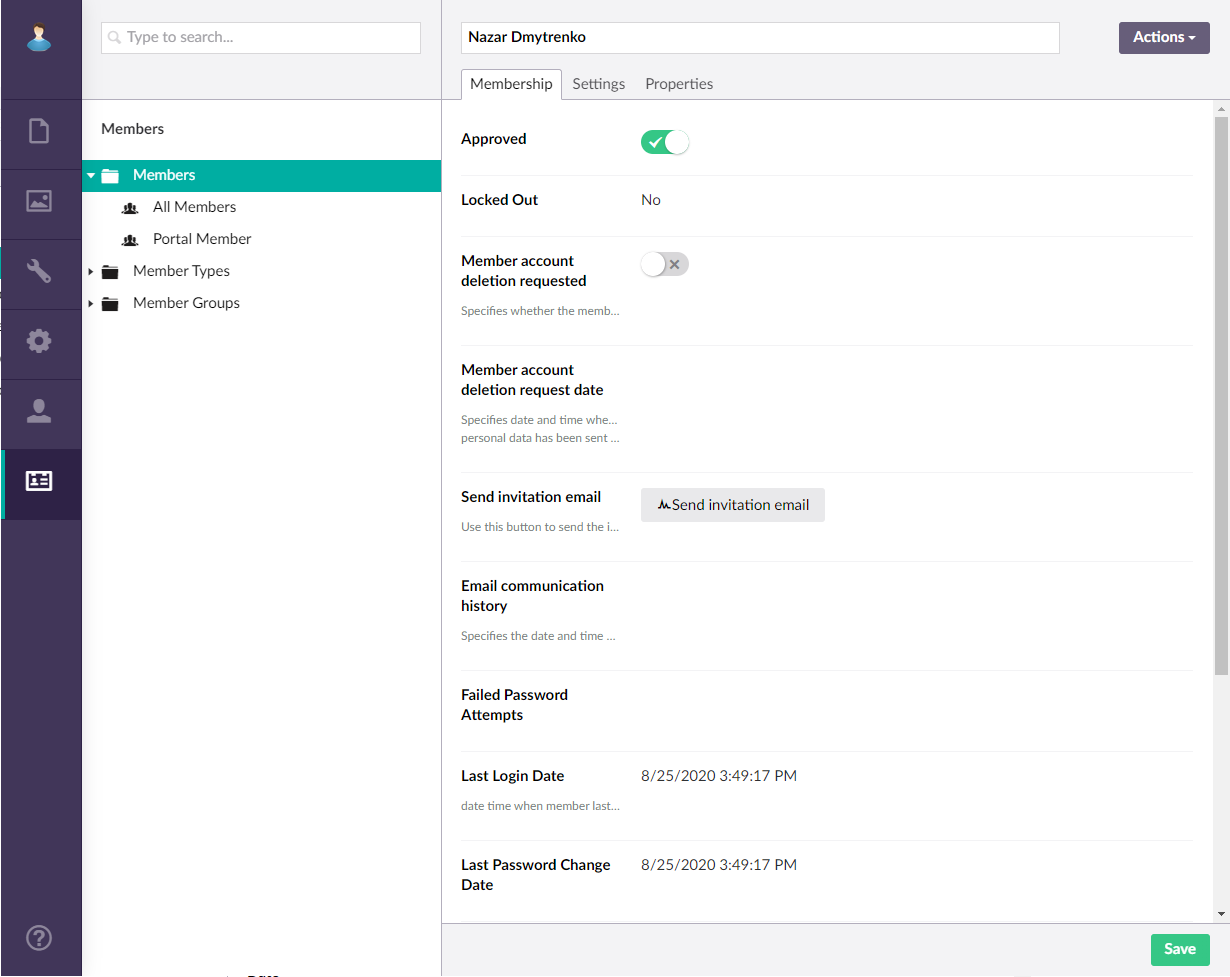
- In the Content section, on the Membership tab, the following information or settings are available:
- Member account deletion requested - Use this switch to indicate that this member account is to be deleted. This switch is automatically turned on if a portal member requests deletion of their account. If this switch is turned on, the admin is expected to manually delete the portal member account.
- Member account deletion request date - Specifies the date when the portal member requested that the admin delete their portal member account.
- Send invitation email – Select the Send invitation email button to send an email to the existing member where they will be prompted to change the password. This action is useful if you chose not to send an invitation email during creation of a portal member, but then, after saving the member, decided to allow the member to set up the password. A template that will be used for invitation emails must be configured in the Account registration page settings.
- Invitation email sending history – Specifies the status of the invitation email and sending date. This information is displayed if an invitation email was sent to the member.
- Comments - You can type a comment about this portal member in this field.
- Module assignment & protection - Specifies settings that allow you to assign this content element (localization, page, etc.) to an internal module as well as to protect this element from certain operations (copying, changing, deletion). Select the Configure button to configure module assignment & protection or the Change button to edit existing configuration if it has already been configured.
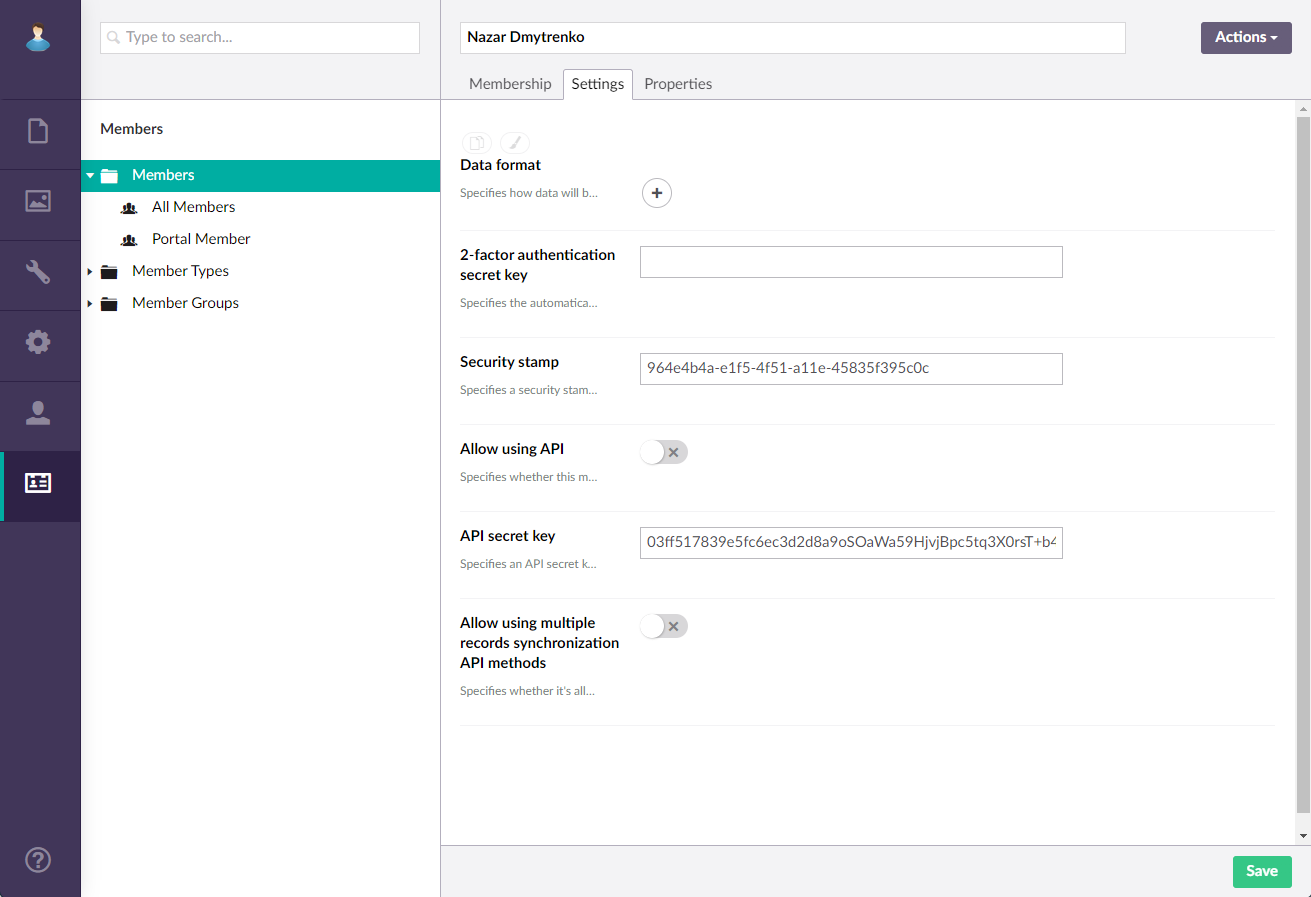
- On the Settings tab, the following settings are available:
- Data format - Specifies the data format that will be used to display date fields for this portal member. Data format can be configured on three levels in Xpand Portal:
- Allow using multiple data synchronization API methods – Specifies whether this member is allowed to use API methods that create, update, remove or retrieve multiple records. Enable this switch if you want to such API methods as Sync Get and Sync Store. Note that this setting can also be configured on the API client level in the API clients settings.
- Allow using API – Specifies that this member is allowed to use Xpand Portal API.
- In the Member section (selectable in the top right corner), the following settings are available:
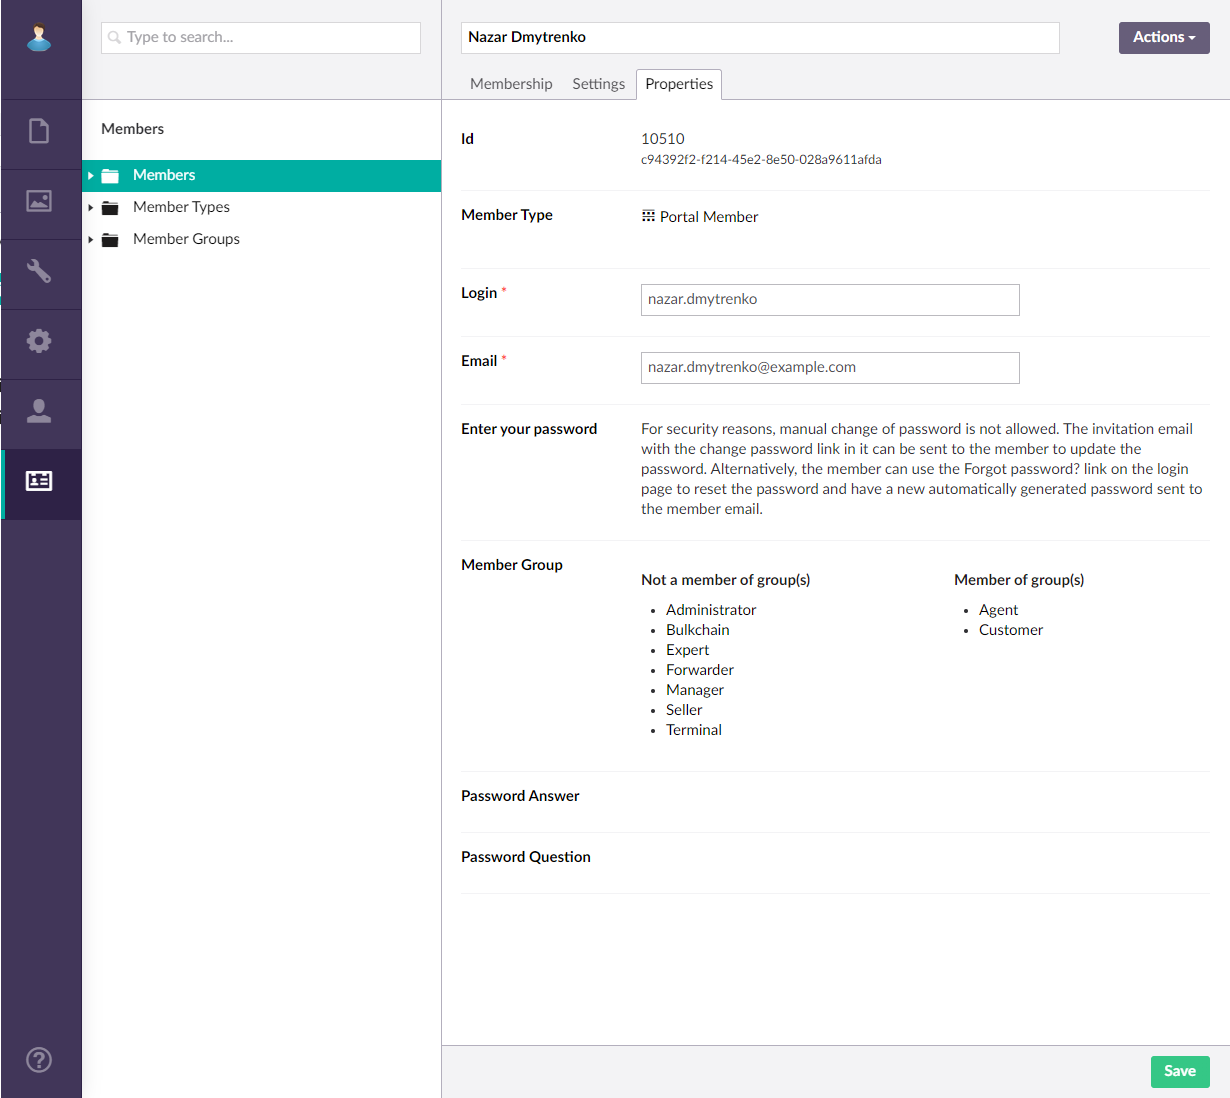
- Sign in (login) - Specifies the login/username, which is used as an identifier along with the password to sign in to the front end. You can change it for an existing member if necessary. This field is mandatory. The portal member will be able to change this through the Account Information page.
- Email - Specifies the email of this portal member. This email can also be used as a login to sign in. Also, various notifications will be sent to this email. The portal member will be able to change their email through the Account Information page.
- Enter your password - Specifies the password that the member will use to sign in to the front end of the portal. For a new member, enter a new password and confirm it. For an existing member, you can select Change password and enter a new password. Alternatively, the portal member will be able to change this password by using the link in the invitation email or using the Forgot password? link on the sign-in page. The password requirements:
- Minimum length: 12 characters
- Special symbols or digits: recommended, but not mandatory
- The account becomes locked out after 5 unsuccessful attempts
- Member groups - Specifies the group(s) the portal member is assigned to. These member groups define permissions for various features on portal pages as well as access to certain portal pages. Select Add, select a group(s) to add the member to, and then select Submit.
- Failed login attempts - Specifies the number of unsuccessful attempts to sign in with this account. If a member fails to sign in 5 times, their account becomes automatically locked out. A locked out account can be reactivated by the administrator.
- Approved - Use this switch to indicate that the new portal member has been approved. If the Send invitation email check box was selected on the Properties tab during the process of creating a new member, this switch is automatically disabled, and then when the member accepts the invitation, the switch is automatically enabled. Note that manual enabling or disabling of this switch doesn't trigger sending of an invitation email.
- Locked out - Specifies whether this portal member has been locked out. A locked out member cannot use their account. This field cannot be manually field in and is automatically enabled if, for example, a portal member requests that their member account is deleted or a member fails to sign in successfully 5 times.
- Two-factor authentication enabled - Specifies that this member can use two-factor authentication. This switch is automatically enabled when the member uses the 2-factor authentication to sign in; it cannot be manually enabled but can be manually disabled if necessary. The member can bind only 1 device with 2-factor authentication at a time.
- Last lockout date-time - Specifies the date and time when this portal member was last locked out.
- Last sign-in date-time - Specifies the date and time when the portal member last signed in.
- Last password change date-time - Specifies the date and time when the password for this portal member was last changed.
- Select the Save button to save the changes if any.
Member settings that are only available when managing members from the front end
Starting since release 3.5.0.0, the following member settings are available only when managing members from the front end (to configure them, ensure that the corresponding fields are added to the page where members are managed):
- Company integration code (the source field xNAVDatabaseName) - Specifies the integration code that is used to link this member with a Business Central company for data synchronization. This code must be the same as the code in the Company Integration Code field on the Portal Integration Setup page on the Business Central side in the BC company that you want to synchronize data with for this member.
- Related contact ID (the source field xContactId)- Specifies the ID of the contact(s) from the data source database to which the member is related. This field is optional. Fill it in if you want to limit access to data for this portal member by specified contact ID. This setting can be used when integration with Microsoft Dynamics NAV is used and you have some tables with direct or indirect contact information configured as data source for some of your portal pages. In this case, the portal member will have access only to records, for which the related contact ID in the data source is also specified as a related contact ID in this setting or only to records that have a business relation to one of the specified related contact IDs, such as customer number, vendor number, bank account, etc. If you fill in this field, make sure you set up portal entities properly in Microsoft Dynamics NAV with direct or indirect contact information on entities that you want to filter by contact number.
- Related customer ID (the source field xCustomerId) - Specifies the ID of the customer(s) from the data source database to which the member is related. This field is optional. Fill it in if you want to limit access to data for this portal member by specified customer ID. This setting can be used when integration with Microsoft Dynamics NAV. If you fill in this field, make sure you set up portal entities properly in Microsoft Dynamics NAV.
- Allow acting on behalf of other members (the source field xMemberAllowedAct) - Use this switch to enable the ability of this member to act on behalf of another member, that is to give the ability to sign in as another member without having to enter another member's credentials. It will allow the member to see portal data based on the other member's settings and permissions, such as filters, sorting, field visibility, etc. This setting is used in combination with the Related Member ID and Database name settings.
 Note
NoteWhen acting as another user, if the member creates a record, the Created By field will still be filled in with the name of the member who is acting on behalf of another member.
- Related member ID (the source field xMemberIdPicker)- Specifies the member(s) to which this member is related and allowed to act on behalf of. One member can be related to multiple members. The selected member(s) will be filtered by this member's associated database name, if any, and displayed in the list of members available for selection when this member tries to act as another member. Configure this setting if the Allow acting on behalf of other members switch is turned on. This setting also depends on the Database name field as follows:
- If the Database name field for this member is not empty (Database name = [DB_Name] where [DB_Name] is the name of the database), among the members that you specify in the Related member ID field, only members with the same associated database will be available for selection for this member when trying to act as another member. When selecting related members, you can see in brackets which database they are associated with. If you leave the Related member ID empty in this case, all members with the same associated database as this member, if any, will be available for selection.
- If the Database name field for this member is empty, all the members that you specify in the Related member ID field, regardless of their associated database, will be available for selection for this member when trying to act as another member. If you leave the Related member ID empty in this case, all other portal members will be available for selection.
- Avatar (the source field xAvatar) - Specifies the avatar that will be displayed on the header of the portal when this member is signed in. You can select an image from the available media or upload a new one.
- Default localization (the source field xSiteId)– Specifies localization that will be used by default in the front end for this portal member. The member will be able to change the localization if necessary.
- Start page (the source field XHomePage)- Specifies the home page for this portal member.
- Auto. subscribe to changes on new records (the source field xSubscribeAfterCreation)- Specifies whether automatic subscription to changes to changes on all new records will be enabled for this member.
- Time Zone (the source field xMemberTimeZone)- Specifies a time zone that will be used for date and datetime fields on the grid, detail and notification pages. When it's not configured, the time zone settings from the PC will be applied. The time zone can also be configured by the member on the member account page. The setting is synchronized between the member account page in the front end and member page in the back end.