Creating/editing a document template layout
Once you’ve created a document template and defined its settings, such as source data and related options, the next step is to design the template layout, which controls the structure and appearance of the final document. This is done by exporting the layout, editing it in the appropriate application (Microsoft Word for Word/PDF formats or Microsoft Excel for Excel formats), and then importing it back into Business Central.
To help you get started quickly, the solution includes a set of pre-configured templates, complete with layouts, for commonly used financial documents, such as:
- Sales Order
- Sales Invoice
- Sales Credit Memo
- Posted Sales Invoice
- Posted Sales Credit Memo
- Purchase Order
- Purchase Invoice
- Purchase Credit Memo
- Posted Purchase Invoice
- Posted Purchase Credit Memo
These ready-made templates can be used as-is or customized to better fit your business needs.
Exporting a layout for editing/updating
Document template layouts are edited in an external application: Microsoft Office Word or Microsoft Office Excel, depending on the document template format. To edit a layout, it must be exported from the template card. A layout can also be exported for sharing purposes.
To export a document template layout:
- In Business Central with the Qvaba Flexible Documents app installed, choose the
 icon, enter Document Template List, and then choose the related link.
 - In the Document Template List window, choose the number of a document template to open its card. Make sure that the general information and the source data is already configured.
- In the Document Template Card window, choose Export Layout to export the layout for editing.
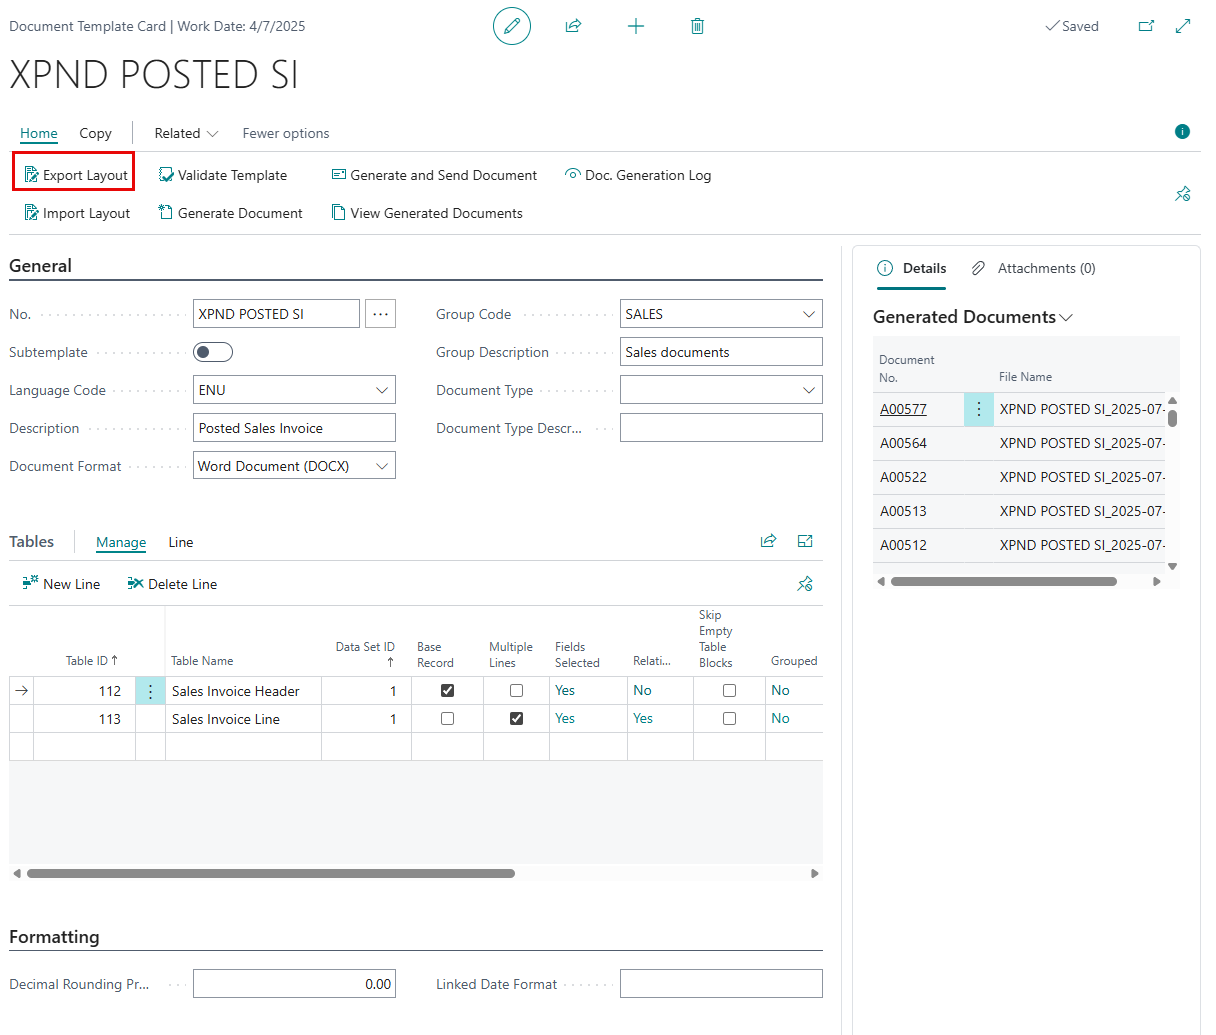
The layout may contain one or two files (in an archive) depending on the document format:- For Word/PDF documents: the exported layout contains a [TemplateNo].docx file (where [TemplateNo.] is the number of the document template; you edit the layout in this file) and a DataSource.xlsx file that stores the information about the data source (BC table fields or custom fields) that can be used on the layout.
- For Excel documents: the exported layout consists of only [TemplateNo].xlsx file (where [TemplateNo.] is the number of the document template), which includes both the layout and source data.
- Extract the archive (if the document layout includes multiple files), and then open the [TemplateNo].docx (for Word/PDF documents) or [TemplateNo].xlsx file (for Excel documents).
- For the [TemplateNo].docx file, when you try opening it, you need to specify the location of the second file with data source information. Choose Yes on the message that appears, and then browse to the DataSource.xlsx file.
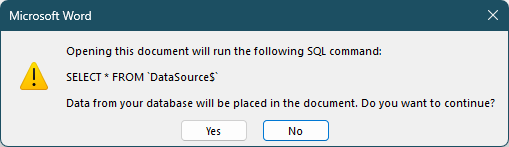
|
If you choose No on this message, you will be able to link the DataSource.xlsx file later in Word: on the Mailings tab, choose Select Recipients > Use an Existing List. |
Creating or editing a layout for Word/PDF documents
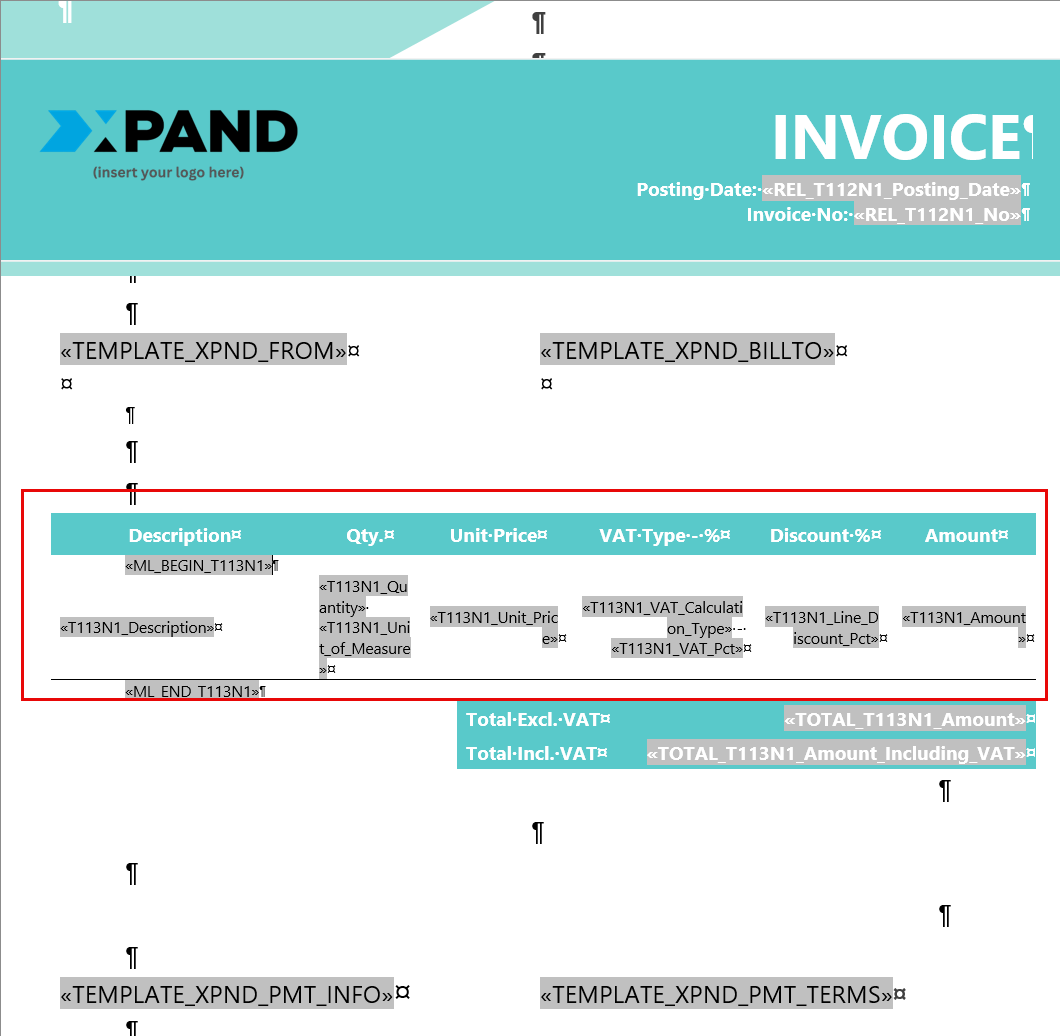
For documents in the PDF or Word format, Microsoft Office Word is used for creating/updating the document layout.
Once you've opened the [TemplateNo].docx file from the exported archive, and specified the location of the second file with data source information as shown above, you can start creating or changing the layout.
You can add such elements as:
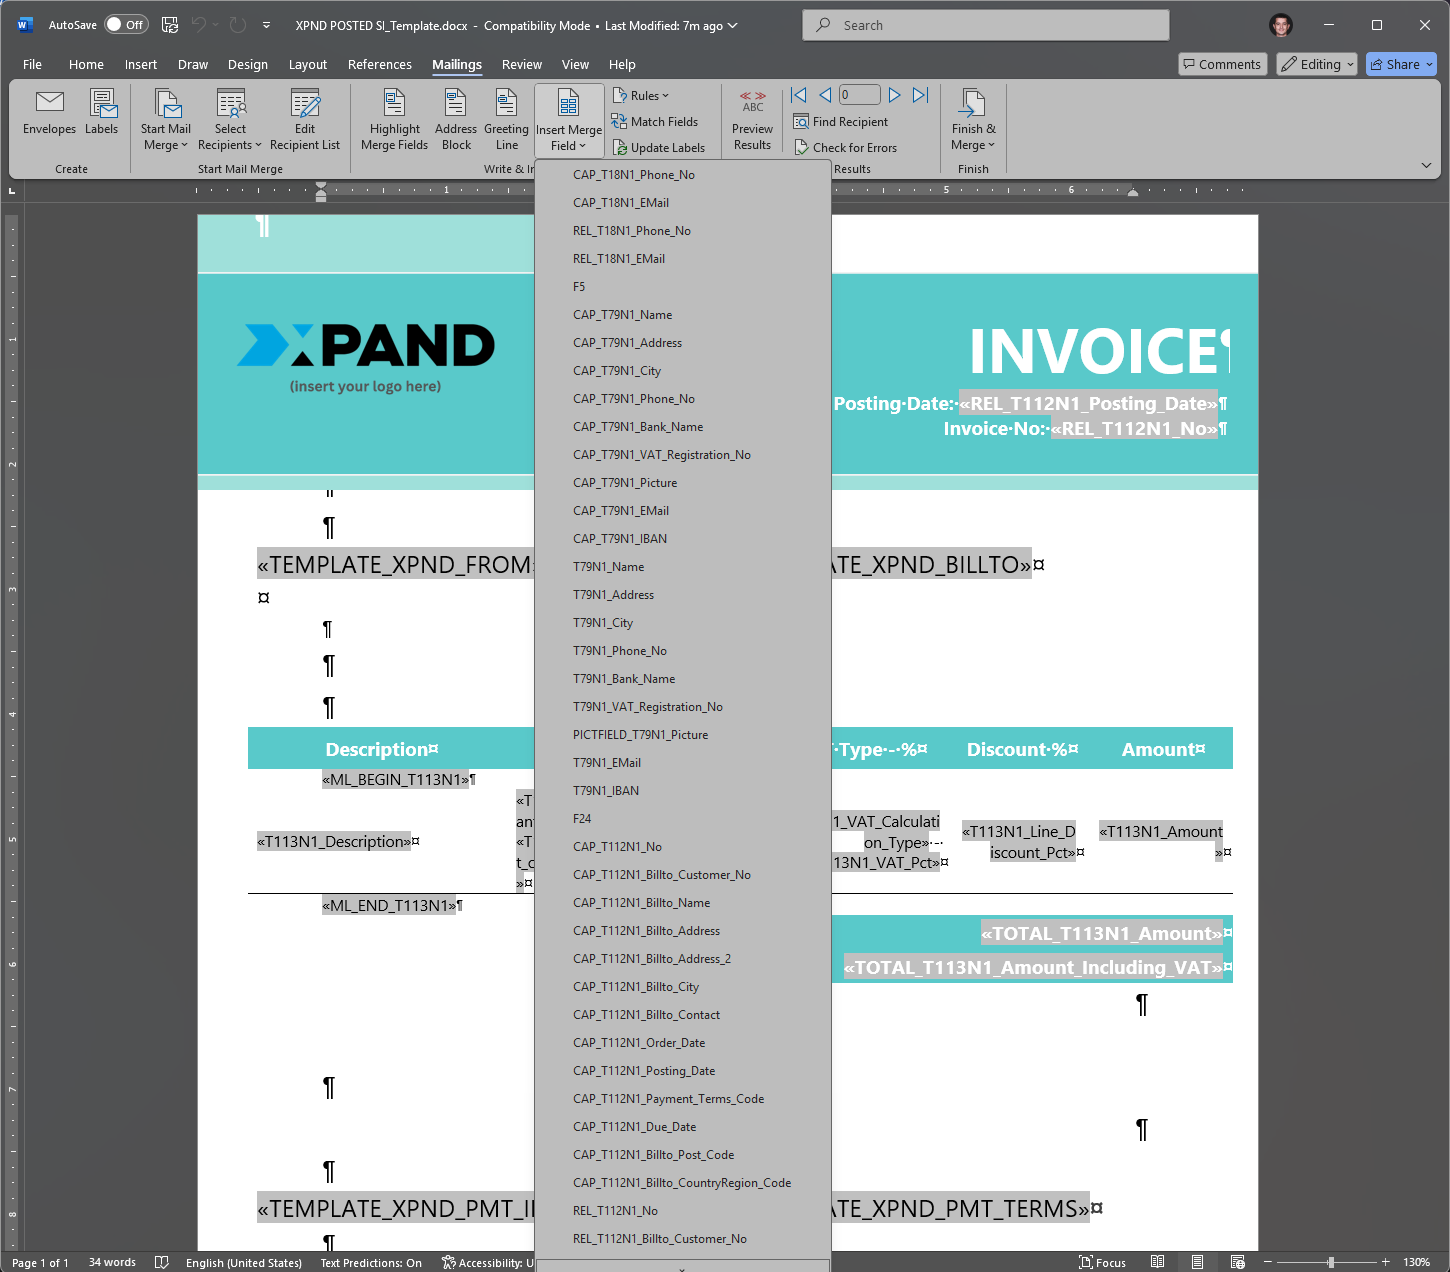
- Business Central data: on the Mailings tab, select Insert Merge Field. This data is retrieved from the second exported file DataSource.xlsx file that you specified.
- Table fields (these codes start with the table number, field number, and then followed by the field name, e.g. T79N1_Name) - data from table fields.
- Field captions – captions of fields (such codes start with CAP_).
- Subtemplates – If a there a template set up as a subtemplate and that template is linked to the given template, that subtemplate will be available for selection. Subtemplates can be used for template elements that are the same in multiple templates, such as headers, footers, logos, etc. The inserted subtemplate will be shown as a code in the Word template layout similar to the field codes.
- Custom fields – Fields that are not available in any table. These fields as well as their values are set up in a separate set up for custom fields. See the Custom Fields section for information on how to create custom fields.
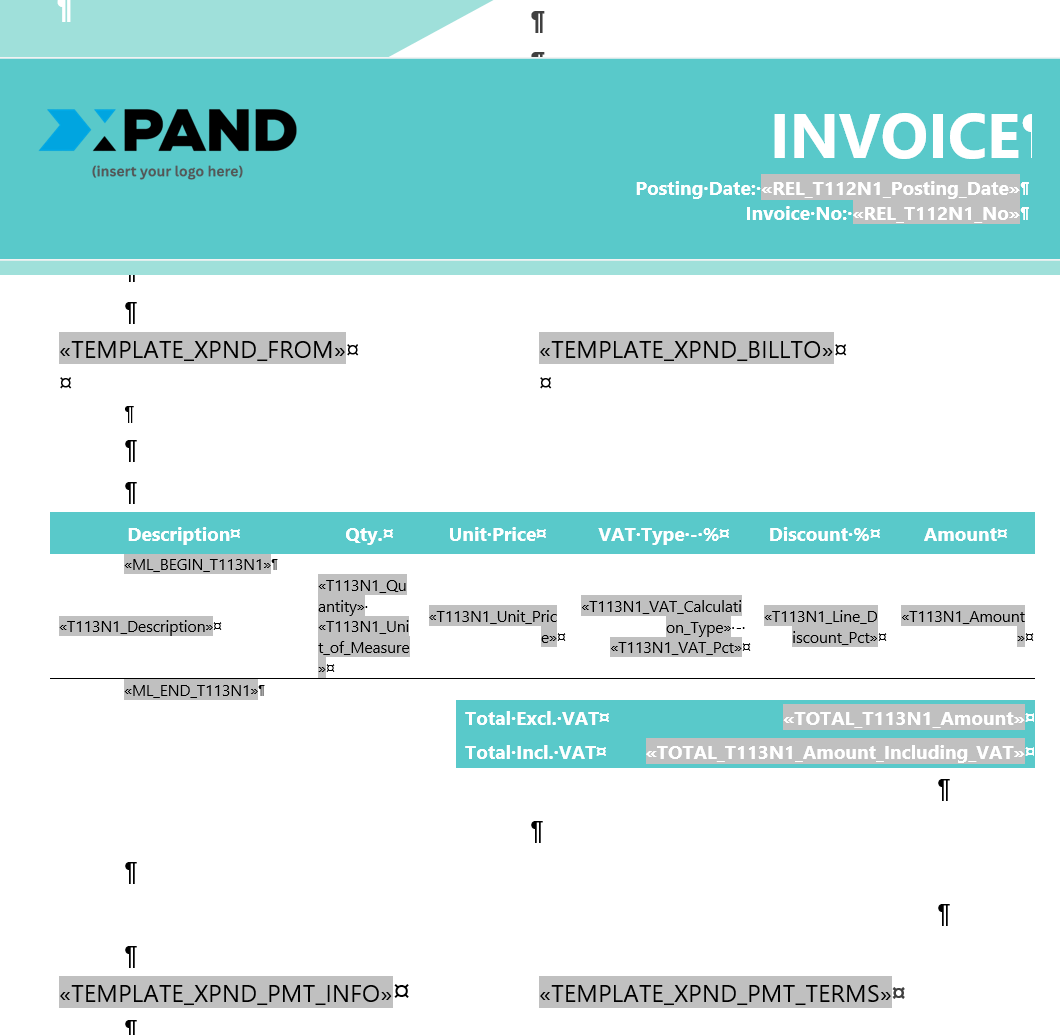
- ML_BEGIN_<TableID> and ML_END_<TableID> code to enclose field codes for a table that will be used to show multiple records as opposed to a single record.
- Group fields codes – These codes are available for fields marked as group and can be used as a group title (caption). This code does not return any value.
- Text
- Images (for example, to use as a background or header)
You can apply formatting to tailor the appearance of your document to your business needs.
Multiple records (Word/PDF layout)
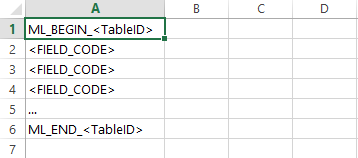
If you want to have multiple records retrieved from a table, the fields that you add must be enclosed by the following code:
ML_BEGIN_<TableID>
…
ML_END_<TableID>
as shown below:
ML_BEGIN_<TableID>
| <FIELD_CODE> | <FIELD_CODE> | <FIELD_CODE> |
ML_END_<TableID>
where <TableID> is the ID of table from which the field values are retrieved and <FIELD_CODE> is the code of a field that you add from that table. Additionally, for a multi-line construction, the field codes that you insert into the template layout must be in a table. You can make the table borders invisible if necessary.
 The ML_BEGIN_<TableID> and ML_END_<TableID> table codes are added in the same way as table field codes.
|
To be able to add codes for multiple records, you must have the Multiple Lines check box selected for the corresponding table on the Tables FastTab in the Document Template Card window in Business Central. |
It is also allowed to have codes for a table with multiple lines be enclosed by codes for another table with multiple lines. For example:
ML_BEGIN_<TableID>
| <FIELD_CODE> | <FIELD_CODE> | <FIELD_CODE> |
ML_BEGIN_<TableID>
| <FIELD_CODE> | <FIELD_CODE> | <FIELD_CODE> |
ML_BEGIN_<TableID>
ML_END_<TableID>
Multiple records may be grouped in various ways:
- If you select the Group check box for a field in the Document Template – Fields window, which is opened from the document template card, when you set up fields for a table in the document template, multiple records will be grouped for that field value in such a way that the records that have the same value of the fields marked as Group will be shown together in a separate table, as a separate group of data. Additionally, for a field marked as Group a field code with Group (Gr.) in the name appears for selection which is used as a caption with the name of the group. You can use this group caption instead of adding field code so that only a group name was shown as opposed to repeating the field with the group name on every record line.
- You can use the Group in One Table check box on the document template card for a table to have grouped data shown in a single table as opposed multiple separate tables.
- You can use the New Page per Group check box on the document template card for a table for each group of data to be shown on a separate document page.
Creating or editing a layout for Excel documents
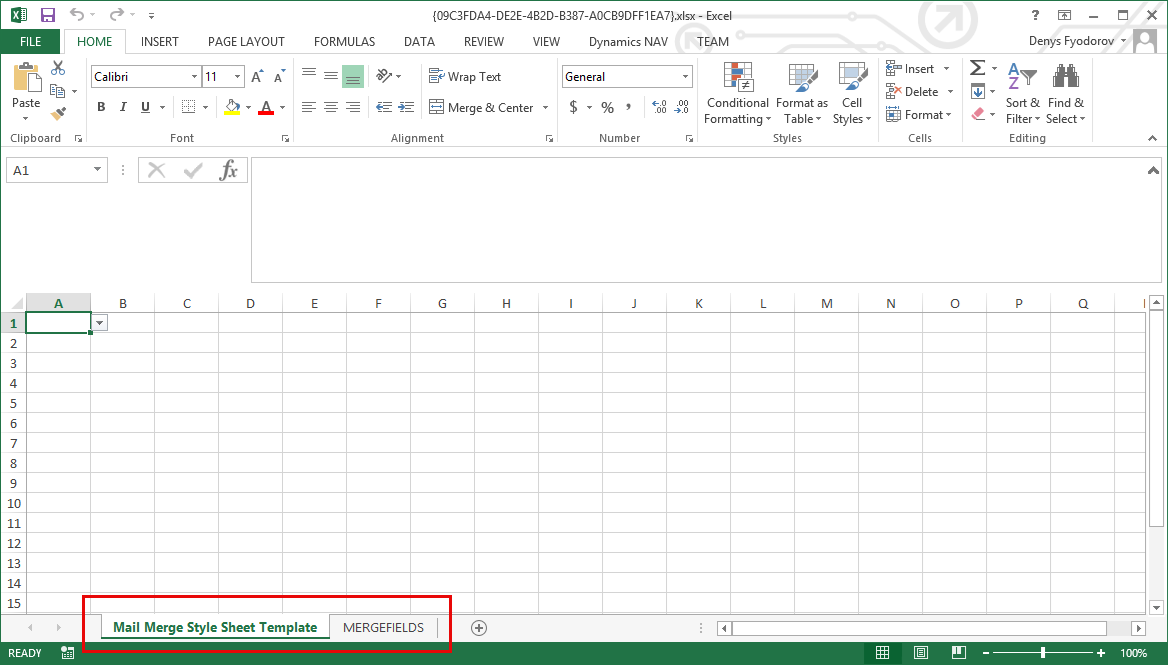
For documents in the Excel format, Microsoft Office Excel is used for creating/updating the document layout.
Once you've opened the exported [TemplateNo].xlsx file, you can start creating or changing the layout.
You can work with the layout only on the first sheet. This sheet can be renamed if necessary. The second sheet shows a list of available merge fields that was retrieved from the document template card in Microsoft Dynamics 365 Business Central.
Add various elements:
- Business Central data: add merge fields in places where you want data retrieved from Microsoft Dynamics 365 Business Central by choosing the drop-down list in a cell where you want data to be located.
 Note
NoteIf you want to add a total merge field to an Excel layout, the cell with this total field must be located right under field for which it is calculated in contrast to Word/PDF template layout where it can be located anywhere.
- Text
- Images
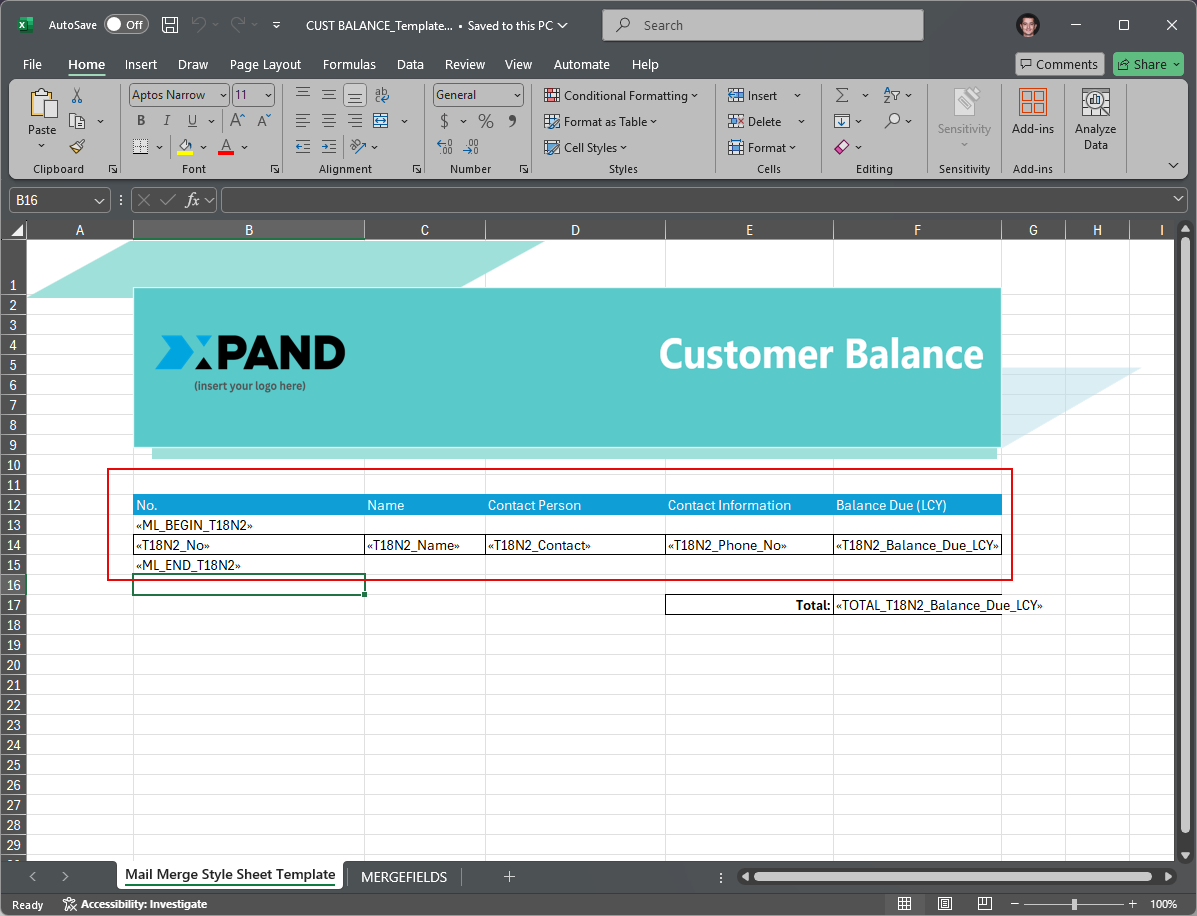
Multiple records (Excel layout)
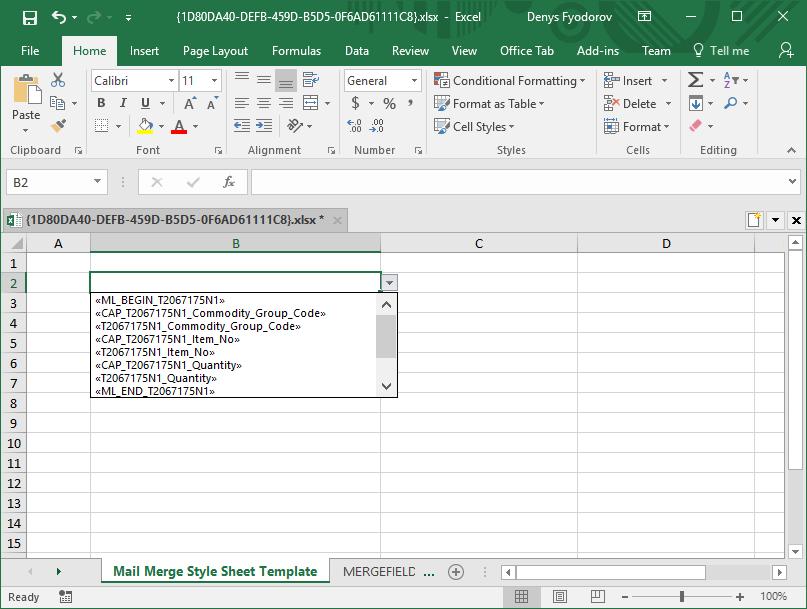
If you want to have multiple records retrieved from a table, the fields that you add must be enclosed by the following code:
ML_BEGIN_<TableID>
…
ML_END_<TableID>
as shown below:
where <TableID> is the ID of table from which the field values are retrieved and <FIELD_CODE> is the code of a field that you add from that table. In contrast to the Word/PDF template layout, in an Excel template layout, for a multi-line construction, the field codes between ML_BEGIN and ML_END do not need to be in a table (Excel sheet is already a table).
A multi-line construction is filled in as follows: after the ML_BEGIN code, data starts to be inserted as soon as there is a data field, and then lines are repeated until there is a TOTAL field or ML_END code. You can also add the codes of field captions (start with CAP) if you want field captions to be displayed. Ensure that the Multiple Lines check box is selected on the Tables FastTab on the document template card for the table that you want to be able to add as a multi-line construction on the template layout.
Importing a document template layout
After you are done making changes to the document template layout, you need to import it back into BC on the corresponding document template card. This will overwrite the existing saved layout.
To import a layout:
- In Business Central with the Qvaba Flexible Documents app installed, choose the icon, enter Document Template List, and then choose the related link.
- In the Document Template List window, choose the number of a document template for which you want to import the updated layout.
- In the Document Template Card window, choose Import Layout to export the layout for editing.
- Choose Yes on the confirmation message that appears. The existing layout will be overwritten. The confirmation message appears only if there is a layout already.
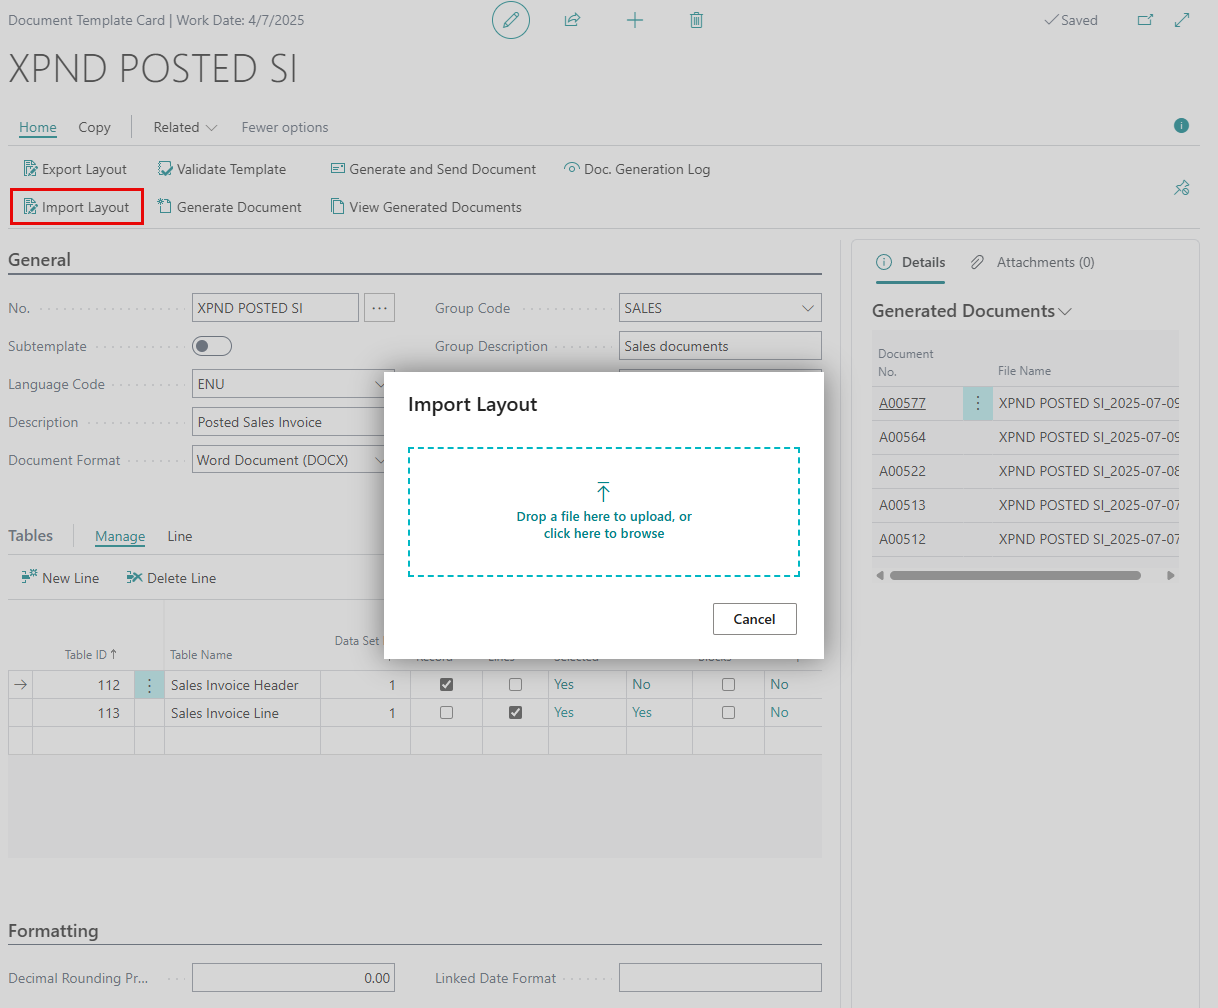
- In the Import Layout dialog window, drop or click, and then browse for the updated [TemplateNo].docx (for Word/PDF documents) or [TemplateNo].xlsx file (for Excel documents).
Note
Even though the exported layout of a Word or PDF document template includes two files (a [TemplateNo].docx file with the layout and a DataSource.xlsx file with information about the data source) in an archive, during import, you only need to specify the [TemplateNo].docx file with the updated layout).
You can validate document templates that already have a layout to ensure that there are no configuration issues.