Configure member activity tracking
The activity of portal members is automatically tracked. Backoffice users can view the member activity log if the portal admin configured the corresponding page.
The member activity log can show such information as when a member signed in, and which pages the member visited and when.
To create a page for member activity tracking
- In the backoffice, go to Content > Xpand Portal.
- Create a
 Grid page for member activity tracking.
 Note
NoteYou can create this page as a child page to any page within the localization node.
- On the header, enter the page name that will be used to identify it in the backoffice. For example, Member Activity Log.
- On the General tab, you specify the page title, which will be displayed on the page, menu item title, and configure other optional settings if necessary. See the Creating a grid page topic for information on how to configure settings on this tab.
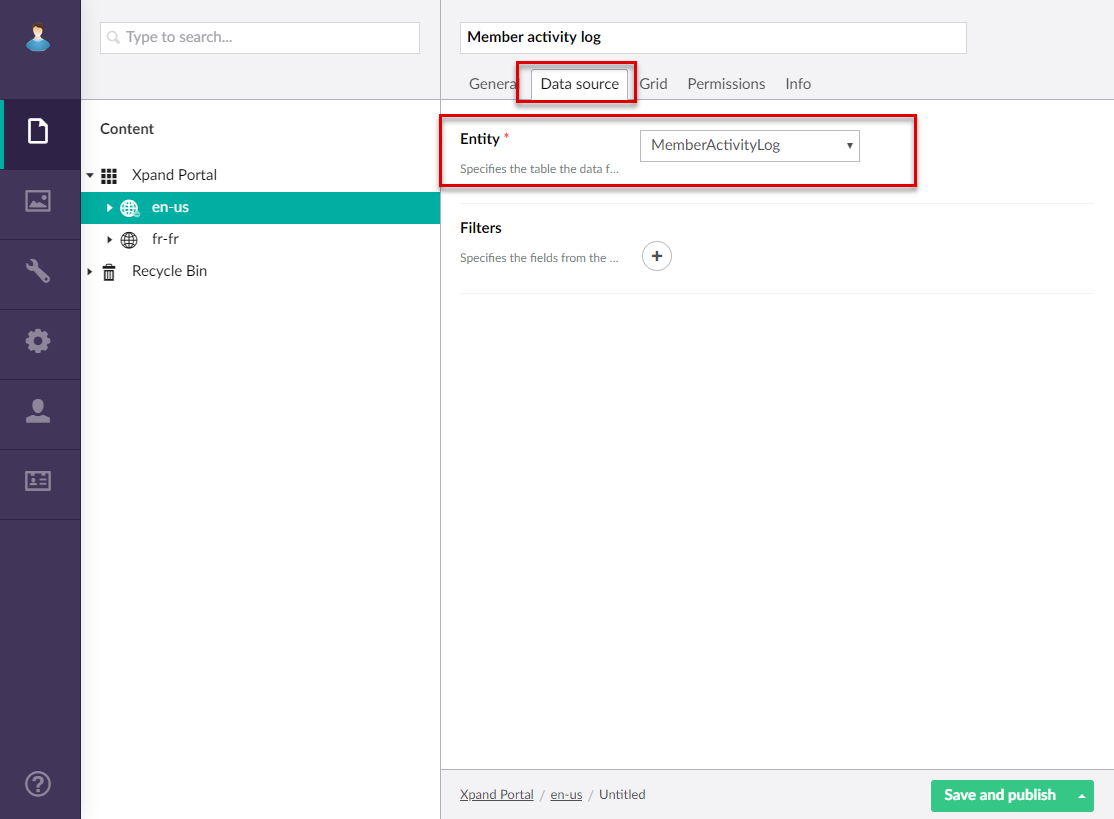
- On the Data source tab, in the Entity field, select MemberActivityTracking as the source entity.
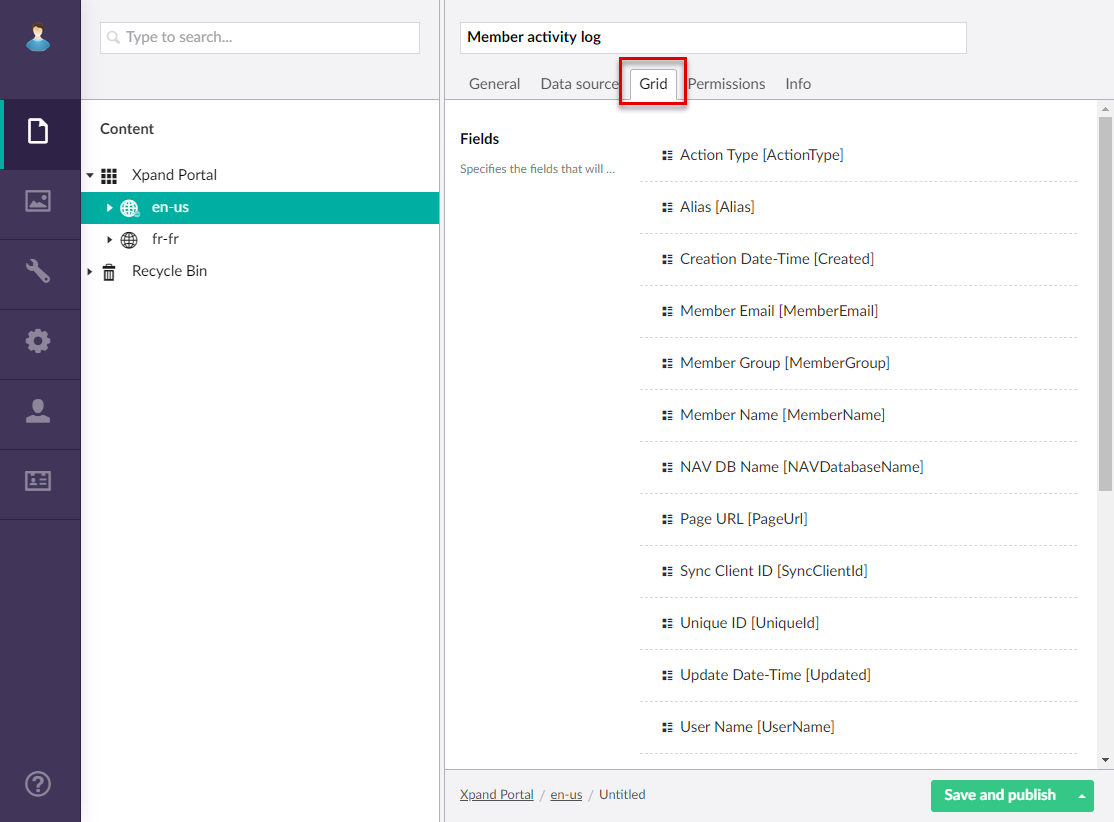
- On the Grid tab, under Fields, configure which fields will be displayed in the log. See the Creating a grid page topic for information on how to configure field settings.
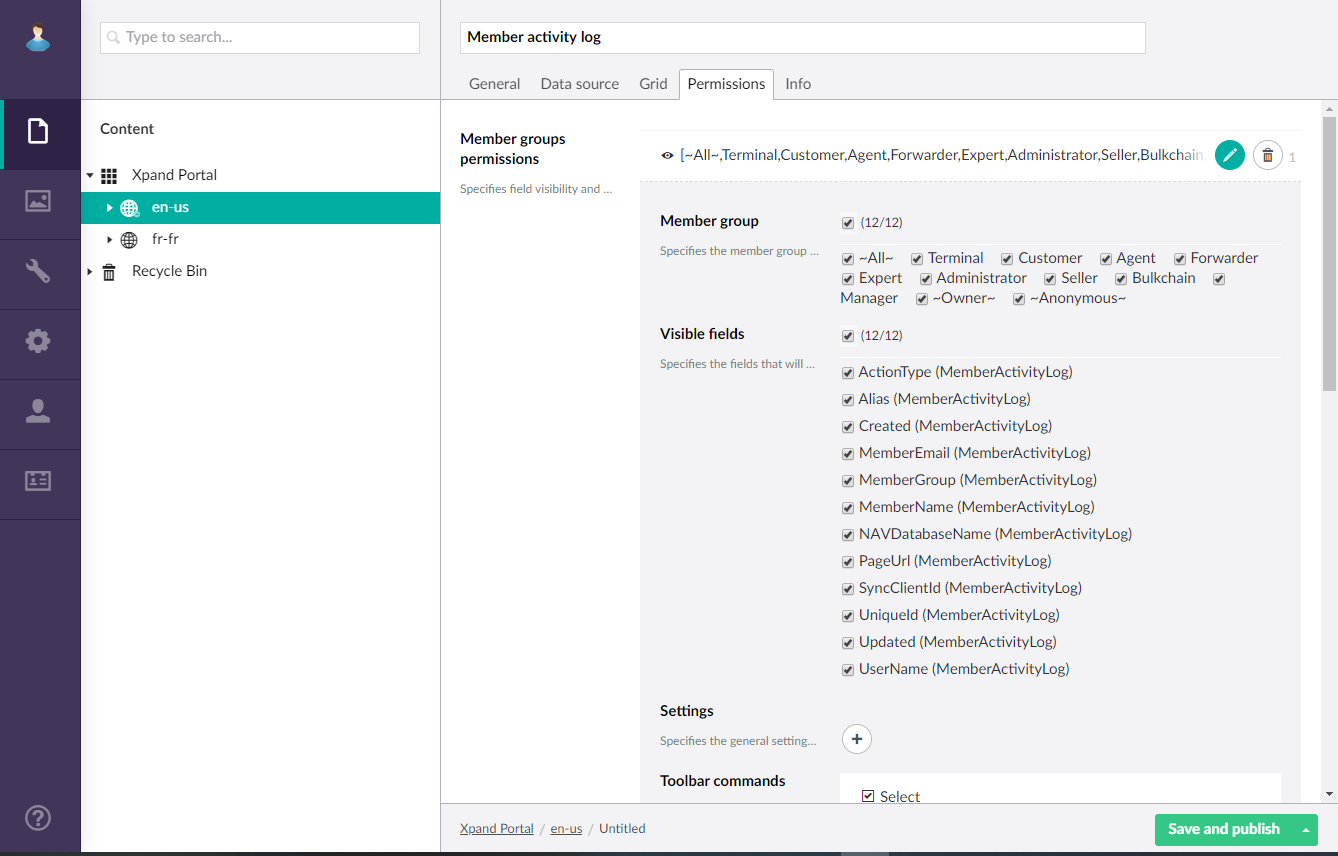
- On the Permissions tab, under Member group permissions, configure permission set(s) for various combinations of member groups where you can specify which fields will be displayed, define grid page settings, and add toolbar commands.
 Tip
TipInformation about member activity is not intended for members, not related to the portal administration, therefore we recommend you hide the page menu item for certain member roles, not related to portal administration. For example, you can do this by adding the page to the admin member group who have access only to administration-related pages.
- Select Save and publish in the bottom-right corner to save the created page.
Now members that belong to the roles, for which the created page is allowed, can view member activity from the front end.
|
Tracking starts as soon as the member activity log page is published. |
Additional member tracking settings
You can also enable tracking in specific portal places where it is available:
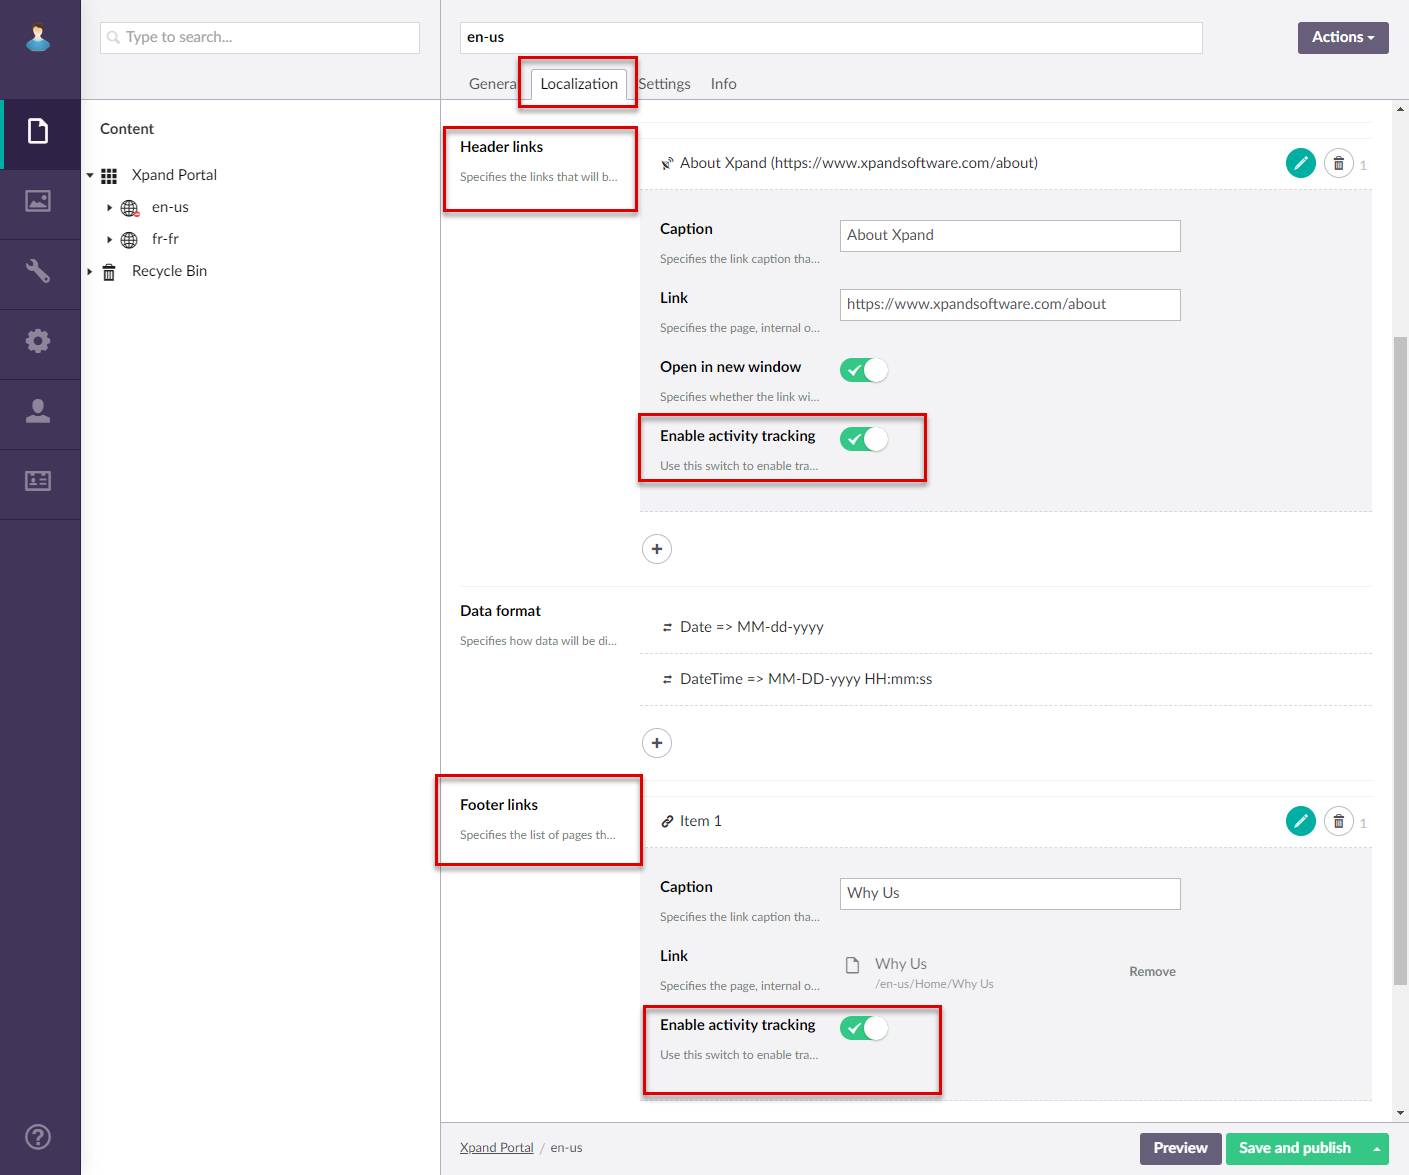
- You can enable tracking on header and footer links by turning on the Enable Activity Tracking switch in the settings of a header or footer link, which are configured in the site settings. If enabled, when a portal members follows this link, this activity will be shown in the member activity log with the link click action type.
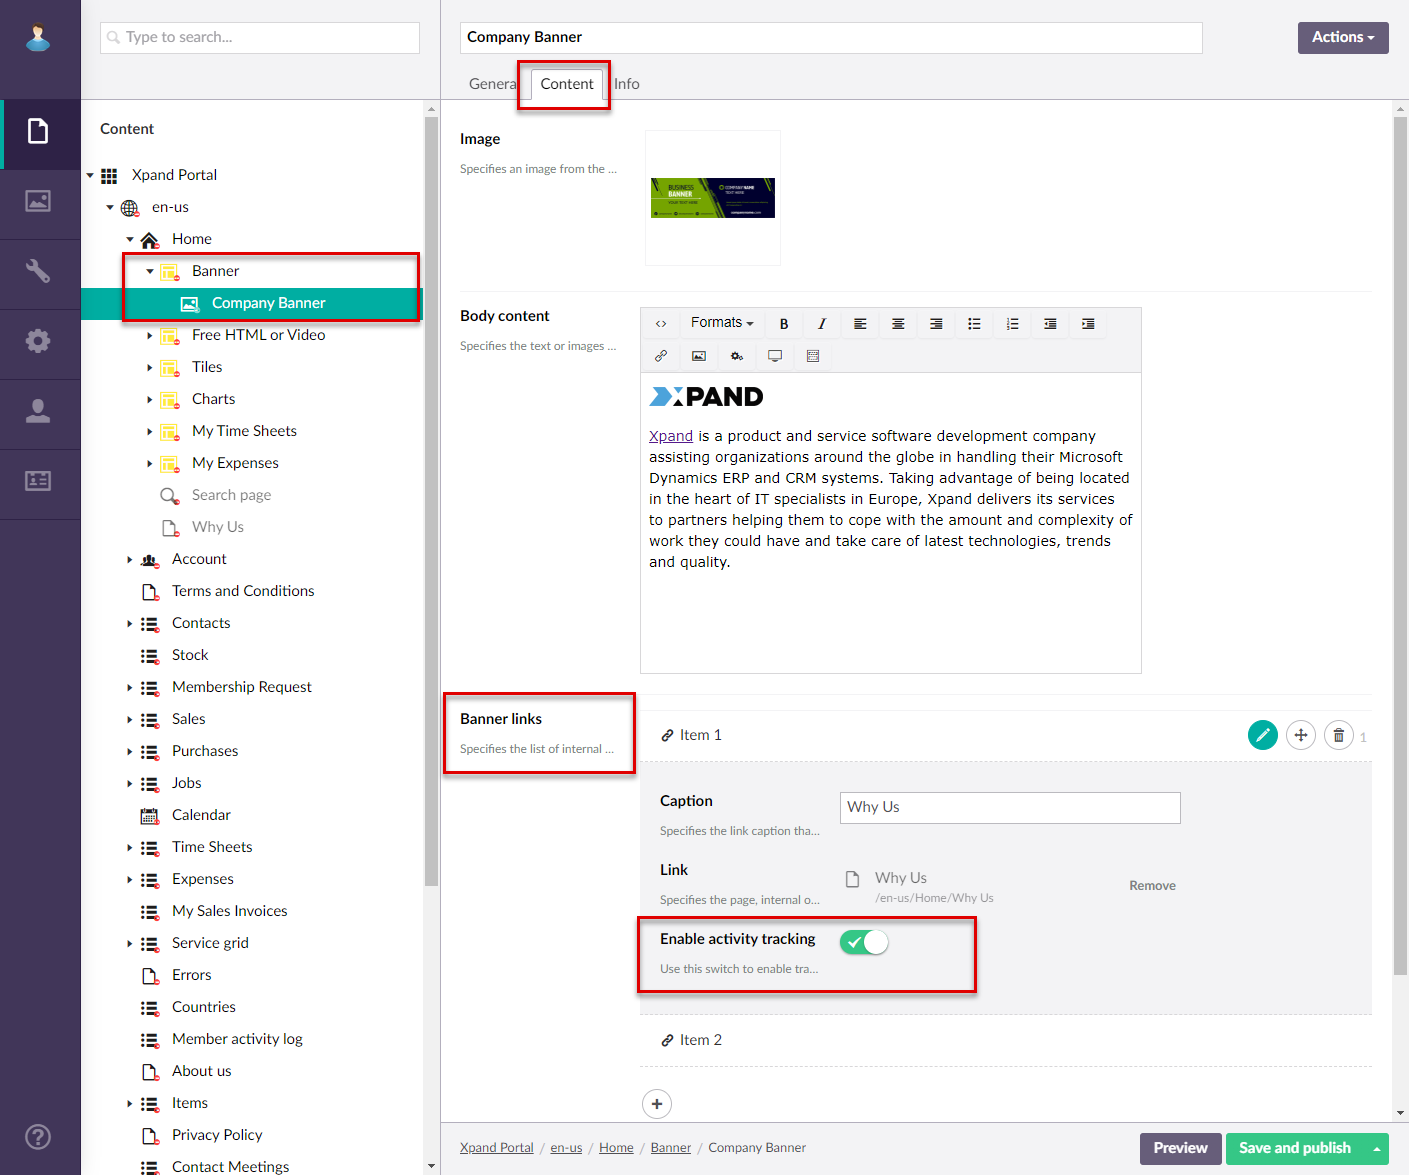
- You can enable tracking on banner links by turning on the Enable Activity Tracking switch in the settings of a company banner. When a member follows such a banner link (by selecting a button with the link in the banner layout block of the home page), this activity will be shown in the member activity log with the link click action type.
- You can add the attribute data-activity="link click" to any HTML link, such as the button that downloads files or navigate-to links. For example, to HTML links that you specify in the Data format setting of a field (the Fully custom format string option) on a grid. When a member follows such a link (by clicking or tapping the field value), this activity will be shown in the member activity log with the link click action type.