Custom quick search (configuration)
Custom quick search is an element of a ![]() grid,
grid, ![]() detail, or
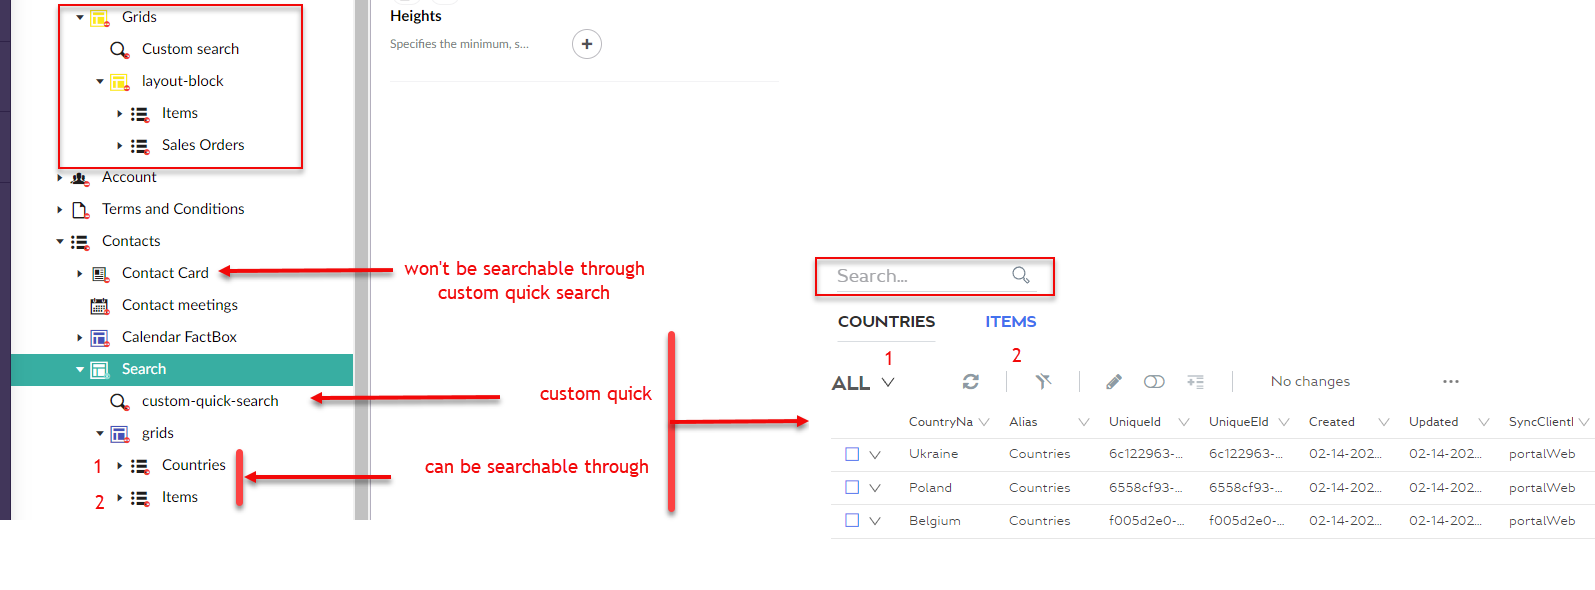
detail, or ![]() dashboard layout block that adds customizable search box instead of the standard embedded search box. As this custom quick search is part of a layout block, it can be located anywhere on a page. Custom quick search can be configured to search data in multiple grids using a single search box. However, custom quick search cannot search in the parent grid – only in grids within the same layout block or child layout blocks.
dashboard layout block that adds customizable search box instead of the standard embedded search box. As this custom quick search is part of a layout block, it can be located anywhere on a page. Custom quick search can be configured to search data in multiple grids using a single search box. However, custom quick search cannot search in the parent grid – only in grids within the same layout block or child layout blocks.
If a custom quick search is added, it replaces the standard search box on the grid pages where data is searchable through the custom quick search.
To add custom quick search to a page
- In the backoffice, go to Content and expand the node of a
 grid page,
  detail page, or
  dashboard (home) depending on where you want to add custom quick search.
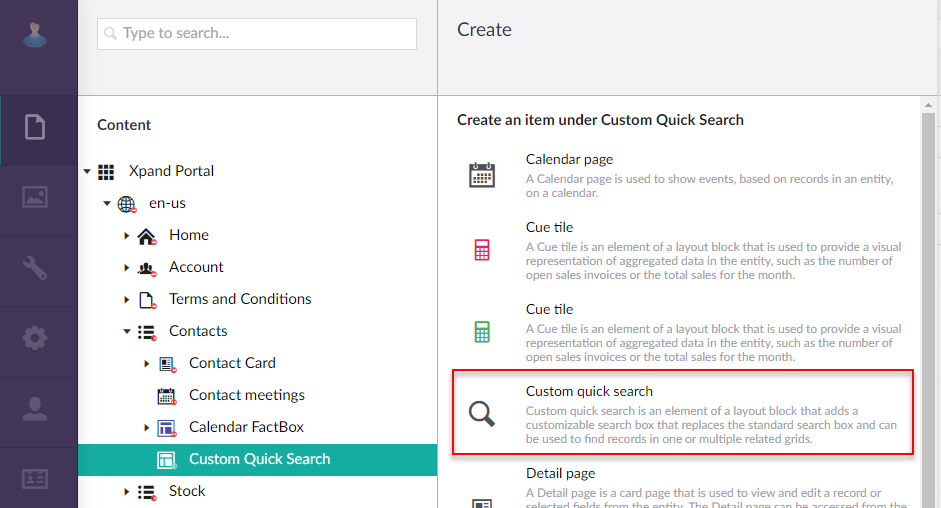
 - Select the
 icon next to the corresponding layout block node (
 grid,
grid,  detail, or
  home dashboard). Alternatively, select and hold (or right-click) the node, and then select Create.
 Tip
TipThe layout block settings define where your custom quick search will be located on the page. If you want your custom quick search to look tidy, above all the grid(s) where data is searchable, we recommend creating a child layout block for the grids that will be searchable through the custom quick search. In this scenario, if you are going to use the View type layout block setting for these child grids (for example, to organize them into tabs), leave the View type layout block setting blank in the layout block where custom quick is added make the custom quick search always visible while you navigate through the related grids.
- Select
 Custom Quick Search.
- On the header, enter the custom quick search name that will be used to identify it in the backoffice.
- On the General tab, fill in the general settings:
- Titles - Specifies the settings where you can configure the title of various elements on this page.
- Title - Specifies the title that will be displayed in the header of the created page or page element.
- Subtitle - Specifies the subtitle that will be displayed in the header of the created page or page element.
- Icon - Specifies the image that will be displayed in front of the title if specified. Adding an icon is optional. You can leave this setting empty (in this case, the default icon, chosen by the development team, will be used) or choose an icon from one of the available icon libraries.
- Responsive behavior - Specifies the settings that define how this page part or UI element responds to different viewport widths by adjusting its width and visibility at each responsive breakpoint.
- Hide element - This setting hides the custom quick search box from the page. It can be configured per member group. Select one or several member groups, for which this custom quick search box will be hidden. Alternatively, you can select the ~All~ checkbox to hide it for all member groups (without the necessity to select every member group's checkbox) or select the Hide element checkbox to have all member groups selected at once.
- Description - Specifies a description of this layout block element.
- Content-from page - Specifies the page the content of which will be displayed instead of the content of this page when this page is opened via a direct link. The URL in the address bar will remain that of the original page. For a custom quick search box, filling in this setting is not required.
- Redirect-to page - Specifies the page that will be displayed instead of this page when this page is opened via a direct link. The URL in the address bar will be that of the target page. For a custom quick search box, filling in this setting is not required.
- Module assignment & protection - Specifies settings that allow you to assign this content element (site, page, page element, etc.) to an internal module as well as to protect this element from certain operations (copying, changing, deletion). Select the Configure button to configure module assignment & protection or the Change button to edit existing configuration if it has already been configured.
- Titles - Specifies the settings where you can configure the title of various elements on this page.
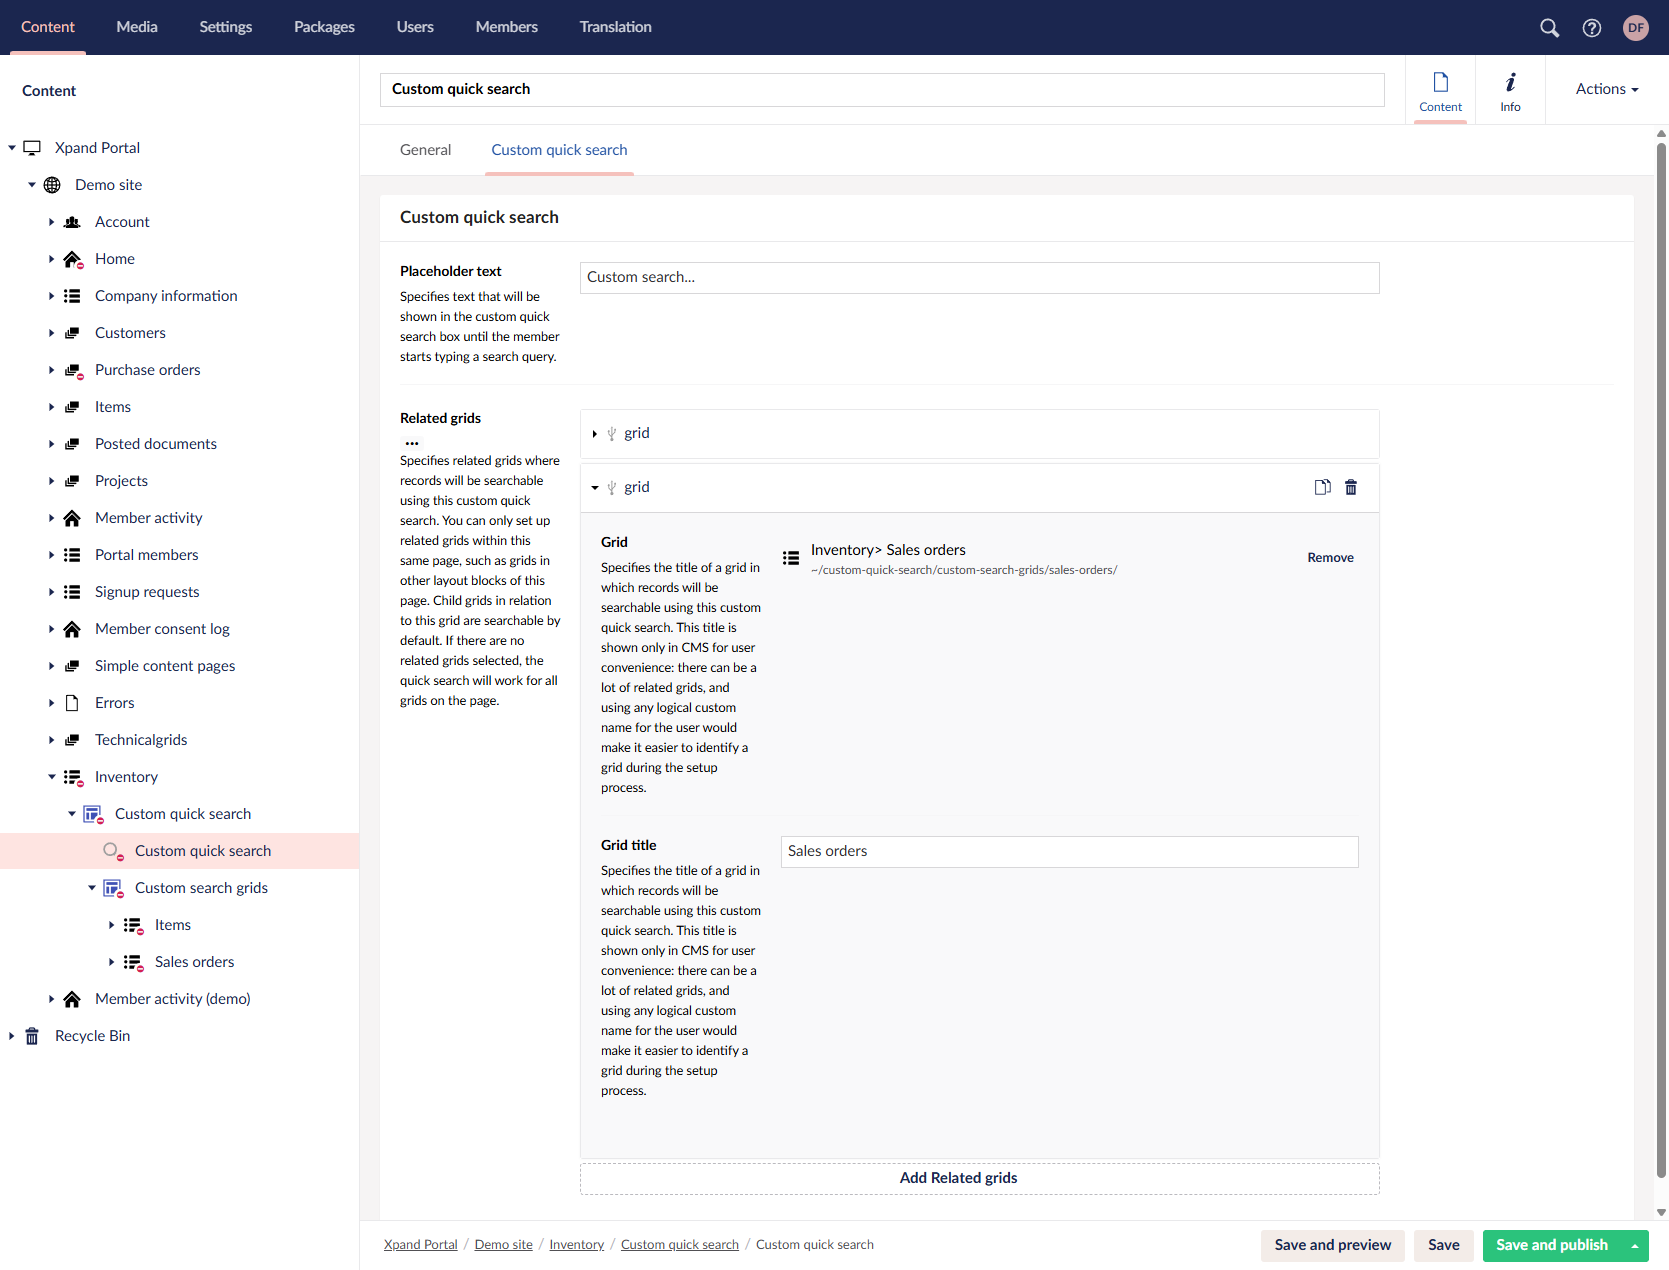
- On the Custom quick search tab, fill in the custom quick search-related settings:
- Placeholder text - Specifies text that will be shown in the custom quick search box until the member starts typing a search query.
- Related grids - Specifies related grids in which records will be searchable using this custom quick search. You can only set up related grid within this same page, such as grids in other layout blocks of this page. Child grids in relation to this grid are searchable by default. If there are no related grids selected, quick search will work for all grids on the page (within the same layout block or lower, but not in the parent grid(s) if any). Therefore, configuring related grids makes sense only if you want to make data searchable in some of the related grids (not all) through custom quick search; otherwise, you don't have to configure related grids. Make sure that related grids are created within the same or (recommended) a separate child layout block. To add a related grid, select Add related grids.
- Grid - Specifies a grid in which records will be searchable using this custom quick search. You can only select a grid that is within the same or child layout block.
- Grid title - Specifies the title of a grid in which records will be searchable using this custom quick search. This title is shown only in the backoffice for user convenience: there can be a lot of related grids, and using any logical custom name for the user would make it easier to identify a grid during the setup process.
 Note
NoteThe related grids settings are not automatically cleared if the related grid pages are deleted; these settings need to be manually updated.
- Select Save and publish to save the changes and publish them on the front end. Optionally, if you were editing the page, you can select Save and preview to preview how the page will look like on the front end.
Now you can use custom quick search on the configured page to search in all related grids at once.