Managing members from the front end
Portal members (end users of Xpand Portal who work with the front end) are normally created and managed in the backoffice. However, Xpand Portal also provides portal administrators with the ability to manage (create, edit, delete, send invitation emails, etc.) from the front end. To be able to do this, the corresponding page must be configured for your portal.
|
Some member settings are only available when managing members from the front end. |
Setting up pages for managing members from the front end
Normally, pages for managing members from the front end is deployed during portal installation as part of the content package, and should already be available on your portal. In case they are missing, you can set them up using the details below.
To set up a grid page for managing members from the front end
- Create a grid page where portal administrators will be managing members from the front end. When creating the page, make sure the following grid settings are configured as described below:
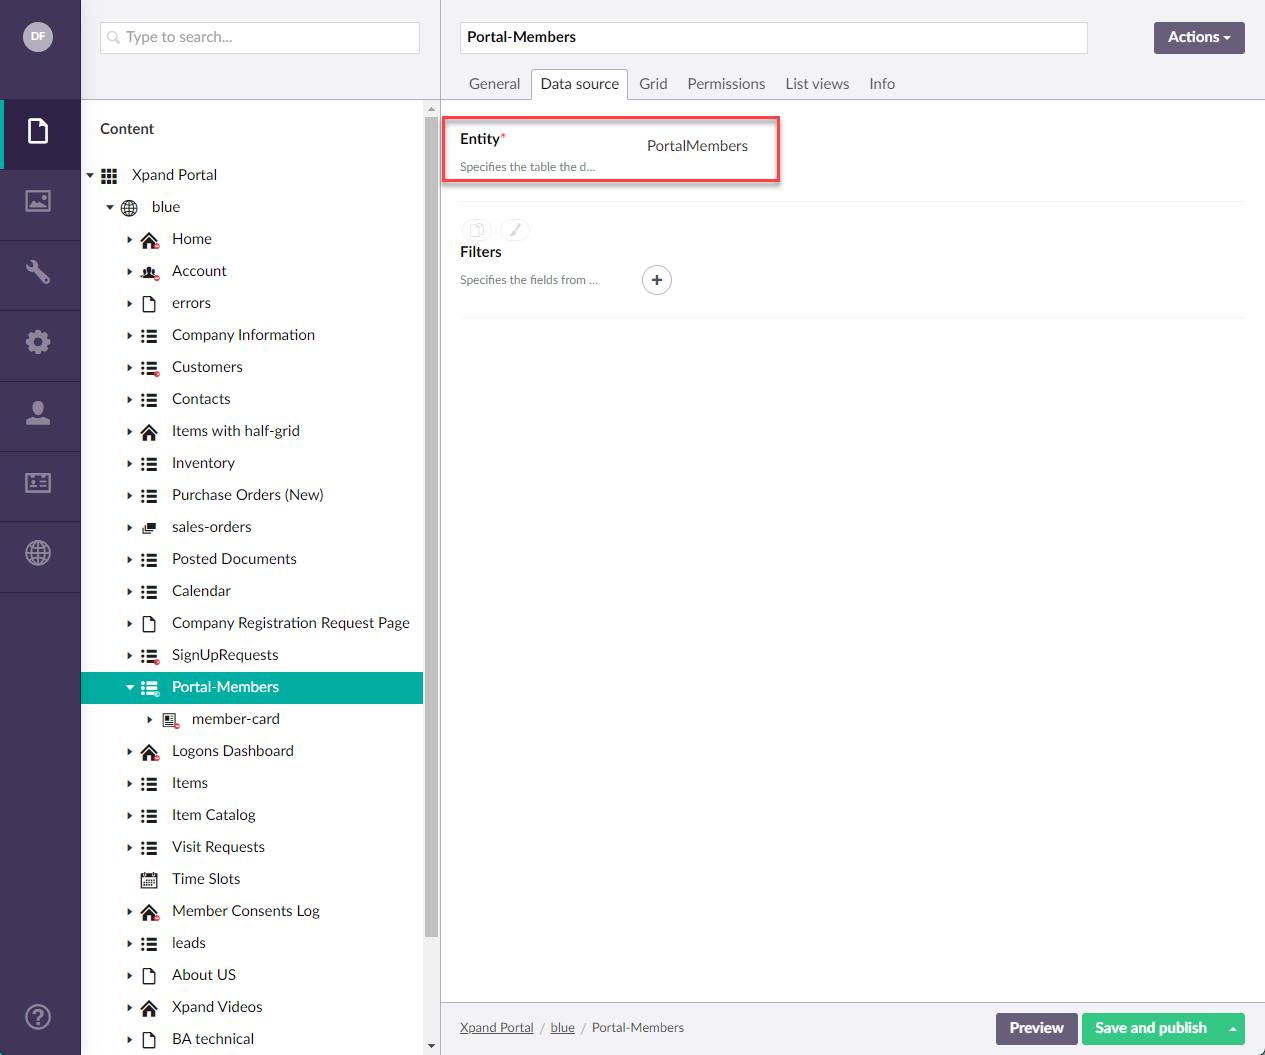
- On the Data source tab, set the Entity setting to PortalMembers.
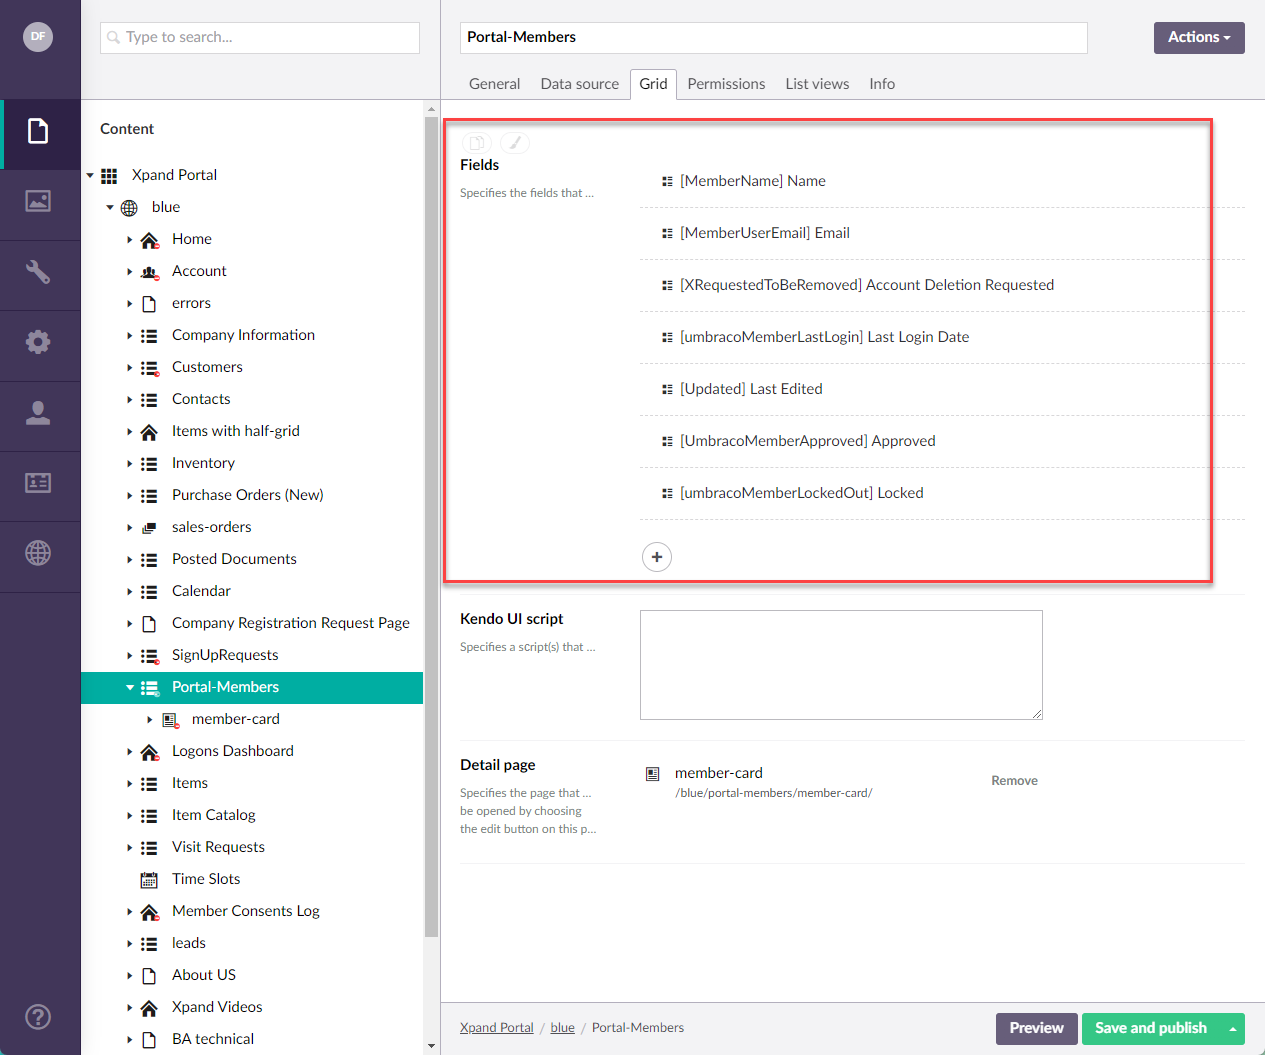
- On the Grid tab, under Fields, set up fields that will be available on this page. The recommended list of fields is shown below.
- On the Permissions tab, set up grid permissions. Make sure that only administrator member groups have access to this page. Under Toolbar commands add grid actions that you want to be available on the page. For this page, we recommend configuring the following actions:
- Select (to be able to select member records to perform actions with).
- Refresh (to be able to refresh data on the page without reloading the whole page).
- Create (to be able to register new members by creating new member records).
- Edit (to be able to edit information about members)
- Delete (to be able to delete members from the portal).
- Export (to be able to export member information to Excel/PDF).
- Print (to be able print out member information).
- Filter (to be able to set filters on the page)
- Set column visibility (to be able to change the column visibility on the page)
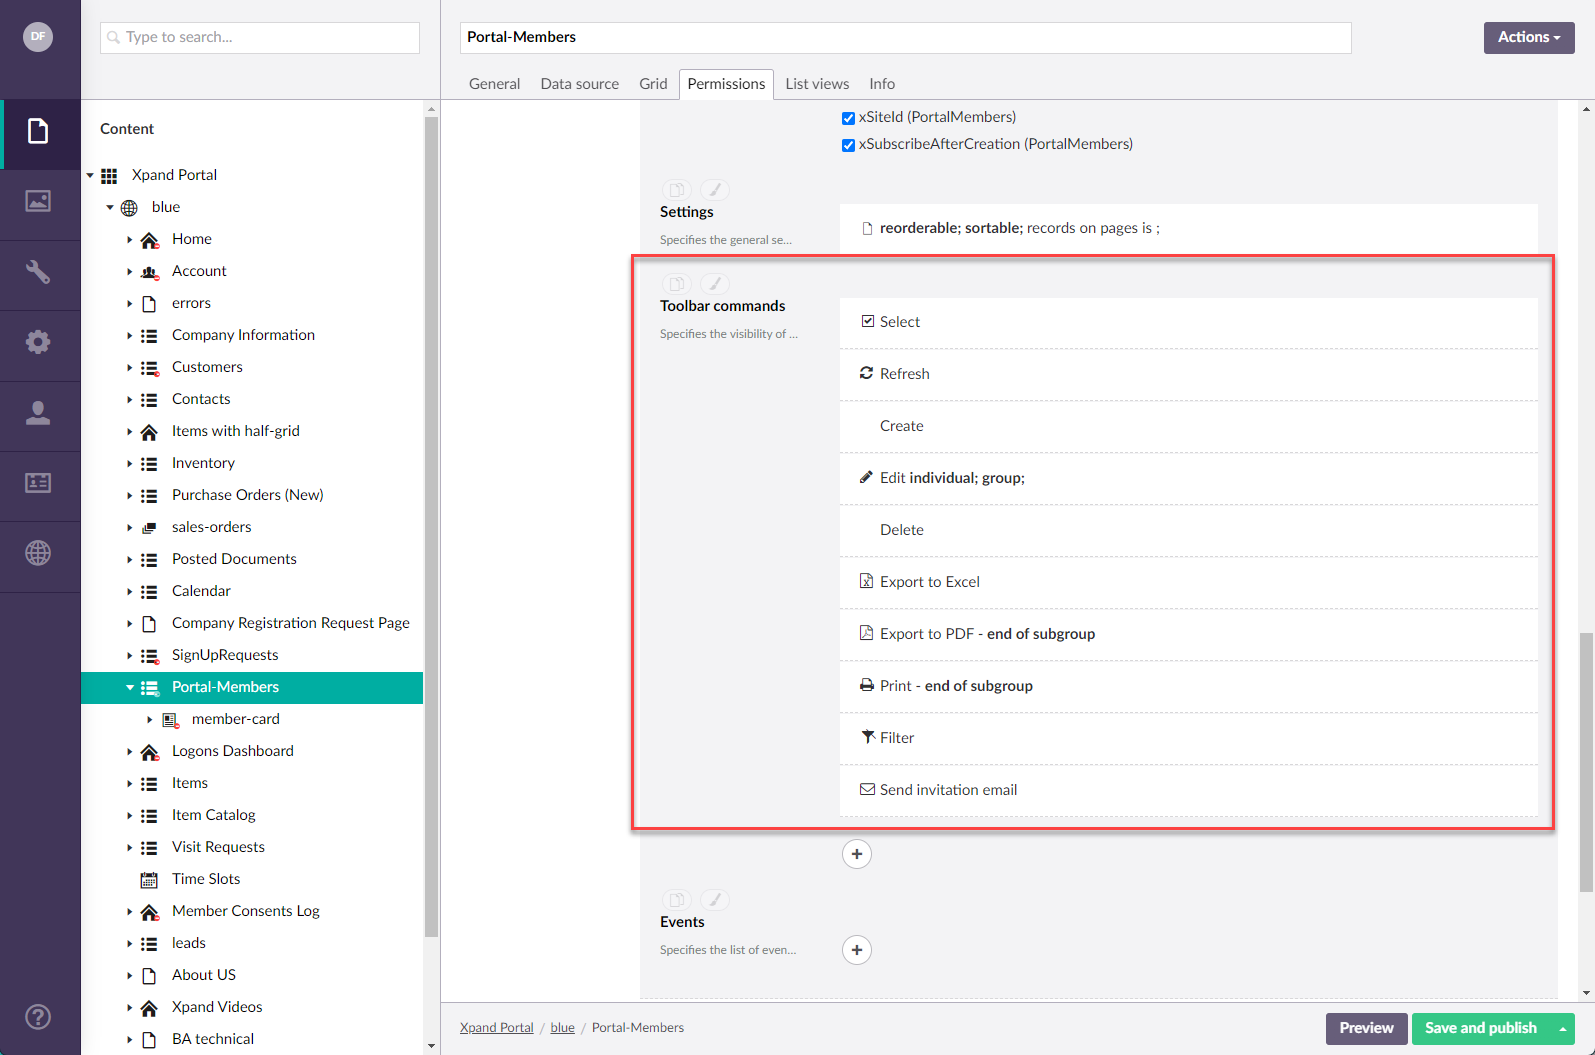
- Complex modify (to be able to invite new members by sending an invitation email). For this action, specify the following action settings:
- Caption = Send invitation email
- Show command title = Yes
- Command icon = (an icon that represents an envelop/email)
- Dialog window settings:
- Width = 12
- Items = [[membername]]
- Fields to update:
- Field = xSendConfirmation (PortalMembers)
- Value: Constant value = 1
- On the Data source tab, set the Entity setting to PortalMembers.
- Select Save and publish to save the changes and publish them on the front end. Optionally, if you were editing the page, you can select Save and preview to preview how the page will look like on the front end.
If want to be able to view/edit members on a card (detail) page, also create a child detail page under the created grid page.
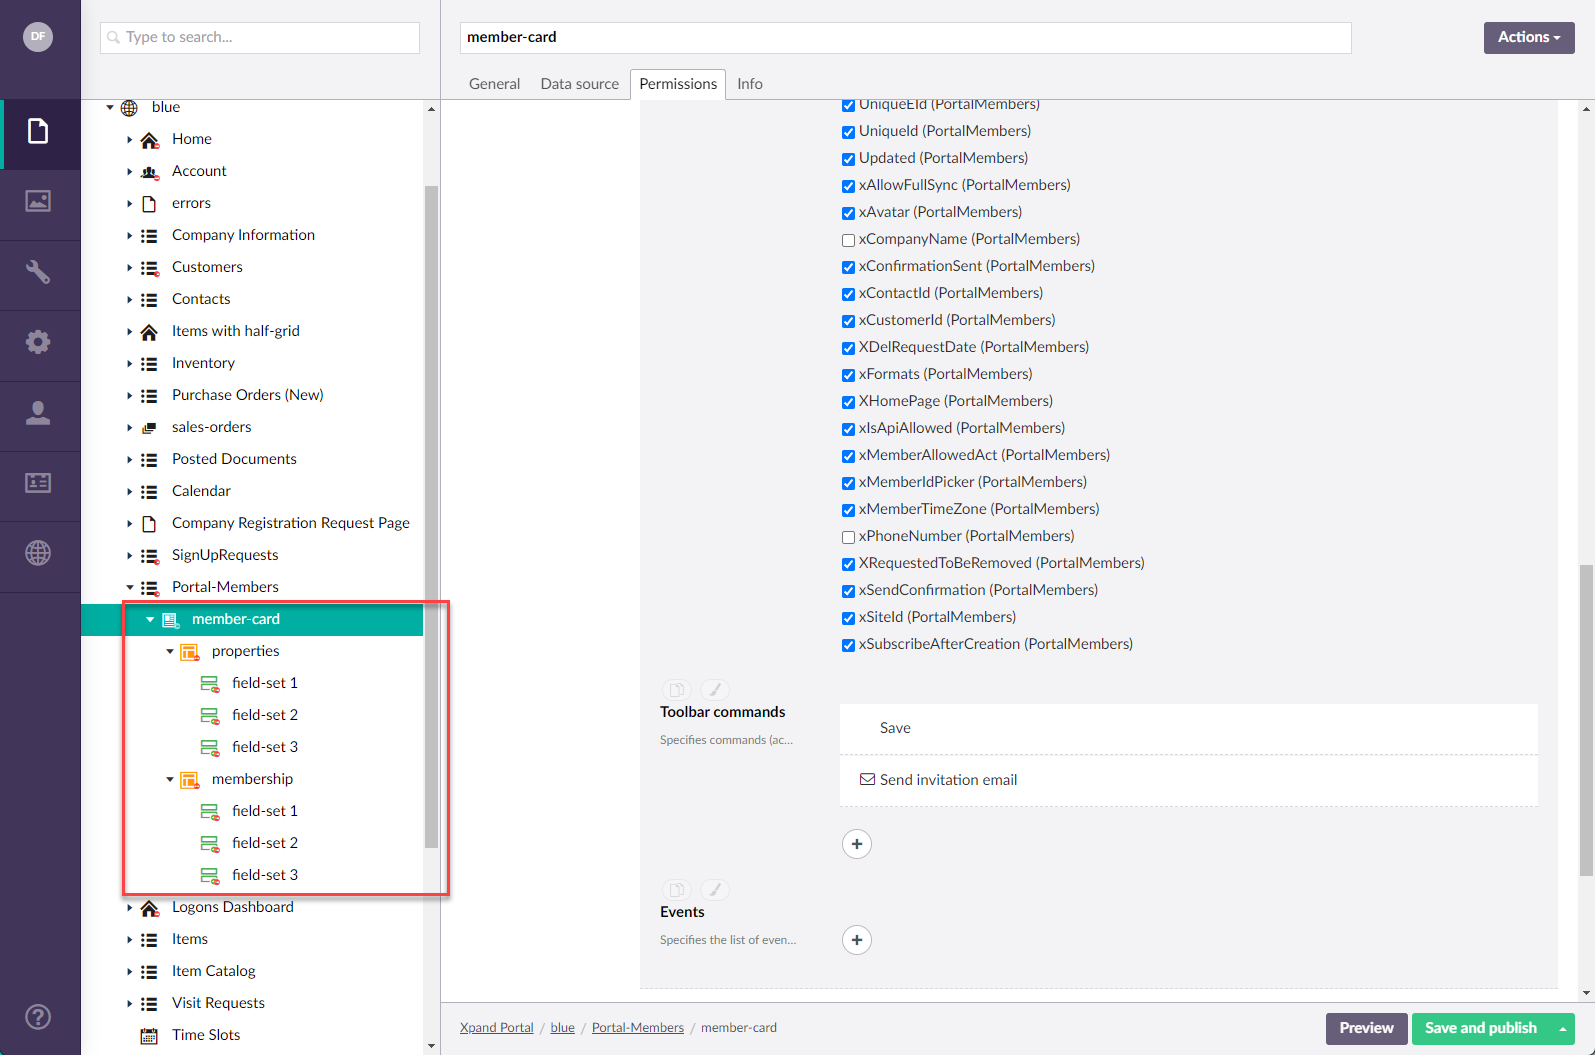
To set up a detail page for managing members from the front end
- Create a detail page as a child page for the created grid page (described above). On this page, portal administrators will be viewing/editing members as well as approve/reject member registration requests on on a detail page. When creating the page, make sure the following detail page settings are configured as described below:
- On the Data source tab, set the Entity setting to PortalMembers.
- On the Permissions tab, set up detail page permissions. Make sure that only administrator member groups have access to this page. Under Toolbar commands add detail page actions that you want to be available on the page. For this page, we recommend configuring the following actions:
- Save (to be able to save the changes).
- Complex modify (to be able to invite new members by sending an invitation email). For this action, specify the following action settings:
- Caption = Send invitation email
- Show command title = Yes
- Command icon = (an icon that represents an envelop/email)
- Dialog window settings:
- Width = 12
- Items = [[membername]]
- Fields to update:
- Field = xSendConfirmation (PortalMembers)
- Value: Constant value = 1
- Select Save and publish to save the changes and publish them on the front end. Optionally, if you were editing the page, you can select Save and preview to preview how the page will look like on the front end.
- Create detail page layout block(s) for hosting fields, and then add field sets to them. The recommended list of fields on the detail page is the same as on the grid page.
Managing members from the front end
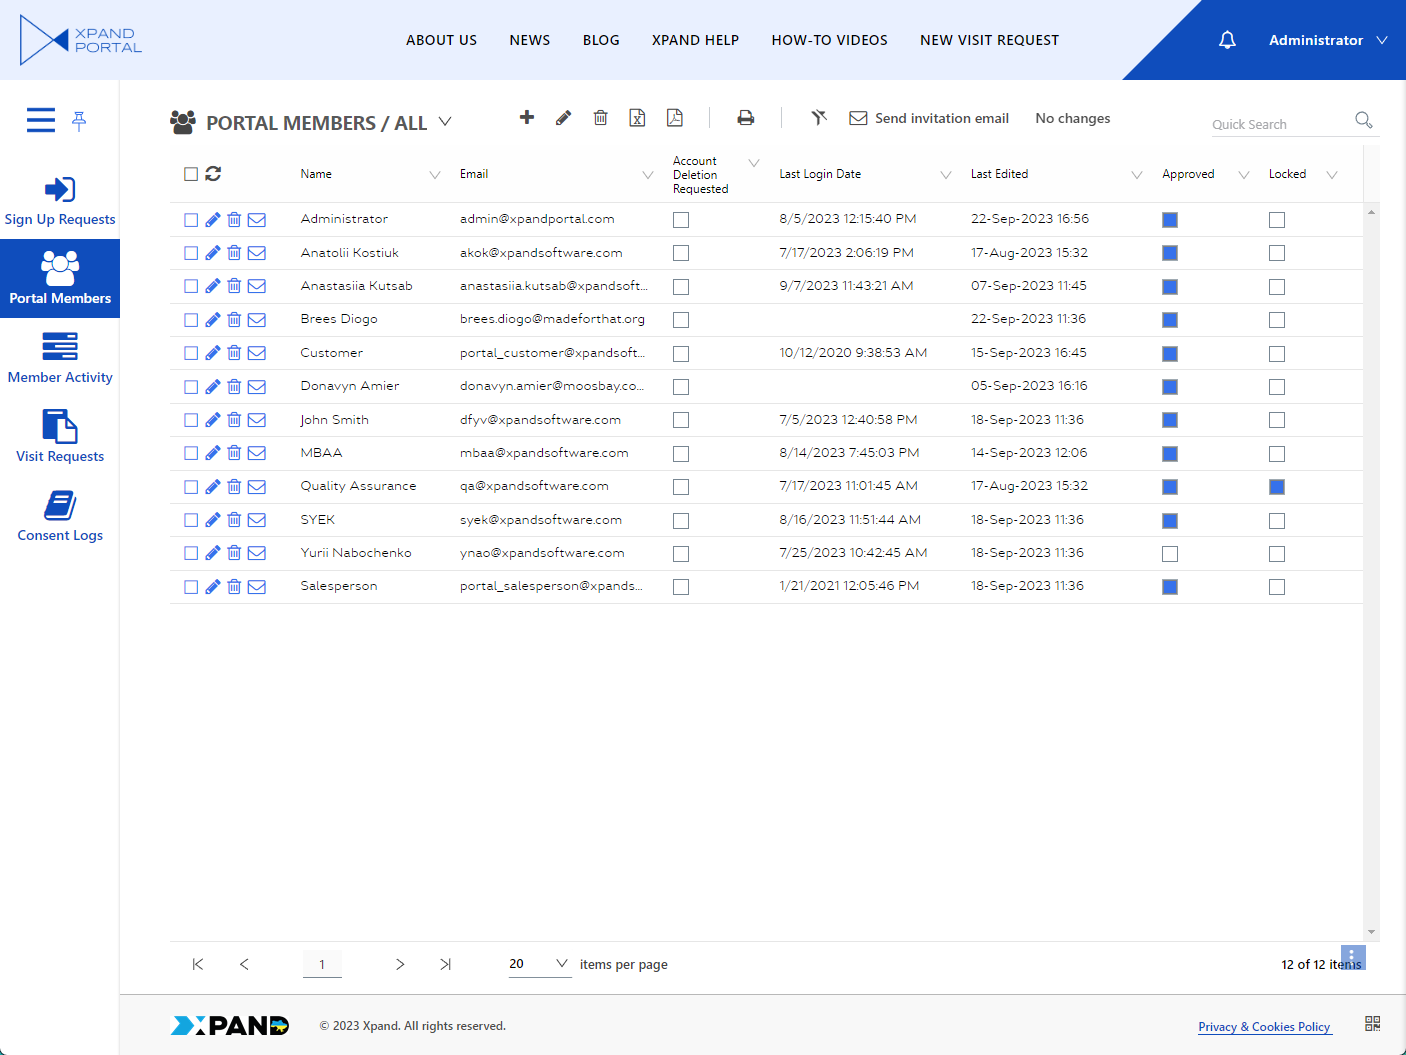
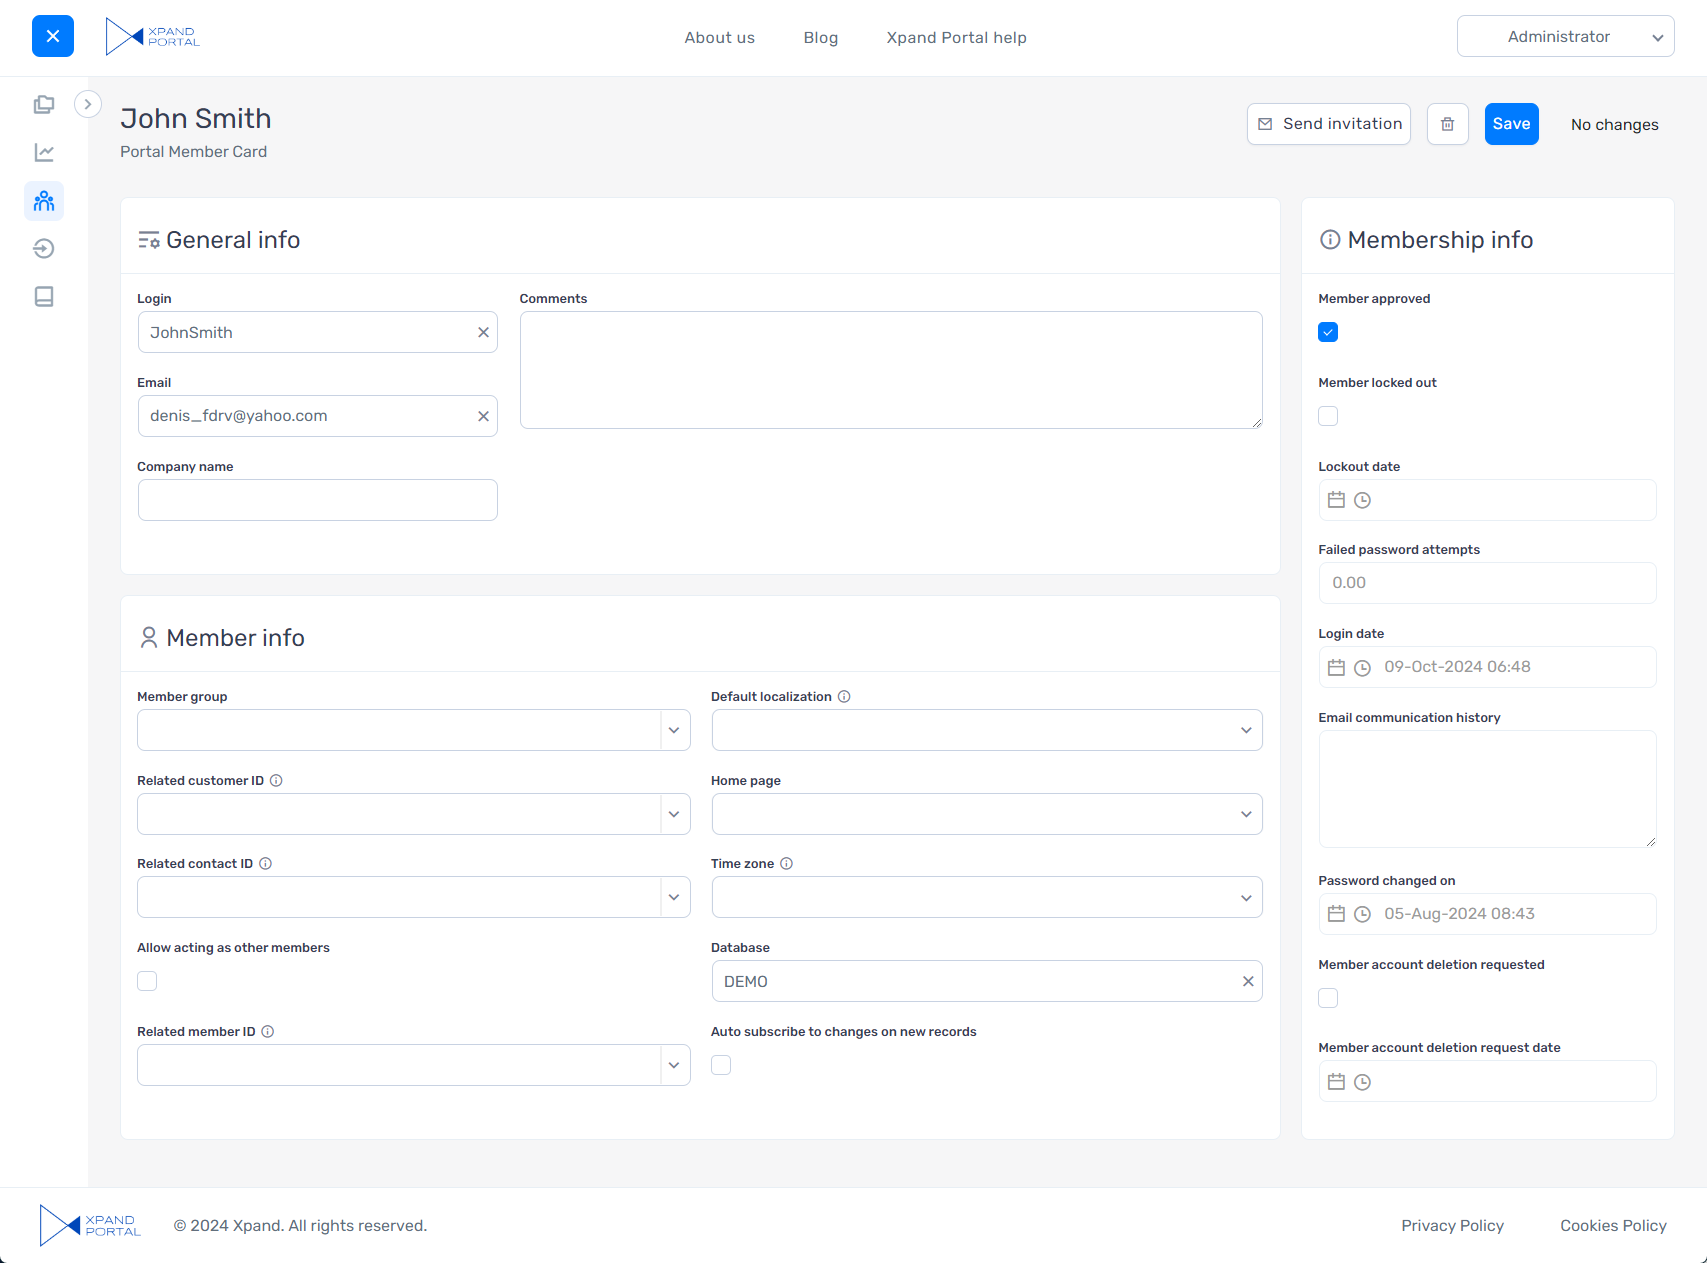
If pages for managing members from the front end were configured, portal administrators can sign in to the portal using an admin member role (or any role that was configured to have access to the pages where members are managed), locate the page for managing members, view member information as well as perform various activities (depending on the actions that were configured):
- Register new members (using the Create action)
- Edit member information (using the Edit action)
- Export member information (using the Export action)
- Invite new members (using the Send invitation email action (the caption can be different in your case) configured on the basis of the Complex modify action as described above)
- Delete members (using the Delete action)
Synchronization of members between back and front end
|
Since version 4.0.0.0, manual synchronization of members between the back and front end is no longer available. |
Members are automatically synchronized between back and front end; normally there's no need to perform any additional steps to synchronize member information. However, under certain circumstances, synchronization may fail due to various reasons. In this case, in older portal versions, you can force the synchronization of members as follows:
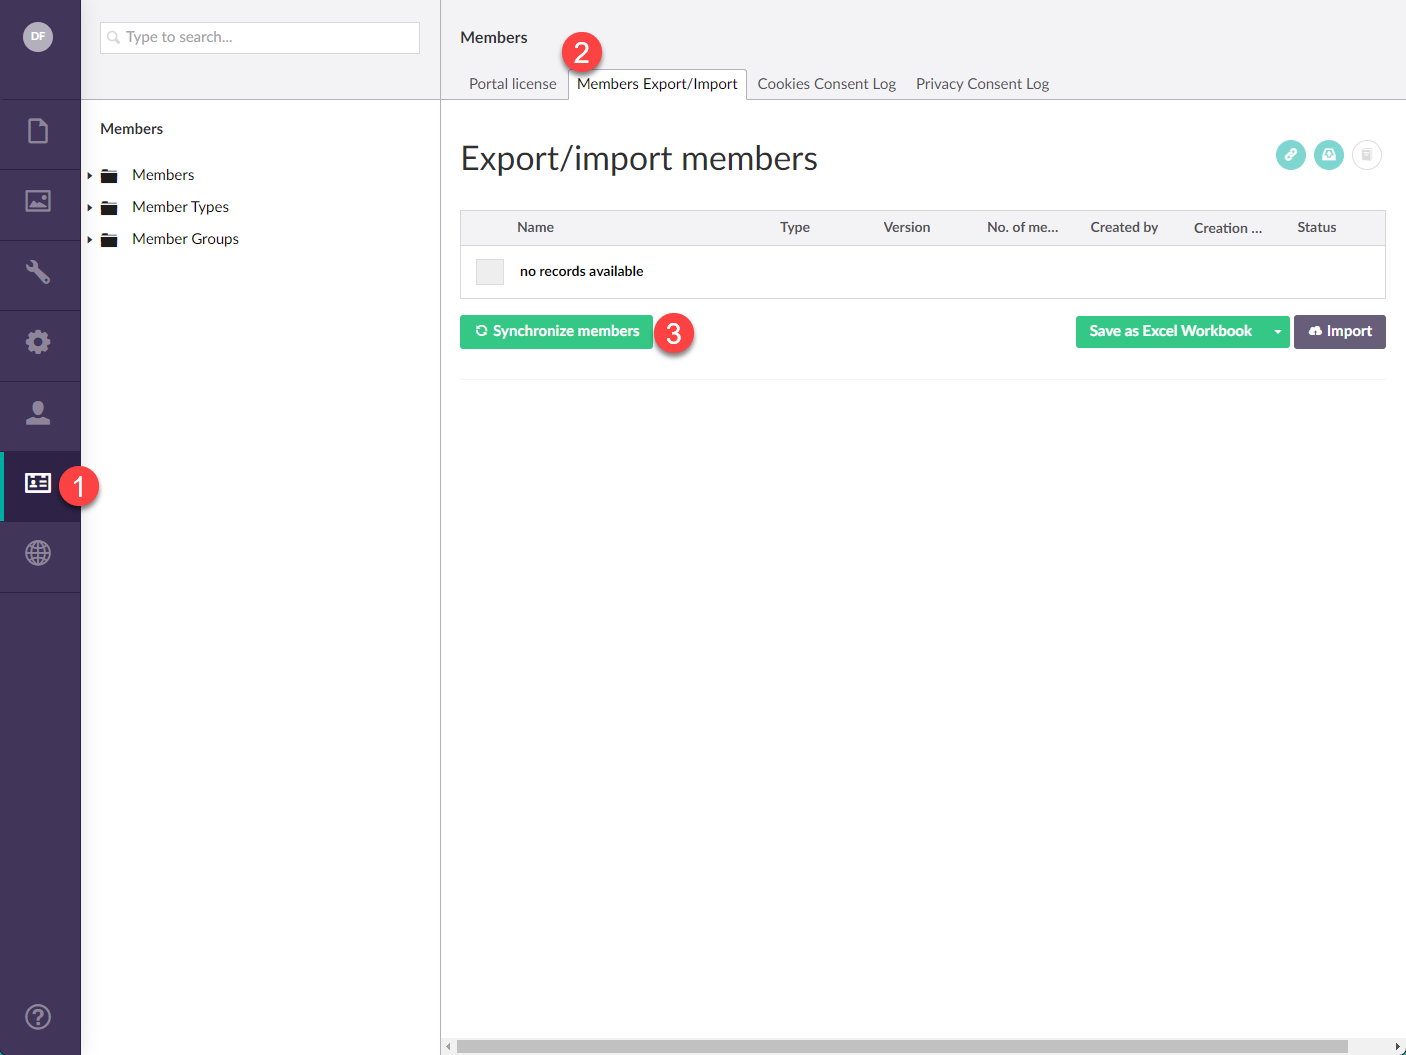
- In the backoffice, go to Members.
- On the Members Export/Import tab, select the Synchronize members button to force member synchronization.
Managing sign-up requests
When members sign up on the portal, they submit a request to register a new member account for them. To be able to manage sign-up requests, a grid page must be created for administrators on the front end.
|
For the sign up functionality to work correctly, also the Account registration page must be configured, and the ability to sign up must be enabled in the settings of that page. |
To create a grid page for managing sign-up requests
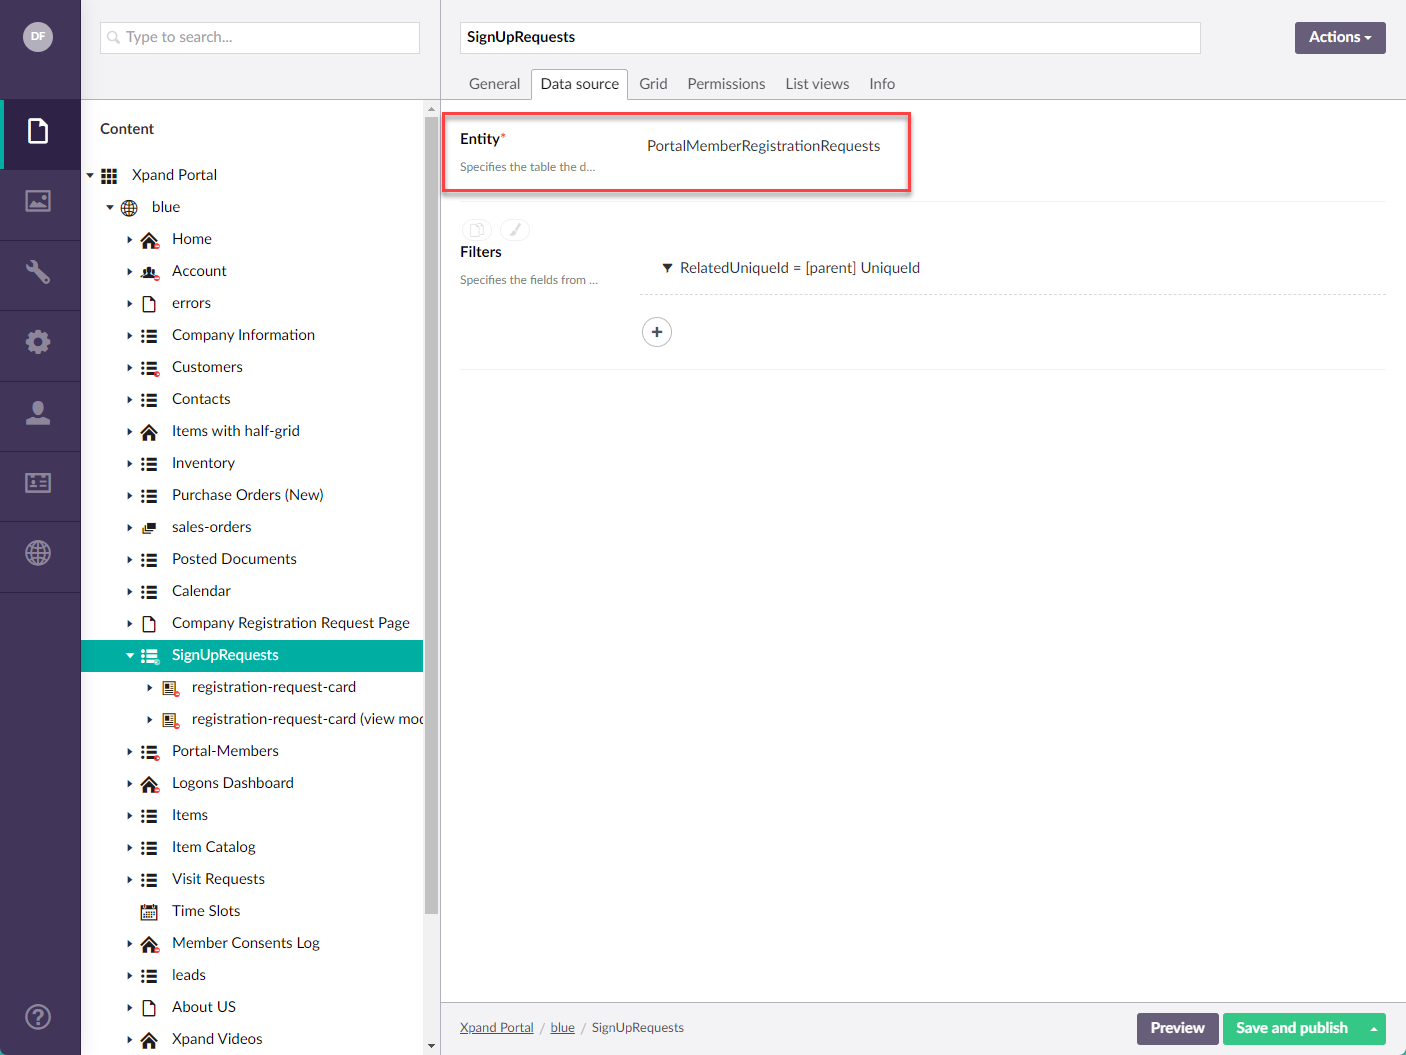
- Create a grid page where portal administrators will be able to approve/reject sign up requests. When creating the page, make sure the following grid settings are configured as described below:
- On the Data source tab, set the Entity setting to PortalMemberRegistrationRequests
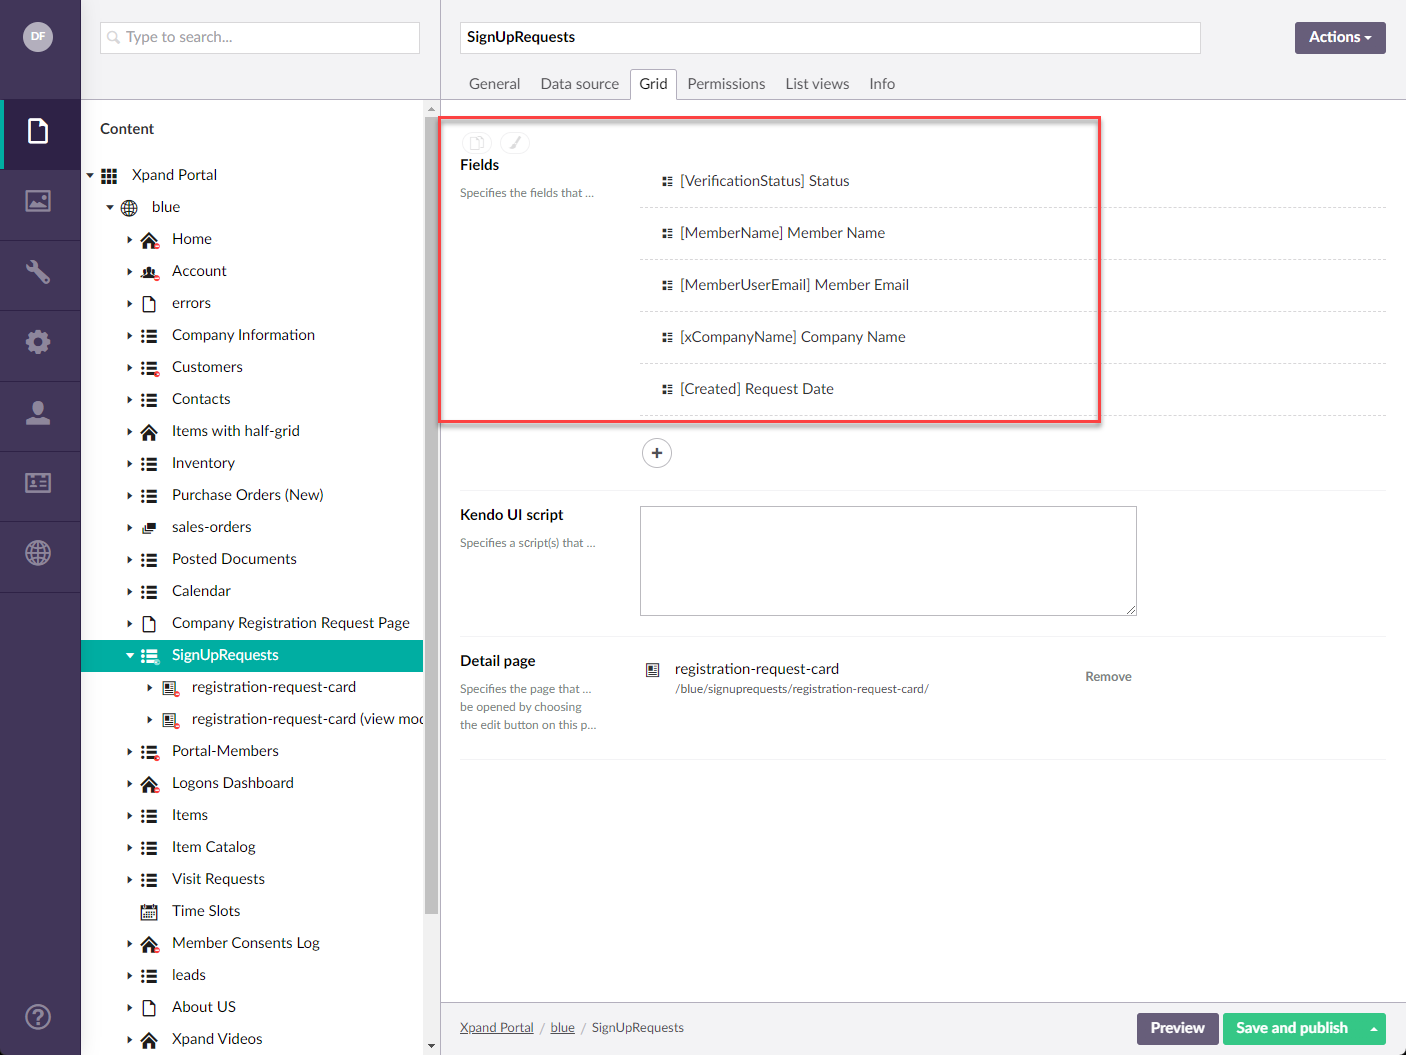
- On the Grid tab, under Fields, set up fields that will be available on this page. The recommended list of fields is shown below.
- On the Permissions tab, set up grid permissions. Make sure that only administrator member groups have access to this page. Under Toolbar commands add grid actions that you want to be available on the page. For this page, we recommend configuring the following actions:
- Select (to be able to select member registration requests to perform actions with).
- Refresh (to be able to refresh data on the page without reloading the whole page).
- Edit (to be able to edit member registration requests)
- Delete (to be able to delete member registration requests).
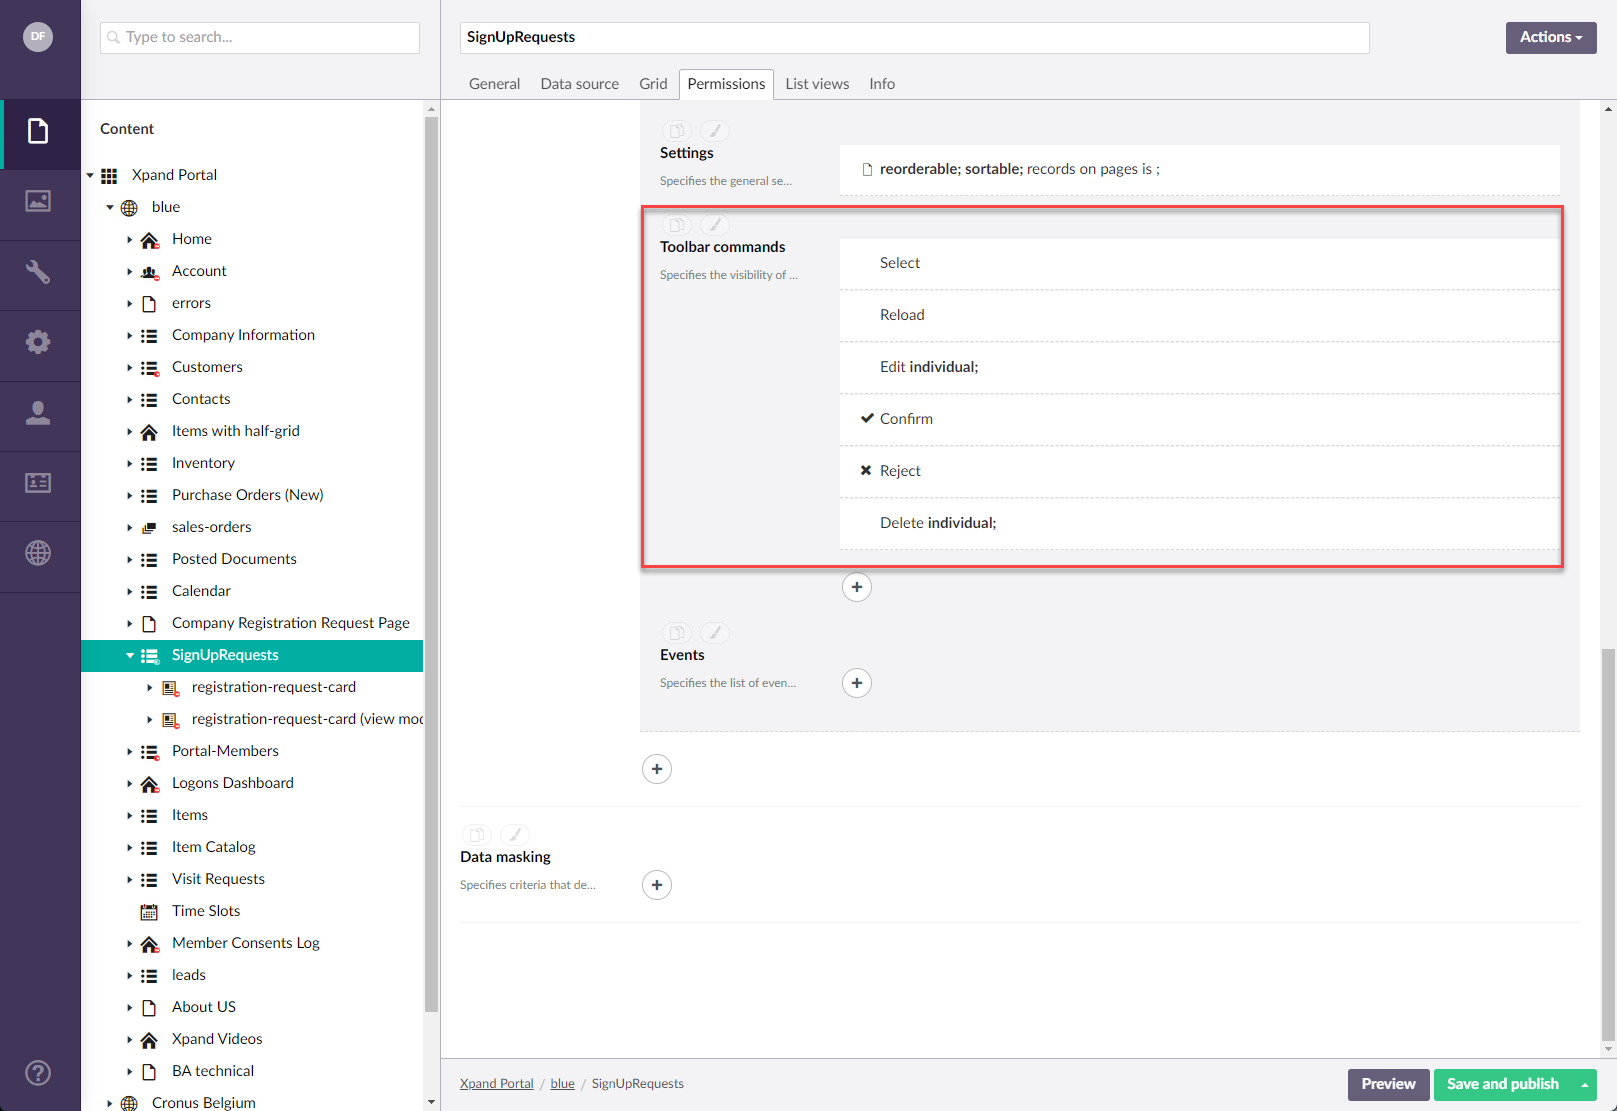
- A Complex modify action (for administrators to be able to confirm member registration requests). For this, specify the following action settings:
- Caption = Confirm
- Show command title = Yes
- Command icon = (an icon that represents confirmation/approval)
- Base dictionary key = XPortal.Frontend.ConfirmRegistrationRequest
- Dialog window settings:
- Title = Confirmation
- Height = 130
- Width = 4
- Validation filters:
- A filter where the filter logic is AND and VerificationStatus (PortalMemberRegistrationRequests) = pending
- A filter where the filter logic is AND andMemberRoles (PortalMemberRegistrationRequests) != ___empty___
- A filter where the filter logic is AND anddatabaseName(PortalMemberRegistrationRequests) != ___empty__
- Fields to update:
- Field = VerificationStatus (PortalMemberRegistrationRequests)
Value: Constant value = Confirmed - Field = XSkipToSendFinalMessageToAdmin (PortalMemberRegistrationRequests)
Value: Constant value = 1
- Field = VerificationStatus (PortalMemberRegistrationRequests)
- Another Complex modify action (for administrators to be able to reject member registration requests). For this, specify the following action settings:
- Caption = Reject
- Show command title = Yes
- Command icon = (an icon that represents rejection)
- Base dictionary key = XPortal.Frontend.RejectRegistrationRequest
- Dialog window settings:
- Title = Confirmation
- Height = 130
- Width = 4
- Validation filters:
- A filter where the filter logic is AND and VerificationStatus (PortalMemberRegistrationRequests) = pending | new
- Fields to update:
- Field = VerificationStatus (PortalMemberRegistrationRequests)
- Value: Constant value = Rejected
- On the Data source tab, set the Entity setting to PortalMemberRegistrationRequests
- Select Save and publish to save the changes and publish them on the front end. Optionally, if you were editing the page, you can select Save and preview to preview how the page will look like on the front end.
- Create detail page layout block(s) for hosting fields, and then add field sets to them. The recommended list of fields on the detail page is the same as on the grid page.
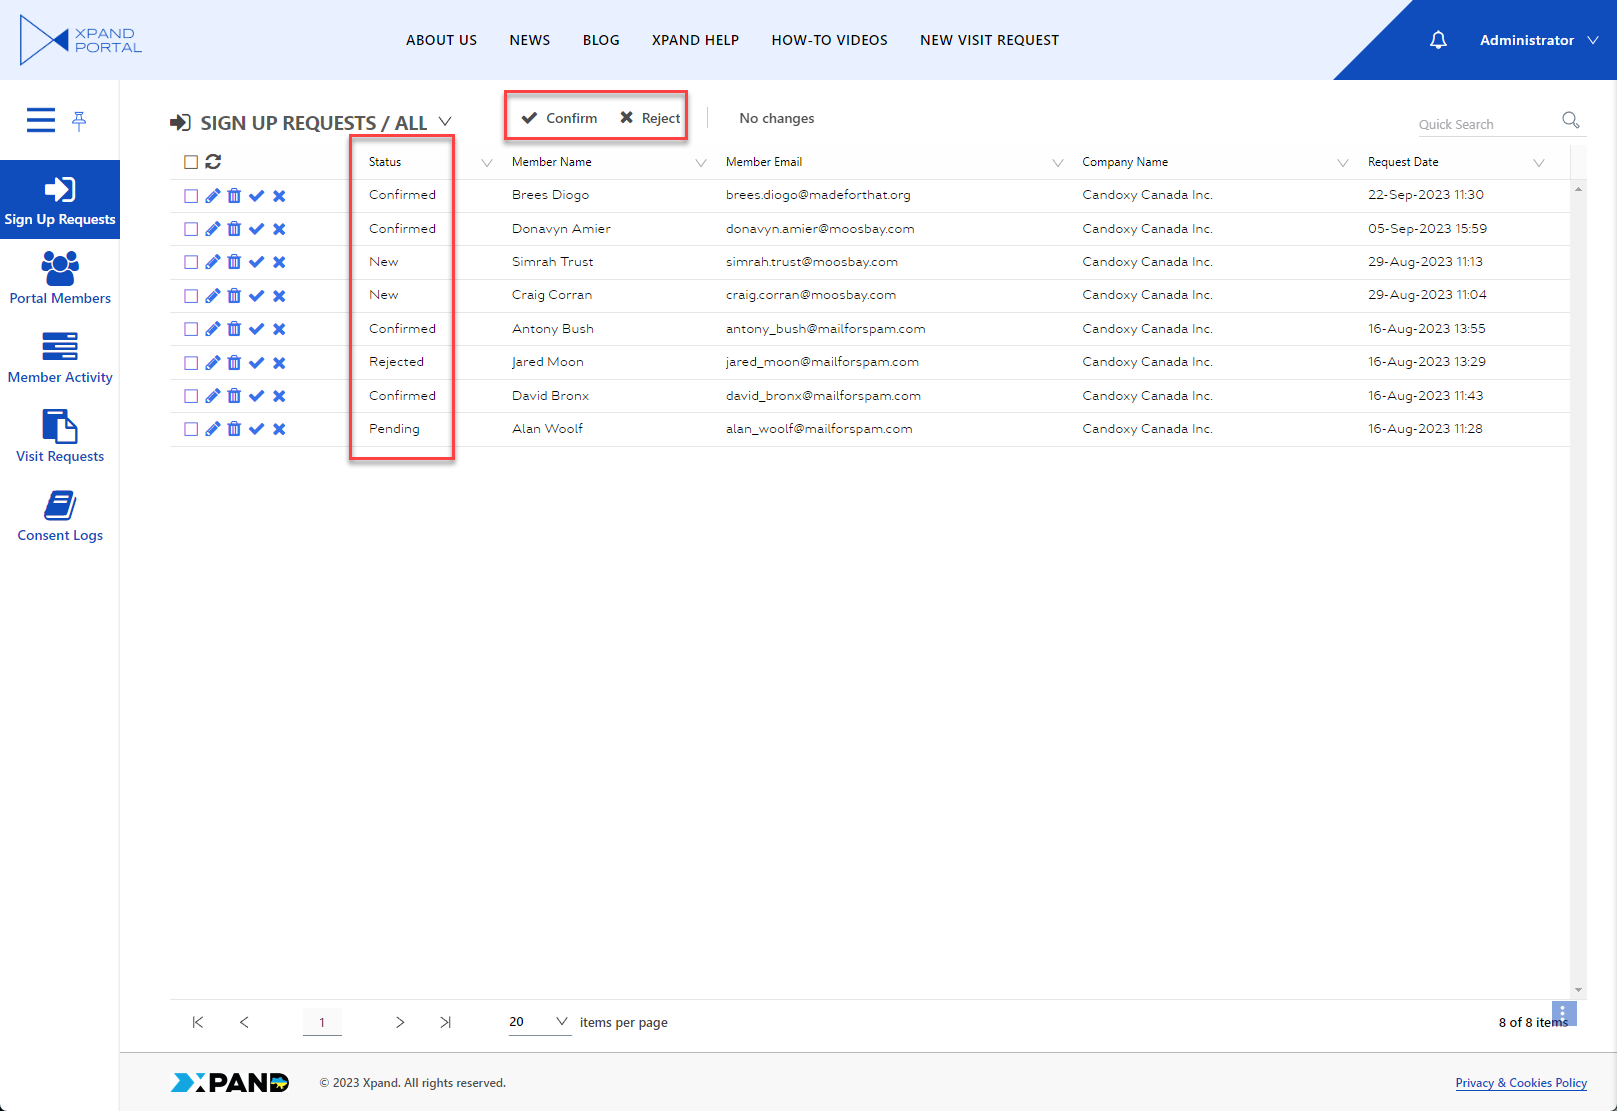
To manage sign-up requests
- Sign in to the front end using an administrator member role (or any role that was configured to have access to the page where sign-up requests are managed).
- Locate the page where sign-up requests are managed.
- Review new sign-up (member registration) requests.
- To confirm a member registration request, select the line with the request, and then select the Confirm action (the caption may be different in your case). When a request is approved, the member receives an email notification with further instructions (with a link to reset their password), while the administrator receives an email notification that a new member account has been registered. The email templates are configurable on the Account registration page.
- To reject a member registration request, select the line with the request, and then select the Reject action (the caption may be different in your case). When a request is approved, the member receives an email notification that their request has been rejected, while the administrator receives an email notification that a new member account has not been registered. The email templates are configurable on the Account registration page.